# What is PortSIP?
### An All-in-One Platform for Cloud PBX, UCaaS, CPaaS, and CCaaS Providers
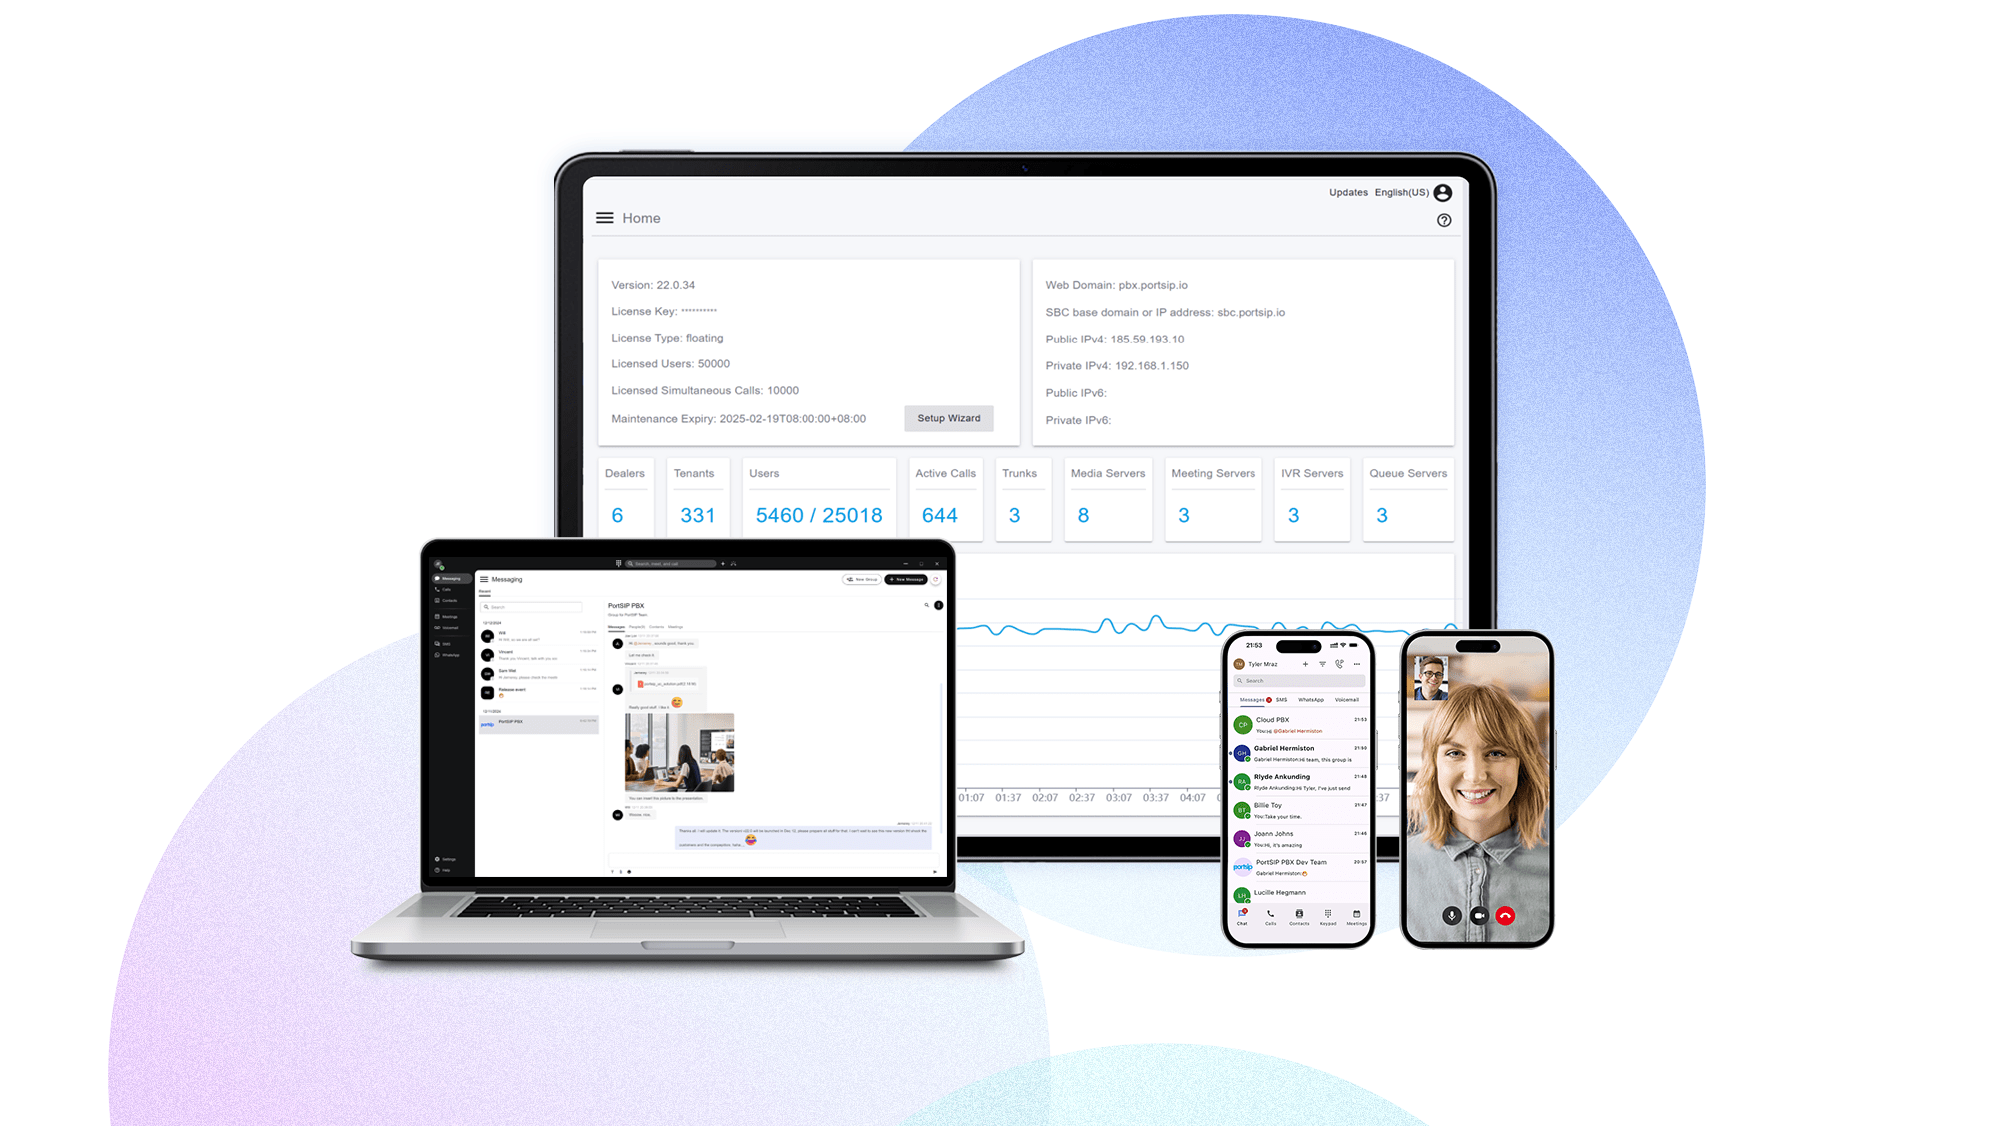
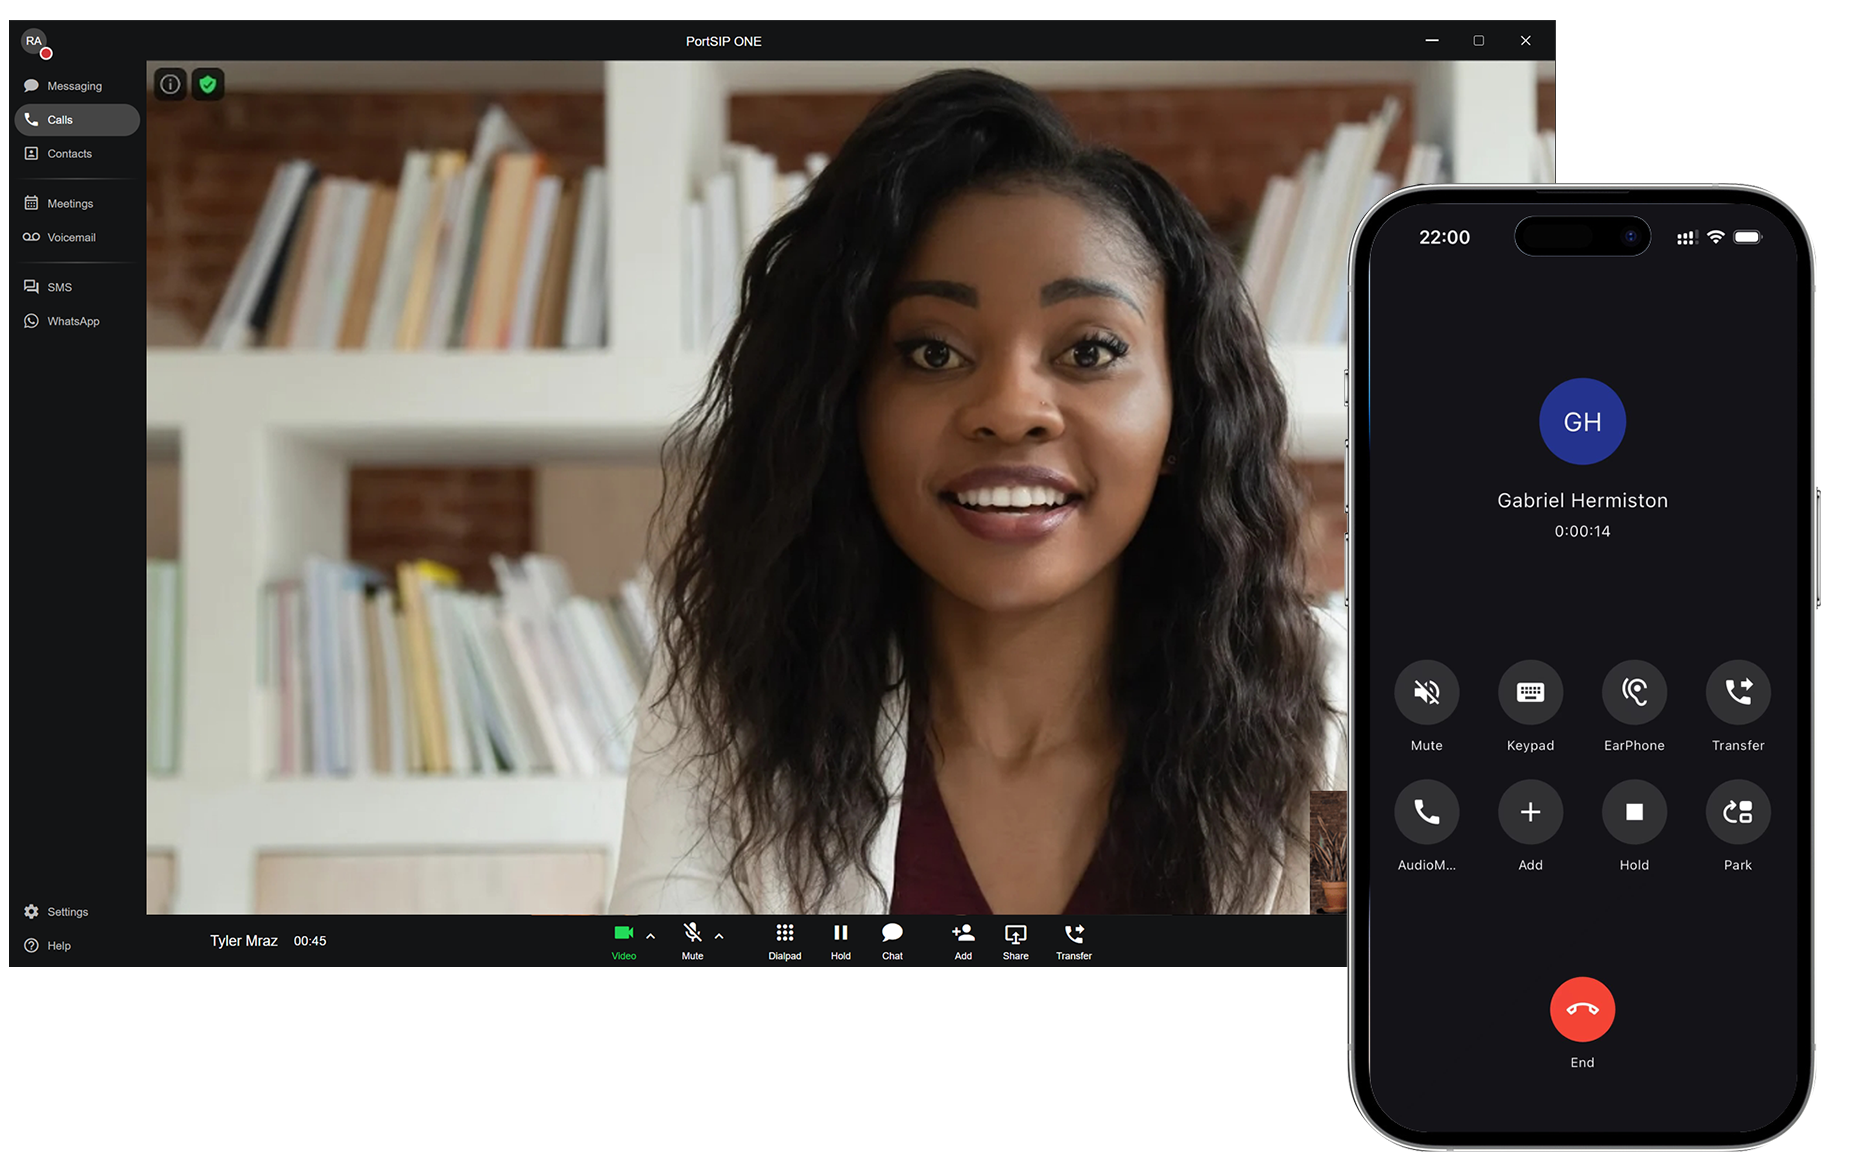
[PortSIP ](https://www.portsip.com)is a powerful, all-in-one Unified Communications platform purpose-built for service providers and modern enterprises. It brings together voice, video, messaging, SMS, WhatsApp, video meetings, AI transcription, CRM integration, contact center capabilities, and team collaboration into a single, tightly integrated solution.
Unlike fragmented communication stacks that rely on multiple vendors and complex integrations, PortSIP delivers everything out of the box—reducing operational complexity while accelerating time to market.
### Built for Productivity. Designed for Scale.
PortSIP PBX is engineered to help organizations work smarter and serve customers better. Acting as both a **real-time business productivity platform** and a **customer experience engine**, PortSIP ensures that every interaction—internal or external—is seamless, contextual, and actionable.
With **real-time synchronization across all devices**, users can communicate effortlessly from anywhere, on any device, without disruption. Whether on desktop, mobile, or web, conversations, presence, messages, and call history stay perfectly in sync.
***
### One Platform. Endless Possibilities.
PortSIP is more than a PBX—it is a **complete communications ecosystem**, including:
* **Multi-platform client apps** (Windows, macOS, iOS, Android, WebRTC, and Teams Phone)
* **SDKs** for building custom voice, video, and messaging applications
* **Open APIs, Webhooks, and PUB/SUB** for deep integrations and automation
* **AI-powered capabilities**, including call and voicemail transcription
* **Built-in Contact Center** and **CCaaS features**
* **Native CRM integrations** to unify communications and customer data
This open and extensible architecture gives service providers full control to differentiate, customize, and innovate without vendor lock-in.
***
### Purpose-Built for Service Providers
Whether you are:
* A Cloud PBX provider
* An MVNO looking to deliver UCaaS
* A cloud communications provider launching CPaaS
* A contact center operator building CCaaS offerings
PortSIP PBX provides a **carrier-grade, multi-tenant architecture** designed for performance, scalability, and reliability. It enables you to launch quickly, operate efficiently, and scale confidently as your customer base grows.
***
Here are some of our key products:
* [PortSIP PBX](https://www.portsip.com/portsip-pbx/)
* [PortSIP ONE App](https://www.portsip.com/portsip-one)
* [PortSIP VoIP SDK](https://www.portsip.com/portsip-voip-sdk/)
# Cloud PBX Phone System for Service Providers
Cloud PBX (Cloud-based Private Branch Exchange) is a virtual phone system hosted over the internet, designed to efficiently manage inbound, outbound, and internal calls by routing them to the appropriate departments, teams, or user extensions. It enhances collaboration and communication within modern organizations without the need for traditional on-premises hardware.
In today’s cloud-first environment, Cloud PBX has become a cornerstone for service providers looking to launch and scale next-generation communications services. By leveraging a Cloud PBX platform, providers can deliver a fully integrated suite that includes voice calling, video conferencing, messaging, and team collaboration—unified within a single business communications system and app.
This all-in-one approach not only streamlines operations but also offers a robust, scalable, and cost-effective solution tailored for UCaaS, CCaaS, and Cloud PBX service providers. It empowers them to compete with industry leaders by offering modern, multi-channel communication experiences for businesses of all sizes.
### What is Cloud PBX (Private Branch Exchange)?
Cloud PBX (Cloud-based Private Branch Exchange) is a virtual phone system that operates over the internet. It uses cloud-based services to manage calls both to and from a business, delivering advanced calling features and unified communications through Voice over Internet Protocol (VoIP) technology.
You may also hear Cloud PBX referred to as a VoIP system, UCaaS (Unified Communications as a Service), or hosted PBX—essentially, these terms all describe the same concept.
Historically, PBX systems were on-premises—large machines that required dedicated space, significant capital investment, and ongoing maintenance. This made them inaccessible for many smaller businesses.
The advent of cloud computing has changed all of this. A Cloud PBX is hosted in secure, remote data centers and delivered over the internet. It offers the same call routing and management features as traditional on-premises PBX systems, but without the need for expensive hardware. Additionally, Cloud PBX solutions are typically offered on a subscription basis with flexible pricing plans, making it an affordable and scalable option for businesses of all sizes.
Today, every VoIP Service provider is looking for a good solution to host their Cloud PBX service. However, several crucial elements need to be considered when making this decision:
* **Multi-tenant.** A multi-tenant architecture is essential for a Cloud PBX, given its need to serve many businesses. In this setup, each business acts as a separate tenant within the Cloud PBX. These tenants are isolated from one another, each perceiving that they have their own dedicated PBX in the cloud. It’s hard to imagine a Cloud PBX solution that doesn’t support multi-tenancy. Without it, service providers would need to set up a separate PBX instance for each tenant. This approach would not only be challenging to manage and maintain but would also consume massive server resources. Therefore, multi-tenancy is a critical feature for any Cloud PBX solution.
* **High performance.** High performance is a fundamental requirement for any Cloud PBX solution, since a Cloud PBX could be serving thousands of businesses (tenants) at any given time, and managing a high volume of calls is part of its daily operations. The performance of the service is vital to ensure a smooth call experience. The Cloud PBX must efficiently handle a variety of calls, including regular calls, group calls, queue calls, and meeting calls. The poor performance could lead to customer attrition.
* **Rich features.** The Cloud PBX offers not only the same features as an on-premise PBX, but also a suite of modern unified communication tools for businesses. These tools encompass audio, video, messaging, and presence, as well as sharing and collaboration capabilities. Additionally, Cloud PBX integrates with WebRTC and Microsoft Teams, and includes Session Border Controller (SBC) offerings.
* **Open and Integratable Platform**: The Cloud PBX should be an open platform that provides a full REST API, allowing service providers to build their own web portal page. It should also provide a webhook and PUB/SUB mechanism for seamless integration with customer's current business system. The solution should also include a client app SDK that enables service providers to build their own applications with ease.
* **All-In-One solution.** Service providers are in search of an All-In-One solution that is ready to use out of the box. The Cloud PBX solution should include ready-to-use client apps for iOS, Android, Windows, and WebRTC, and offer rebranding with customer brands. This allows service providers to deliver a unified branding experience, all at no extra cost.
### Understanding the Differences Between PBX, Cloud PBX, and UCaaS
In today’s digital age, it’s essential to understand the various types of business phone systems available:
* **On-Premises PBX**: Starting with the traditional PBX model, the primary advantage is the granular control it offers over your system. However, these systems require a substantial investment in on-premise communications infrastructure, which can be expensive to maintain.
* **Cloud PBX**: In contrast, hosted cloud PBX systems unlock vital additional functionalities. Leveraging cloud-based management, you can utilize features like automated routing for inbound calls and intelligent Interactive Voice Response (IVR) menus. When considering a cloud PBX service, it’s crucial to clarify precisely what’s included in the package to ensure value for money.
* **UCaaS (Unified Communications as a Service)**: The pinnacle of modern technology is embodied in a comprehensive UCaaS solution. This platform consolidates all communication channels, allowing not only for inbound and outbound calls but also integrating key channels like web chat, SMS, and video. The outcome? Your business can enjoy a truly integrated business communications environment.
### Switching from legacy solutions to a cloud PBX phone system
**Cloud PBX** serves as an affordable alternative to traditional business PBX phone systems, enabling seamless communication across various office locations using a multitude of devices.
If you find yourself weary of costly, outdated phone solutions that drain your IT resources, it might be the right moment to transition your communication systems to the cloud. Delivered via the internet, this service offers enhanced flexibility, efficiency, and cost-effectiveness.
#### Easy setup & Maintenance
Another big plus is the fast setup with minimal maintenance. Cloud PBXs can deploy in days without on-site infrastructure. You don’t need to hire dedicated staff to manage changes or troubleshoot issues.
The cloud-based nature makes the whole cloud PBX system simpler to implement & maintain.
#### Cost efficiencies
Businesses of all sizes can now experience using an advanced internet-powered communications system through a simple subscription. In contrast to the traditional PBX, a cloud PBX phone system is significantly more cost-efficient, largely due to its incorporation of **Voice over Internet Protocol (VoIP)** technology. As VoIP calls are transmitted via the internet and handled by cloud PBX, businesses can avoid the international calling fees typically levied by carriers, resulting in substantial operational cost savings.
#### Future-proofing
Cloud PBX systems combine the best of traditional phone services with a diverse range of integrations with your other tools and software. This means that your cloud PBX can flex and adjust to your business needs as they evolve—effectively future-proofing your company.
#### Mobility & Remote workers
Today’s workforce is a mobile one. More people are working remotely and working on the go. Cloud PBX makes it easy to work from any device and from anywhere in the world.
The VoIP protocol lets employees use an app and immediately have calls forwarded to any number or device, anywhere in the world. All that’s needed is a cloud PBX provider and reliable internet. This accomplishes what an on-premises PBX typically can’t. Who says work has to be confined to the office or your desk?
#### Better customization & Control
With a [cloud PBX](https://www.portsip.com/2024/04/17/cloud-pbx-phone-system-for-service-provider/), call settings and routing can be adjusted instantly. Features like **call forwarding**, meeting lines, caller ID, and voicemail to SMS are easily toggled on/off. The days of calling the phone company for changes are over — cloud PBX platforms put businesses in charge.
#### Enhanced reliability & Redundancy
Arguably, the most crucial benefit is reliability.
Since [cloud PBX](https://www.portsip.com/2024/05/19/white-label-cloud-pbx-phone-system/) isn’t tied to physical wiring or an on-site box, many infrastructure failure points are avoided. With built-in failover and interconnected data centers, cloud PBX offers redundancy that keeps companies running smoothly.
For businesses, increased reliability is arguably the most crucial benefit.
Even in the event of a critical situation requiring evacuation, you can configure the cloud PBX phone system for remote employees to alert customers with timely messages, forward calls to voicemail, or even forward calls to cell phones.
### Call security and encryption
The calls transmit call data packets between the cloud PBX and IP phones/PC app/mobile app.
Leading business VoIP providers encrypt these voice packets using Secure Real-time Transport Protocol (SRTP) and Transport Layer Security (TLS), making it nearly impossible for data to be intercepted. Encryption secures all call data without impacting voice quality.
### What else can you expect from cloud PBX providers?
Transitioning to the cloud PBX not only enables seamless communication across various time zones and locations, irrespective of the device used but also offers the convenience of a centralized business number for all your office locations. You can easily assign extensions to different departments in the cloud PBX as needed.
Incoming calls arrived at the cloud PBX are managed by a highly customizable automated attendant that can instantly redirect calls to the appropriate party. With the right configurations, you can utilize advanced call forwarding features to direct calls straight to voicemail or to your mobile device, ensuring that your employees never miss important messages, even during holidays or while on the move.
Furthermore, customers are relieved from the burden of memorizing multiple phone numbers or extensions. There’s no need for you to disclose your personal mobile number to remain reachable when you’re away from the office.
Subscribing to a cloud PBX service streamlines maintenance and troubleshooting processes. Unlike traditional phone services that require dedicated staff to manage infrastructure and hardware, the cloud PBX upkeep is handled by the provider at an offsite location, promising enhanced security and uptime. Your communication system doesn’t need to go offline for repairs or updates, and any technical issues or glitches can be resolved simply by alerting your provider, who typically offers round-the-clock technical assistance or customer care services.
Lastly, cloud PBX offers high scalability. As your business grows, your cloud PBX phone system can expand accordingly. You only need to contact your provider when you need to add more phone lines to your subscription. Extensions can be added or removed via your online dashboard, and every setting can be adjusted to meet the evolving needs of your business.
Experience the limitless advantages and benefits of a cloud PBX system by reaching out to a PortSIP PBX solutions specialist today.
#### Compare and Contrast
But how do cloud PBX solutions stack up against on-premises offerings?
| **Cloud PBX** | **On-Premises/Traditional PBX** |
| ------------------------------------------------------------------------------------------------ | ------------------------------------------------------------------------------------------------- |
| No hardware needed on-site, so set-up and maintenance costs are low. | Requires on-premises hardware and equipment, causing high initial set-up and maintenance costs. |
| Quick and easy to add new capabilities and stay up to date with changes in business needs. | Difficult, time-consuming, and costly when it comes to scaling up or down. |
| On-the-go and flexible — staff can connect to the cloud and work from anywhere. | On-premises PBX is more restrictive, requiring staff to work from the office. |
| Features can be altered swiftly to stay up to date with advances in technology. | High risk of obsolescence thanks to hardware requirements and the need for copper phone lines. |
| Does not require a dedicated IT team to maintain; your own staff can be trained in the software. |
Often requires specialist training by the on-premises P BX provider.
|
| Additional features are typically included in your monthly fee. | Upgrades need to be purchased. |
| Lower overall monthly costs depending on plans, number of users, and additional features. |
Higher overall monthly costs. Fees are also particularly high for international calls.
All other trademarks referenced in this document are the property of their respective owners.
No portion of this document may be reproduced or transmitted in any form or by any means, for any purpose other than the recipient’s personal use, without the express written permission of PortSIP Solutions, Inc.
***
### End User License Agreement (EULA)
By installing, copying, or otherwise using this product, you acknowledge that you have read, understood, and agree to be bound by the terms and conditions of the **PortSIP End User License Agreement (EULA)** applicable to this product.
***
### Open Source Software Used in This Product
This product may include **open-source software components**.
You may request a copy of the applicable open-source software from PortSIP Solutions, Inc. for up to **three (3) years** following the distribution date of the relevant product or software, at a charge no greater than the cost incurred by PortSIP to distribute the software.
***
### Disclaimer
While PortSIP Solutions, Inc. makes reasonable efforts to ensure that the information contained in this document is accurate and up to date, no warranties or representations are made regarding its accuracy, completeness, or reliability.
PortSIP assumes no responsibility or liability for typographical errors, technical inaccuracies, or omissions contained in this document.
***
### Limitation of Liability
PortSIP Solutions, Inc. and/or its suppliers make **no representations** regarding the suitability of the information contained in this document for any purpose.
All information is provided **“as is”**, without warranty of any kind, and is subject to change without notice. The entire risk arising from the use of this information remains with the recipient.
In no event shall PortSIP Solutions, Inc. and/or its suppliers be liable for any direct, indirect, incidental, consequential, special, punitive, or other damages, including but not limited to loss of business profits, business interruption, or loss of business information, even if PortSIP has been advised of the possibility of such damages.
***
### About This Guide
This document provides guidance to assist administrators in managing the **PortSIP PBX Unified Communications solution**.
It includes key information related to:
* System installation
* Administration and configuration
* Upgrade and maintenance procedures
Where applicable, this guide references additional documentation that provides detailed instructions for administering PortSIP PBX servers and PortSIP client applications, particularly in administrator mode.
# Overview
**Our product is not built on Asterisk or FreeSWITCH.**
PortSIP PBX is a software-based VoIP PBX platform designed for business communications and collaboration. It is not built on Asterisk or FreeSWITCH.
PortSIP PBX supports both on-premises and cloud deployment models. It provides a complete Unified Communications solution that includes SIP PBX services, integrated Session Border Controller functionality, and the [PortSIP ONE app](https://www.portsip.com/portsip-one). The platform supports audio and video calling, instant messaging and presence, rich text chat, Microsoft Teams Direct Routing, WebRTC, screen sharing, file sharing, picture messages, voice and video messages, and mobile push notifications.
PortSIP PBX also includes integrated contact center capabilities that help organizations manage demanding customer communication scenarios. The solution includes a built-in SBC for Microsoft Teams Direct Routing, video meetings, screen sharing, online meeting rooms, and collaboration features at no additional cost.
Large service providers that require a UCaaS platform designed to support more than 1 million users can contact PortSIP for information about PortSIP UCaaS.
***
### Key Features
PortSIP PBX includes the following capabilities.
#### Platform and Deployment
* Fully rebrandable platform
* True multi-tenant architecture
* Horizontally scalable cluster deployment for media servers, queue servers, meeting servers, IM servers, Data Flow servers, and IVR servers
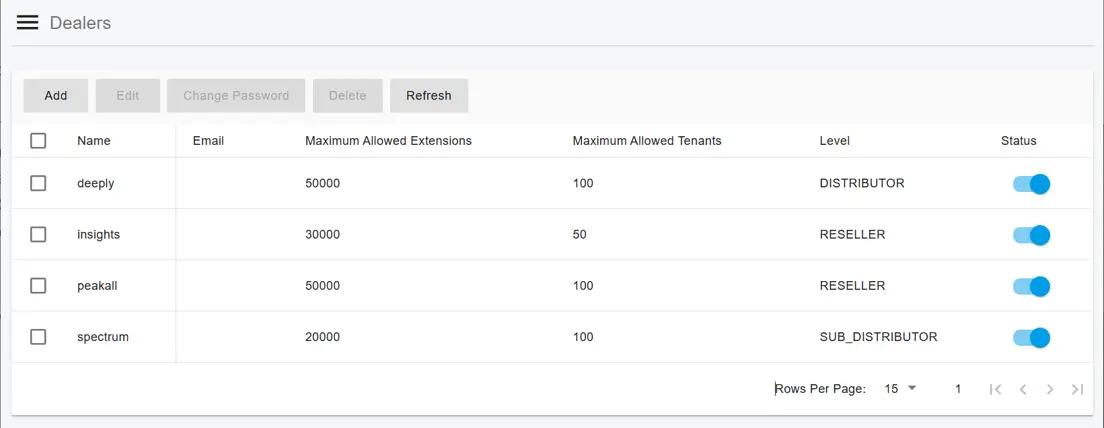
* Dealer management
* Support for multiple System Administrators
* Integrated Session Border Controller
* Open REST APIs
* Webhook support
* Pub/Sub support
* WebSocket-based subscription mechanism for pushing real-time events to subscribers
* Free apps for iOS, Android, Windows, macOS, and WebRTC
* Free client VoIP SDK
#### Security and Access Control
* TLS support
* SRTP support
* Let’s Encrypt support
* Third-party and private ACME provider support
* Role-based permissions
* Password policy
* PIN policy
* Two-Factor Authentication
* Password reset
* PIN verification for auto-provisioning
* Anti-hacking protection
* IP blacklist and whitelist
* Number blacklist
* Country-code-based call blocking
#### Calling and Collaboration
* Audio calling
* Video calling
* Video meetings
* Screen sharing for video calls
* Screen sharing for meetings
* Instant messaging and presence
* Group chat
* Rich messaging
* Voice and video messages
* File and picture sharing
* Mobile push notifications
* WebRTC
* Synchronous status across apps and IP phones
* Synchronous contacts across apps and IP phones
* Synchronous CDR across apps
#### Call Routing and PBX Services
* Service management for call settings
* Centralized service configuration, including call forwarding and Do Not Disturb
* Virtual Receptionist
* Visual IVR editor
* DISA
* Ring Groups
* Call queues
* Call park
* Call pickup
* Call pickup groups
* Call flip
* Automatic callback
* Voicemail and shared voicemail
* Music on hold
* Feature access codes
* Speed Dial 8 and Speed Dial 100
* Outbound caller ID
* SIP header manipulation
* Trunk management
* Emergency number configuration
#### Time-Based and Presence-Based Routing
* Time zone based routing
* Multiple office hours
* Holidays
* Night mode for tenants
* Night mode for Ring Groups, Queues, and IVRs
* Call routing based on presence status
* Call routing based on holidays and office hours
* Advanced routing for specific dates and times
* Office hours, holidays, and destination settings for each IVR DTMF input
* Selective Call Rejection
* Selective Call Acceptance
#### Contact Center
* Contact center functionality
* Contact center wallboard
* Contact center supervisor tool
* Agent activities
* Skills-based routing
* Queue callback
* User activities
* Call activities
* Call reports
#### Recording, Storage, and AI
* Audio call recording
* Video call recording
* Recording management
* Private recording links that require authentication
* Public recording links
* AI transcription
* Recording file storage in AWS S3
* Recording file storage in Azure Blob Storage
* Call recording notification prompt playback
* Granular call recording controls
#### Messaging and Integrations
* WhatsApp messaging integration
* WhatsApp message templates
* SMS/MMS
* Address book and contact management
* CRM integrations
* Microsoft Teams Direct Routing
* Microsoft 365 integrations
* Google Workspace integrations
* Single Sign-On
* Billing
* Email notifications at the system and tenant levels
* HTML email notifications
* Webhooks for pushing CDR and extension events
#### Provisioning and Device Management
* Zero-touch auto-provisioning
* DECT phone support
* Custom phone templates
* Custom notification templates
* Hot desking
***
### Deployment Architecture
PortSIP PBX supports both cloud and on-premises deployments. The platform can be deployed as a single-server system or scaled horizontally by adding dedicated servers for media processing, queues, meetings, instant messaging, Data Flow, and IVR services.
For larger environments, PortSIP PBX supports clustered deployment models to improve scalability and operational flexibility.
***
### Design Architecture
PortSIP PBX is designed as a software-based Unified Communications and PBX platform. It combines core SIP PBX services with collaboration, contact center, messaging, recording, provisioning, reporting, and integration capabilities.
The platform is suitable for enterprises, service providers, and organizations that require a flexible PBX or UCaaS-ready communications solution.
***
### Getting Help and Support Resources
For product documentation, troubleshooting information, and technical assistance, use the following PortSIP support resources:
* [PortSIP Support Center](https://support.portsip.com/)
* [Submit a support request](https://portsip.zendesk.com/hc/en-us/requests/new)
* [Email support](mailto:support@portsip.com)
# Summary of Changes
PortSIP PBX is available in the following versions:
* **v22.x – Current and Recommended Version**\
This is the latest release and is strongly recommended for all new deployments and existing systems.
* **v16.x – Maintenance Mode**\
This version is in maintenance mode and will reach **End of Life (EOL) at the end of 2026**.
* **v12.x – End of Life (EOL)**\
This version is no longer supported and should not be used in production environments.
***
### Recommendation
We strongly recommend that customers deploy and operate the **latest v22.x version** of PortSIP PBX.\
Using the most recent version ensures access to modern features, improved performance, enhanced security, and ongoing support, helping to maximize system reliability and user productivity.
***
### Release Notes
For detailed information about changes and updates in each version, refer to the following release notes:
* [v22.x Release Notes](/portsip-communications-solution/portsip-pbx-administration-guide/summary-of-changes/v22.x-release-notes)
* [v16.x Release Notes](/portsip-communications-solution/portsip-pbx-administration-guide/summary-of-changes/v16.x-release-notes)
# v22.x Release Notes
{% hint style="warning" %}
Please follow the [guide ](/portsip-communications-solution/portsip-pbx-administration-guide/1-installation-of-the-portsip-pbx/installation-of-portsip-pbx-v22.x/upgrade-to-the-latest-version-within-v22.x)to upgrade your PBX to the latest version.
{% endhint %}
### Changes for Release v22.6.3
**Date:** Augutst 12, 2026
#### Fixed Issues
* Fixed an issue where, after a call was forwarded from a Virtual Receptionist to a ring group and then forwarded to a trunk after no answer, 183 early media from the trunk could be mixed with the call transfer music-on-hold.
* Fixed an issue where the Media Server could send keep-alive packets to itself in certain scenarios.
* Fixed an issue where ALE phones could not be provisioned through RPS.
* Fixed an issue where Fanvil W602W phones could fail to apply the configured time zone.
* Fixed an issue where exporting extensions could produce duplicate extension records.
* Fixed an issue where removing a tenant DID pool from a trunk could cause undefined behavior.
* Fixed an issue where the operation object in Audit Logs could be identified incorrectly.
* Fixed an issue when querying meeting recording files.
***
### Changes for Release v22.6.2
**Date:** July 14, 2026
#### Fixed Issues
* Fixed an issue where a tenant could experience unexpected behavior if it was using an outbound caller ID selected from a trunk DID pool and the system administrator later removed that DID from the pool.
* Fixed an issue where users could not change their passwords in the PortSIP ONE app.
* Fixed an issue where some user configuration values were not imported correctly when exporting and importing users.
***
### Changes for Release v22.6.1
**Date:** July 7, 2026
#### New Features and Enhancements
**IP Phone Provisioning**
* Added support for auto-provisioning Avaya J Series IP phones using DHCP Option 242.
#### Fixed Issues
* Fixed a memory leak in the Queue Server introduced in v22.6.0.
* Fixed an issue with Snom phones where the BLF key could incorrectly show a monitored extension as idle after the extension had been on a call for several minutes.
***
### Changes for Release v22.6.0
**Date:** July 1, 2026
#### REST API Changes
For details on REST API updates in v22.6.0, please refer to the [**REST API Changes Summary**](/development-portsip/rest-apis/summary-of-changes).
#### New Features & Enhancements
**Security and Authentication**
* Added **Require Voicemail PIN Verification for Auto-Provisioning** at both the system and tenant levels. When enabled, users must enter their voicemail PIN during IP phone auto-provisioning.
* Added **Provisioning PIN** support for DECT phones and Hot Desking devices. After upgrading to v22.6, if **Require Voicemail PIN Verification for Auto-Provisioning** is enabled, administrators must configure a **Provisioning PIN** for each DECT phone and Hot Desking device. For details, refer to the user guide.
* Added Two-Factor Authentication and password reset support for System Administrators and Dealers. Previously, these capabilities were available only for extension users.
* Added password policy support for System Administrators and Dealers. Previously, password policies were supported only at the tenant level.
* Made the Dealer email address mandatory. The email address is required for Two-Factor Authentication and password reset.
**Recording and File Access**
* Added a tenant-level option to control whether call recording files are generated with public or private URLs. When private URLs are used, users must authenticate before accessing recording files.
* Added more granular call recording controls. Administrators can now enable recording for specific Virtual Receptionists, Ring Groups, Queues, inbound rules, outbound rules, trunks, service types, and trunk calls.
**API and System Behavior**
* Added an option to hide the PBX private IP address when PBX basic information is retrieved through the API.
* Optimized error response codes for login and authentication REST APIs.
* Added a new REST API to update an agent’s status across all queues the agent belongs to.
* Split the caller field in voicemail and shared voicemail records into two separate fields: `sender_name` and `sender_number`.
* Added a new tenant custom option, `no_vm_sip_notification`. When set to `true`, PortSIP PBX sends email notifications only for new voicemails and does not send SIP notifications.
**Phone Provisioning and Device Management**
* Added support for specifying the IP address and DNS server for IP phones during auto-provisioning.
* Added new columns on the **Phones** and **DECT Phones** pages to show online and offline status for IP phones and DECT phones.
**Call Control and Routing**
* Added support for **Selective Call Rejection** and **Selective Call Acceptance**.
* Added new Feature Access Codes to activate and deactivate Selective Call Rejection and Selective Call Acceptance.
* Improved forwarding rule behavior when rules are activated or deactivated by Feature Access Code. When a forwarding rule is deactivated, it is now restored to its previous settings. In earlier versions, the rule was restored to the default settings.
* Added time zone support for extensions. Call forwarding rules, routing logic, office hours, and holidays are now calculated based on the extension’s configured time zone. During upgrade, all extension time zones are set to the tenant time zone by default.
* Updated the Outbound Caller ID selection logic for callee-side transfers to SIP trunks. This applies to scenarios such as forwarding rules, Blind REFER, exception handling, IVR timeout, IVR no-answer, IVR failure handling, and Night Mode transfers for Virtual Receptionists, Queues, and Ring Groups.
* For callee-side transfers to SIP trunks, PortSIP PBX now selects the Outbound Caller ID using the following priority:
**Callee Object Outbound Caller ID > Outbound Rule Outbound Caller ID > User Group Outbound Caller ID > Tenant-level Outbound Caller ID**
* If the callee object does not have an Outbound Caller ID configured, PortSIP PBX does not fall back to the caller’s Outbound Caller ID. If no Outbound Caller ID is configured at any supported level, the caller ID is not replaced.
* Added a **Display Name** field for Outbound Caller ID. When an Outbound Caller ID is selected for an outbound call, the configured Display Name is used as the display name in the `From` header of the SIP INVITE.
* Updated outbound rule matching for calls initiated or forwarded by non-extension users, such as system extensions or trunks. By default, the **User Group** condition in outbound rules is still evaluated. If this condition should be ignored for these calls, the behavior can be controlled through custom options.
* Improved call history display for Ring Group and Queue calls when simultaneous ringing is enabled. When multiple agents receive the same incoming call and one agent answers, the other agents no longer see the call as missed in the app call history. Instead, the call is treated as **Call Completed Elsewhere** for those agents.
* Added support for the **SIP 603+** option at the system level.
* Made the tenant website field mandatory. This website is used in SIP messages when calls are rejected with SIP 603+.
**Virtual Receptionist, Voicemail, and Meetings**
* Enhanced the Virtual Receptionist URL Action to support capturing any DTMF input.
* Increased the maximum voicemail greeting duration to 3 minutes.
* Added support for uploading a custom meeting welcome prompt file.
* Added automatic meeting cleanup. If no participant joins a meeting within 30 minutes after it is created, the meeting is closed automatically.
* Improved prompt file format validation when prompt files are uploaded.
**Messaging and WhatsApp**
* Added support for WhatsApp Templates, allowing businesses to send template messages to customers after the 24-hour customer service window has expired.
* Added support for MMS messages.
* Added support for sending images, audio, video, and files through WhatsApp.
* Added support for customizing the WhatsApp message URL.
**Contact Center and Reporting**
* Added support in Queue Wallboard to filter agent status by custom Not Ready Reason Code.
* Added a new **User Activities** page and report.
* Added a time zone filter for Call History in the Web Portal.
**Administration and Notifications**
* Added new columns on the **Tenants** page to make tenant information easier to view and manage.
* Added support for system-level email notification templates.
* Optimized tenant-level email notification templates.
* Added a new email notification when the pending webhook data size exceeds the configured threshold.
* Added a **Reset** option for Microsoft 365 and Google Workspace integrations.
**Integrations and Platform Updates**
* Integrated Sinch as a new provider for voice trunks and SMS.
* Added OpenAI support for AI transcription.
* Updated the HubSpot CRM integration to require the new `crm.objects.companies.write` permission, which is required to update company contacts.
* Updated the Odoo CRM integration so it no longer uses the `Company` property.
* Upgraded the Data Flow Server. ClickHouse has been upgraded to the latest LTS version.
**Call Parking**
* Added a new **Send park notification to the parker** option in Park Global Settings. When a user parks a call to a group, the parker can also receive the notification and retrieve the parked call.
* Added support for parking multiple calls on the same extension. In earlier versions, parking a new call to an extension failed if another call was already parked on that extension.
**Cert Manager**
* Added support for third-party and local private ACME providers. Administrators can now use an ACME-compatible certificate authority other than Let’s Encrypt for certificate issuance and renewal.
#### Fixed Issues
* Fixed an issue where IP address blacklist and whitelist rules might not take effect.
* Fixed an issue where configured SIP header forwarding did not take effect for trunk-to-extension calls when **User calls** was selected.
* Fixed an issue where Music on Hold was not played when a queue call timed out and was transferred to another extension.
* Fixed an issue where Queue Abandoned Call statistics could be calculated incorrectly.
* Fixed an issue where the `direction`, `cli`, and Outbound Caller ID fields could be missing from `target_xxx` events.
* Fixed an issue where an extension could remain in **Other Call** status after being added as a queue agent while already on a call.
* Fixed a potential crash that could occur when an extension went offline, and PortSIP PBX processed the registration timeout on the wrong thread.
* Fixed a potential crash that could occur when users sent a large number of SIP PAGER messages.
* Fixed a potential crash caused by an invalid destination value in CDR records.
* Fixed a race condition that could occur when accessing the Odoo CRM integration.
* Fixed a potential crash caused by missing array bounds validation when processing data from the Odoo CRM integration.
***
### Changes to Improve Data Flow Logs
**Date:** May 25, 2026
#### Improved Data Flow Log Rotation
PortSIP PBX has optimized the default log configuration for the Data Flow service, which is based on [ClickHouse](https://clickhouse.com/).
Previously, the default log settings could consume a large amount of disk space over time. If the disk became full, the Data Flow service could fail to start or run properly. This issue did not affect call processing, but it could impact call analytics and reporting.
The Data Flow log rotation policy has now been improved. Logs are retained for 3 days by default, helping reduce disk usage and improve service reliability.
We recommend that all users upgrade Data Flow to apply this improvement and prevent potential disk space issues on the Data Flow server.
#### Upgrade Notes
> ❗**Important**\
> This upgrade applies only to the **Data Flow service**. You do not need to upgrade any other PortSIP PBX services.
To apply this improvement, please follow the **Upgrade Data Flow** section in the PortSIP PBX upgrade guide for your deployment type:
* [Standalone deployment](/portsip-communications-solution/portsip-pbx-administration-guide/1-installation-of-the-portsip-pbx/installation-of-portsip-pbx-v22.x/upgrade-to-the-latest-version-within-v22.x#upgrade-the-data-flow-service)
* [High Availability deployment](/portsip-communications-solution/high-availability-v22.x/high-availability-and-scalability-on-premise/scaling-data-flow-server-on-premise-for-high-availability#upgrade-the-data-flow-server)
***
### Changes for Release v22.5.1
**Date:** Apr 10, 2026
#### New Features & Enhancements
* Updated the default date range filter from Last 28 Days to Last 30 Days for call reports.
* Added support for configuring a custom RPS server domain/host when using a **private Yealink RPS** account.
#### Bug Fixes
* Optimized Microsoft 365 user synchronization to prevent out-of-memory (OOM) issues when handling large directories with frequent updates.
* Fixed an issue where the **callee display name** was missing in CDRs when inbound calls were routed to system services (Ring Group, Call Queue, Virtual Receptionist).
* Fixed an issue where the **date filter** in the CDR and call recording views was displayed incorrectly in the web portal.
* Fixed an issue where the **call end reason** in CDRs was not correctly set when the callee terminated the call.
* Corrected incorrect UI text in the **Abandon Delay report**.
* Corrected incorrect column names in the **Abandon Delay report**.
* Fixed an issue where **Fanvil Linkvil DECT phones** were unable to use TCP transport.
***
### Changes for Release v22.5.0
**Date:** Mar 27, 2026
#### REST API Changes
For details on REST API updates in v22.5.0, please refer to the [**REST API Changes Summary**](/development-portsip/rest-apis/summary-of-changes).
#### New Features & Enhancements
* Added support for accessing an extension’s voicemail through DISA.
* Updated outbound rule behavior for system extensions. When an outbound rule includes a user group condition, calls made by system extensions such as Call Queues or Virtual Receptionists now ignore that condition, since system extensions are not associated with user groups.
* Added support for AI transcription with [Deepgram ](https://www.deepgram.com/)when recording files are stored in public AWS S3, Azure, or private S3 storage.
* Increased auto-provisioning support to up to 200 BLF keys for IP phones.
* REST API enhancement: Queue agent status responses now include both the current status and the associated reason.
* Optimized performance when querying Queue Summary Analytics.
\
CRM integration enhancement: caller and callee names are now included when logging calls to the CRM.
* Updated CRM call logging so that the callee number reflects the final called number.
* Updated CRM logging to use the PBX administrator-defined brand name instead of the default “PortSIP” name.
* For performance reasons, CDR queries are now limited to a maximum of 5 years.
* Improved outbound rule matching for transfer scenarios. For example, if extension 1001 calls extension 1002 and extension 1002 transfers the call to a trunk, the PBX now matches the outbound rule based on extension 1002.
* Added support for using Custom Options to replace the destination URL for outbound SMS and WhatsApp messages.
* Improved speaker recognition accuracy for AI transcription.
* Optimized port usage under high-volume webhook traffic.
* Updated night mode behavior for IVR and Call Queue. When night mode is active, incoming calls are now forwarded directly to the configured night mode destination without playing the prompt.
* Allow alphanumeric sender ID for inbound SMS and WhatsApp messages.
* Enhanced Microsoft 365 Integration:
* Added support for controlling synchronization for specified departments, improving control over permissions, and enhancing enterprise security.
* Added support for more granular Microsoft 365 API permissions, ensuring that only the necessary permissions are requested, enhancing security and reducing access requirements.
#### Bug Fixes
* Fixed an issue where inbound SMS or WhatsApp messages sent to a Ring Group were always assigned to the first group member, even if that member was offline.
* Fixed an issue with incorrect Average Wrap-Up calculation for Call Queue wallboards.
* Fixed an issue where AI transcription failure could cause CRM call logging to fail.
* Fixed an issue where CRM logging used the wrong timezone. The system now uses the tenant’s timezone.
* Fixed an issue where, for outbound calls, the outbound caller ID configured on the calling extension or system extension did not take priority over the caller ID configured in the outbound rule.
* Fixed an issue where, if a call arrived at an IVR, Ring Group, or Call Queue and was routed to an extension or Ring Group because night mode was active, the destination number’s forwarding rules were incorrectly ignored.
* Fixed an issue where an agent remained in Not Ready status after declining a queue callback call, then making and completing another call.
* Fixed an issue where, when calling a WebRTC app, the destination field in "target\_answer" WSI and webhook events contained an incorrect username.
* Fixed an issue in certain rare scenarios where the IP whitelist or blacklist could become ineffective.
* Fixed an issue where, if an app meeting already had a host, participants joining the meeting could
* receive a message indicating that the host was empty.
***
### Changes for Release v22.4.0
**Date:** Feb 10, 2026
#### REST API Changes
For details on REST API updates in v22.4.0, please refer to the [**REST API Changes Summary**](/development-portsip/rest-apis/summary-of-changes).
#### New Features & Enhancements
* Added support for [Odoo ](https://www.odoo.com/)CRM integration, enabling contact synchronization and CRM workflows.
* Added Google Workspace Single Sign-On (SSO) for simplified user authentication.
* Expanded AI Transcription by adding [Deepgram ](https://www.deepgram.com/)as a supported speech-to-text provider.
* Added support for automatic Let’s Encrypt SSL certificate issuance and renewal for both PBX and SBC.
* Added support for HTML-formatted email notifications.
* Added support for application templates, allowing administrators to assign templates per extension to control codecs and other parameters.
* Optimized iOS push notification certificates to improve reliability.
* Added a Call Direction filter (Inbound / Outbound) in Call History.
* Added granular Night Mode permissions, allowing users to control Night Mode via FAC for specific services (Ring Group, IVR, Call Queue) or at the company level.
* Updated the Free Edition limits to support up to 3 users and 2 concurrent calls.
* Added support for using FAC to change agent state with custom Not Ready reason codes for queue agents.
* Added support for configuring a phone BLF key as empty.
* Enhanced caller number masking in inbound rules with support for:
* Number ranges (e.g., `1000-2000`)
* Single numbers (e.g., `60000`)
* Wildcard patterns using `*`, where the pattern must match both the prefix and the total number length (e.g., `0036***` matches numbers that start with `0036` and have a total length of 7 digits)
* Multiple conditions combined with semicolons (e.g., `0036***;1000-2000;6000`)
#### Bug Fixes
* Fixed an issue where CRM contact edits made in the PortSIP ONE app were not synchronized back to PBX contacts.
* Fixed an issue where configuring a trunk with an outbound proxy server could cause re-INVITE requests to fail.
* Fixed an issue where provisioning an HTEK phone to RPS failed.
* Fixed several minor issues to improve overall system stability and reliability.
***
### Changes for Release v22.3.23
**Date:** January 22, 2026
#### Improvements
* Removed parameters from the **P-Asserted-Identity** header during re-INVITE processing after an attended transfer.\
This improves interoperability with certain IP phones where these parameters could cause call failures.
#### Bug Fixes
* Fixed an issue where removing an associated tenant from a trunk could prevent all remaining tenants on that trunk from making or receiving calls.
* Corrected incorrect device information being displayed for Gigaset IP phones.
* Fixed an issue in specific SBC deployment scenarios where the PBX sent an incorrect IP address in the SDP.
* Fixed an issue where call recording links and call summaries were not stored correctly in CRM integrations.
* Resolved multiple issues related to Microsoft 365 user synchronization.
* Fixed an issue where subscribing to *global\_ WSI events* as a system administrator could prevent successful subscription to tenant-level events.
***
### Changes for Release v22.3.22
**Date:** January 8, 2026
***
#### Improvements
1. **SIP Trunk Messaging**\
The PBX no longer adds the custom `X-Info` header when sending SIP messages to trunks, improving interoperability with SIP trunk providers.
2. **Trace Server Scalability**\
Optimized the delivery of SIP messages to the Trace Server under high call volumes, improving performance and stability in large scale environments.
3. **Outbound Rule Matching**\
Enhanced outbound routing rules to support match conditions using a single “+”, simplifying international number matching.
4. **Night Mode Status Visibility**\
Ring Groups, IVRs, and Queues with Night Mode enabled are now highlighted in red on the list page, making their status immediately visible to administrators.
5. **Microsoft 365 Synchronization**\
Improved Microsoft 365 user synchronization for tenants with a large number of users, reducing the probability of sync timeouts.
6. **CRM Caller Matching**\
Optimized call matching when multiple CRM contacts share the same phone number, improving accuracy in CRM integrations.
***
#### Bug Fixes
1. **NAT and LAN Trunk Call Disconnection**\
Fixed an issue where calls could disconnect after 32 seconds when:
* A SIP trunk was deployed with the PBX, both on the LAN, and
* The PBX was configured with a NAT-mapped public IP
***
### Changes for Release v22.3.21
Date: December 19, 2025
#### REST API Changes
For details on REST API updates in v22.3.21, please refer to the [**REST API Changes Summary**](/development-portsip/rest-apis/summary-of-changes).
#### New Services and Features
* **Introduced the Data Flow Service**\
Enables advanced analytics and reporting through real-time data processing.\
Includes:
* All-new Call Reports
* Enhanced CDR with additional filters
* Redesigned Dashboards and Wallboards for queue and agent metrics
* **CRM Integration** *(initially supports Zoho and HubSpot; more CRMs to follow)*\
Provides seamless synchronization between PortSIP PBX and CRM systems:
* Automatic contact synchronization
* Call logging and note-taking directly within the CRM
* Ability to create and edit call notes
* Unified interaction tracking from both the **PortSIP PBX** and **PortSIP ONE App**
* **CRM Contacts Category**\
Introduced a new *CRM Contacts* section that categorizes contacts synchronized from connected CRM platforms.
* **AI Transcription Service**
* Integrated with AWS and Microsoft Azure to provide automatic transcription for calls and voicemails.
* Transcriptions are viewable in both the PBX Web Portal and the PortSIP ONE App.
* **Webhook**
* Now the webhook sender has been moved from Call Manager to another component
***
#### Administration and Access Control
* **Multiple System Administrators**\
Support for creating multiple system administrator accounts.
* **New Administrator Roles**\
Introduced two new predefined roles with limited permissions:
* Operations Admin
* Site Admin
* **Customizable Administrator Roles**\
Administrators can now create custom roles to fine-tune access permissions, enhancing role-based access control and operational flexibility.
* **User Access Limits**\
System administrators can set per-tenant limits on how many users can access:
* The PortSIP ONE App
* The Teams Phone App
***
#### Security and Compliance Enhancements
* **Recording and Voicemail File Protection**\
Strengthened access control for recordings and voicemail files:
* Each file now includes both a Public Link and a Private Link.
* Private Links require credential verification and role-based permission validation.
* Tenant admins can choose whether to push Public or Private Links to the CRM.
* When a CRM user clicks a Private Link, credentials are required to verify access.
* All accesses to recordings and voicemails are now logged in the Audit Log.
* **Enhanced Audit Logging**\
Added additional filters and detailed tracking for administrator and user activities.
***
#### Telephony and Call Handling
* **Virtual Receptionist Security**\
Added the option to block direct extension dialling from the Virtual Receptionist, preventing callers from bypassing menu options.
* **Queue and Ring Group Enhancements**
* Added support for Night Mode per IVR, Queue, or Ring Group.
* Introduced Queue Exit Options for callers.
* Added configurable Agent Wrap-Up Time after each call.
* Added support for Periodic Announcements during queue waiting.
* Introduced Agent Pause Codes for more accurate reporting.
* **Trunk Enhancements**
* Added support for the `tel:` URI scheme in trunk configurations.
* Added configuration for maximum call duration per trunk.
* Enhanced outbound rule configuration to support SMS routing.
* **Voicemail Improvements**
* Minimum PIN length increased to **4 digits** for better security.
* **Call Routing Enhancement**
* If an extension declines a call, it will now follow the Busy Forwarding Rule.
***
#### Device and App Updates
* **New App Releases**
* Released the PortSIP Teams Phone App.
* Released PortSIP ONE for macOS.
* **Device Support**
* Added support for [Fanvil ](https://www.fanvil.com)W620W, V50P, V60P, and W series phones.
* Added support for [Yealink ](https://www.yealink.com)T7x and T8x phones.
* Added support for [Gigaset ](https://www.gigaset.com)IP and DECT phones.
* Added support for [Intelbras ](https://www.intelbras.com/en)IP Phones
* Added support for [SNOM ](https://www.snom.com/en/)headsets in the PortSIP ONE app.
* DECT phone handset names can now be automatically set to the Extension Name.
* **Power Optimization**
* Phones provisioned by PortSIP PBX now automatically disable power-saving mode to prevent missed calls.
* **Codec Configuration**
* Added the ability to enable or disable codecs for IP phones during auto-provisioning.
***
#### Connectivity and System Improvements
* **SMS Integration**
* Integrated with [SMSGlobal ](https://www.smsglobal.com/)for outbound and inbound SMS support.
* Integrated with [CM.COM](https://cm.com) for voice calls and SMS support.
* Integrated with [SIPTRUNK.COM](https://siptrunk.com) for the voice calls and SMS support.
* **IPv6 Support**
* The system now automatically adapts to IPv6 environments — no manual configuration required.
* **WebSocket Interface (WSI)**
* The WSI now supports subscribing to global queue events within a tenant.
***
#### Bug Fixes
* Fixed issues related to the **Diversion Header**.
* Other stability and performance enhancements across PBX core services.
***
### Changes for Release v22.2.25
Date: November 21, 2025
#### Enhancements
* If an outbound rule has multiple trunk routes, and a trunk with 486 or 603 rejects the call, the PBX will stop trying the next trunk route.
* Added Fanvil v50P, v60P phones.
* Added Yealink T7x and T8x phones.
#### Bug Fixes
* Fixed a bug where, if an SNOM phone performs the blind transfer to an app extension user who is offline but has activated push notifications(displayed as "push online" in the PBX web portal), it would cause the voice not to work.
* Fixed a bug where the phone BLF label was displayed incorrectly.
#### PortSIP SBC v11.20
This version fixed a bug where, if the IM service was installed on a separate server, the WebRTC app would fail to connect to the IM server.
***
### Changes for Release v22.2.23
Date: November 6, 2025
#### Enhancements
* Improved trunk configuration handling – When editing a trunk, the system no longer reloads the trunk unless critical parameters (such as IP host, outbound proxy server, domain, or credentials) are modified. This prevents unnecessary deregistration and re-registration events.
* Optimized Twilio SMS response processing to improve reliability and consistency when handling message callbacks.
* Optimized log file management to improve storage efficiency and system stability.
* Enhanced CDR query performance for faster data retrieval and reporting.
* Improved audit log information to improve performance.
* Added new phone templates for the following devices:
* Polycom 8800 series
* AudioCodes 420 and 405 models
* Released PortSIP SBC v11.1.10, which includes the new WebRTC app version.
#### Bug Fixes
* Fixed a routing issue that could occur when modifying the trunk DID pool or inbound/outbound rules, which in some cases prevented calls from being routed through the trunk.
* Corrected a display issue where Snom phones did not show contact names from the phonebook.
* Fixed an inbound message handling issue for VoIP Innovations trunks.
* Fixed an issue where filesystem inodes were not released correctly after file operations in Linux, which could lead to unnecessary disk space consumption over time.
***
### Changes for Release v22.2.22
Date: October 15, 2025
#### Enhancements
* Calls that fail with 486or 603 are now automatically forwarded to voicemail. All other 4xx/5xx failures terminate the call immediately.
* Reduced the size of NOTIFY messages for the dialog-info (BLF) event to help prevent MTU issues when using UDP transport.
* Enabled the **allow\_rtp\_on\_mute** option by default in the Snom phone template.
* Set the extension name for the DECT phone handset.
#### Bug Fixes
* Fixed an issue where the Diversion header was incorrectly set up when sending calls to a SIP trunk.
* Fixed the `/call_queues/{id}/waiting` REST API endpoint, which was previously non-functional.
* Fixed an issue where the voicemail playback date was played incorrectly in English.
* Fixed an issue where the transfer key was configured incorrectly on SNOM and Yealink phones during auto-provisioning.
***
### Changes for Release v22.2.21
Date: September 28, 2025
#### Enhancements
* The SIP **Contact** header no longer includes a display name by default.
#### Bug Fixes
* Fixed an issue where, with multiple extensions registered and **Push Notifications** enabled, active calls could cause the **callmanager** service to crash(only occurs if the PBX is the v22.2.20).
* Resolved two queue-handling issues when a queue has only **one** agent who has **Push Notifications** enabled and whose phone is in the background with the network disabled (e.g., Wi-Fi/Cellular off or Airplane Mode):
* The agent could remain stuck in **ONCALL** status after the caller timed out in the queue and hung up.
* The caller might not receive the SIP **BYE** message after the call timed out in the queue and ended.
***
### Changes for Release v22.2.20
Date: September 18, 2025
#### Enhancements
* **Webhook Reimplementation**\
The webhook has been fully reimplemented for improved stability and reliability.
* **Enhanced BLF Functionality**\
Resolved an issue where IP phones provisioned via the SBC could not be reprovisioned or rebooted after registration.
#### **Bug Fixes**
* Fixed a bug where if a call between two extensions is launched by REST API, and the callee is logged in with the mobile app, once the caller answers, the PBX doesn't send push notifications to the callee's mobile app.
***
### Changes for Release v22.2.19
Date: August 21, 2025
#### New Feature Support
* **Virtual Receptionist Action URL**\
Now supports matching DTMF inputs using the `*`. Each `*` represents a single DTMF digit.
* **Microsoft 365 SSO**\
The PBX now authenticates Microsoft 365 usernames in a case-insensitive manner, ignoring upper and lower case differences.
* **Mobile App Push Certificates**\
Optimized the automatic update process for push notification certificates.
***
### Changes for Release v22.2.18
Date: August 6, 2025
#### New Features Support
* Added support for the [**global\_queue\_events**](/development-portsip/going-real-time-with-portsip-pbx-pub-sub#subscribe-global-queue-event) with the WSI.
#### **Bug Fixes**
* Fixed a bug where if a call between two extensions is launched by REST API, and the callee is logged in with the mobile app, once the caller answers, the PBX doesn't send push notifications to the callee's mobile app.
***
### Changes for Release v22.2.17
Date: July 28, 2025
**New Features Support**
* Introduced a new *Company Call Session* permission that enables users to monitor and manage live calls within their tenant’s scope.
* Added support for **German**, **Dutch**, and **Vietnamese** languages, including localized **voice prompts**.
**Bug Fixes**
* Resolved an issue where the iOS push certificate auto-renewal process failed to update correctly.
* Fixed a bug where newly created extension users were unable to connect to the Instant Messaging (IM) service.
* Corrected an issue where call reports for queues were occasionally generated incorrectly under specific edge-case scenarios.
* Resolved an issue where **WSI notifications were not sent** when an extension signed out.
* Fixed a bug where, in deployments using **IPv6**, the app received push notifications for incoming calls but **failed to answer** them.
* Addressed a compatibility issue when configuring the **SMTP server with AWS SES**, which previously caused email delivery failures.
* Corrected a bug where an extension **removed from a chat group** would be **re-added upon signing back into the app**.
* Fixed an issue where queue agents or ring group members could remain in the "ON CALL" status without active calls under certain conditions.
* Resolved a memory leak in the queue server in specific scenarios.
* Fixed a failure in completing Google Workspace integration.
***
### Changes for Release v22.2.14
Date: Jun 12, 2025
{% hint style="danger" %}
If you are upgrading from a version earlier than v22.2.11. You must update the SBC web portal with the new token.
{% endhint %}
#### Enhancements
* Improved Recording File Upload Performance: Added new parameters in system.ini to configure the number of threads used for uploading call recordings to AWS S3 or Azure Blob Storage. This enhancement significantly improves upload speed and efficiency.
* Optimized CDR Generation for Declined Queue Calls: Prevent generating excessive Call Detail Records (CDRs) when an agent in the queue declines a call with SIP response 488.
#### Bug Fixes
* Fixed an issue where call reports for ring groups were not generated correctly.
* Resolved a problem where importing extension users with IP Phone provisioning, or creating an extension with auto auto-provisioned phone, could cause the provisioning process to fail.
* Fixed an issue where using the same phone number for both WhatsApp and voice calls with different inbound rules could result in WhatsApp messages being delivered to the wrong destination extension.
* Fixed an issue where enabling “Call Recovery” caused incoming calls initiated via the REST API to fail to be answered properly.
***
### Changes for Release v22.2.11
Date: May 15, 2025
{% hint style="danger" %}
After upgrading from a previous version to v22.2.x, the SBC token is automatically regenerated. To ensure continued functionality, you must update the SBC web portal with the new token.
{% endhint %}
#### New Features and Enhancements
* Added **night mode support** for Queues, Ring Groups, and Virtual Receptionists. When night mode is active, calls are forwarded to a predefined destination.
* Enabled **BLF key integration for night mode** on supported IP phones, allowing activation and deactivation via BLF key press.
* Added support for **activating/deactivating night mode** directly from the PortSIP ONE app.
* Added support for **Two-Factor Authentication (2FA)** via email verification code for **web portal login and app login**. Requires proper email server configuration by the administrator.
* Added the ability to **reset passwords by sending a reset link via email** for users who forget their login credentials.
* Introduced **PIN-protected calling**. When dialing a Feature Access Code (FAC) followed by a number, the PBX prompts the user to enter their voicemail PIN before placing the call.
* Added a new FAC to allow users to **set/unset their default outbound caller ID**.
* Enabled **Enhanced Call Park support for SNOM phones**.
* Integrated the SMS API and SIP trunk with the provider [CM.com](https://www.cm.com)
* Added **email notification support** when the **trunk concurrent call limit** is reached.
* Improved agent handling in Queues and Ring Groups: if an agent **declines a call**, it will no longer be offered to that agent again during the same session.
* Updated call decline behavior: when an extension **declines a call**, it is now **routed to voicemail** instead of being disconnected.
* **Enhanced REST API CDR behavior**: When a call is launched via REST API between a number and a queue or ring group, and includes a `user-data` field, the PBX now stores this in the CDR as `user-data=abc;service-number=1111`, where `1111` is the queue or ring group number.
* Added support for **joining meetings via URL link**.
* Added **auto-provisioning support for Aastra/Mitel 6xxxi IP phones**.
* Improved transfer handling: the PBX now updates the **caller and callee name and number** using the **PAI header** in re-INVITE after blind or attended transfers.
* **Caller display name delivery behavior**: In the following scenarios, the **caller display name will be replaced with the tenant’s name (company name)**:
* A queue callback call is sent to the caller after an agent answers.
* A call is placed from an extension that belongs to a user group, and the group’s caller ID is applied.
* A call times out, fails, or is forwarded during night mode by the Virtual Receptionist to a trunk number.
* A call times out or is forwarded during night mode by the Queue to a trunk number.
* A call times out or is forwarded during night mode by the Ring Group to a trunk number.
* Updated **redirect URI** for Microsoft 365 integration. After upgrading to v22.2, the new URI must be configured in Microsoft 365 settings.
* Extended the **validity period of mobile app push notifications** from 3 to 7 days. This value is now configurable in the `system.ini` file.
* **Default header behavior changes in version 22.2**: Starting from v22.2, the following settings are **disabled by default** for Queues and Ring Groups:
* Adding ring group or queue information to the `P-Asserted-Identity` header.
* Adding ring group or queue information to the `Remote-Party-ID` header.
* Added an SRTP policy option in the SBC web portal to control whether SRTP information is included in the SDP.
#### Bug Fixes
* Fixed an issue where **emergency calls should not be billed**.
* Fixed a bug where WhatsApp trunks always appeared offline.
* Resolved a problem with inbound WhatsApp messages using an incorrect phone number.
* Fixed an issue where anonymous calls to trunks were missing the required `Privacy` header.
* Corrected the `extension_agent_status` message to use string values for extension ID instead of a numeric value.
* Fixed an issue where webhook thread numbers were incorrectly managed.
* Resolved a bug where, if all queue agents were busy and the call timed out, the "No Answer" destination was not triggered.
* When a user declines a call on one device, the CANCEL message sent to other devices now includes a `Reason` SIP header with cause `200` and text `"Busy"`.
* Fixed a bug where REST API-initiated a call that was not answered on the caller side could cause recording issues on subsequent calls.
* Resolved a problem in Ring Groups where, if the last agent declined the call and "Repeat on No Answer" was enabled, the caller was disconnected.
* Fixed a bug in Advanced Routing logic where only the last configured route would take effect.
* Corrected an issue where calls were still being routed to an outdated IP/port of an Accept Register Trunk after registration refresh.
* Fixed a bug in PortSIP ONE app where switching between Wi-Fi and mobile networks during a call caused disconnection.
#### REST API Changes
**New Endpoints**
* `/auth/sign_in` – Sign in using account credentials.
* `/auth/sign_in/:provider` – Sign in via social login providers.
* `/auth/sign_out` – Sign out the authenticated user.
* `/auth/send_otp` – Send OTP code for two-factor authentication (2FA).
* `/auth/verify_otp` – Verify 2FA OTP code.
* `/auth/forget_password` – Request password reset email.
* `/auth/reset_password` – Reset user password.
* `/auth/refresh_token` – Refresh access token.
* `/auth/user` – Retrieve authenticated user information.
**Updated Endpoints**
* `/api/tenants`
* Changed default value of `contact_append_type` from `DISABLE` to `APPEND`.
* Added new attributes:
* `enable_night_mode`
* `enable_two_factor_authentication`
* `email_recipients`
* `password_force_reset`
* `/api/tenants/:id`
* Added new attributes:
* `enable_night_mode`
* `enable_two_factor_authentication`
* `email_recipients`
* `password_force_reset`
* `/api/users` and `/api/users/:id`
* Modified `outbound_caller_ids` to include a new sub-attribute: `preferred`.
* `/api/ring_groups` and `/api/ring_groups/:id`
* Added new attribute: `night_mode_forward_rule`
* Changed default values:
* `enable_paid`: now defaults to `false` (was `true`)
* `enable_prid`: now defaults to `false` (was `true`)
* `/api/call_queues` and `/api/call_queues/:id`
* Added new attribute: `night_mode_forward_rule`
* Changed default values:
* `enable_paid`: now defaults to `false` (was `true`)
* `enable_prid`: now defaults to `false` (was `true`)
* `/api/ivrs` and `/api/ivrs/:id`
* Added new attribute: `night_mode_forward_rule`
* `/api/feature_access_codes`
* Extended `feature` enum to include:
* `NIGHT_MODE`
* `PIN_BASED_CALLING`
* `SET_DEFAULT_CLI`
* `/api/user/cdrs/sync_tokens/{token}/diff`
* Added new attribute: `status_code`
* `/api/providers` and `/api/providers/:id`
* Updated `outbound_parameters`: the `privacy_types_supported` field now accepts new enum values:
* `NONE`
* `SESSION`
***
### Changes for Release v22.1.7
Date: Feb 27, 2025
#### New Features & Enhancements
* **OAuth Integration with Microsoft 365 and Google Workspace**\
PBX system administrators and tenants can now authenticate email notifications using OAuth for Gmail and Microsoft 365 accounts.
* **Apply Mail Server Settings to All Tenants**\
A new feature allows tenants to adopt the system administrator’s mail server settings for email notifications, ensuring consistent configuration across all tenants.
* **SMS and WhatsApp Message Records**\
The system now supports listing and querying records for both SMS and WhatsApp messages, providing better tracking and management of communications.
* **Trunk Integration with VoIP Innovations, Bandwidth, and Flowroute**\
Users can now easily configure trunks and integrate with the SMS API for VoIP Innovations, Bandwidth, and Flowroute, simplifying trunk setup and management.
* **New SIP Header – X-Info**\
A new SIP header, *X-Info*, has been introduced to enhance the transmission of call information for improved troubleshooting and analytics.
* **Removal of X-Trunk-Name SIP Header**\
The *X-Trunk-Name* SIP header has been removed. Trunk-related information will now be transmitted via the *X-Info* header for better standardization.
* **Azure Blob Storage Support**\
Added support for storing call recordings and voicemail files in Azure Blob Storage, offering flexible and scalable storage options.
* **BLF Subscription for System Extensions**\
System extensions can now subscribe to other system extensions' BLF status. Previously, only extensions could subscribe to the BLFs of other extensions.
* **Updated Feature Access Code (FAC) Format Rules**\
The format rules for Feature Access Codes (FAC) have been updated to ensure better compatibility and user experience.
* **Optimized CDR Query Performance**\
Performance improvements have been made to enhance the efficiency and speed of Call Detail Record (CDR) queries.
* **Increased REST API Rate Limit**\
The REST API rate limit has been increased to 10,000 requests per minute, improving scalability and performance for high-traffic applications.
* **SMTP Authentication Mode – IP Authentication**\
A new “None” option has been added to the SMTP Authentication Mode settings for use with SMTP servers that employ IP address-based authentication.
* **Chat Group Member Limit**\
The maximum number of members allowed in a chat group has been increased to 200, providing greater flexibility for team communication.
* **Handset Language for SNOM DECT M100 Auto-Provisioning**\
Support has been added for setting the handset language during auto-provisioning of SNOM DECT M100 devices, ensuring smoother user experiences.
* **User and Engineer Passwords for SNOM DECT Auto-Provisioning**\
Fields for User and Engineer passwords have been added in the auto-provisioning setup for SNOM DECT M300, M400, M700, and M900 devices.
* **Web Portal Optimization**\
The web portal has been optimized to enhance usability and provide a more intuitive user interface, improving the overall user experience.
#### Bug Fixes
1. **Trunk ACK Delay Handling**\
Fixed a bug where slow ACK responses from the trunk to the PBX prevented calls from being offered to queue agents.
#### REST API Changes
* **New Endpoint:** `/api/external_messages` – Allows querying of SMS and WhatsApp message histories.
* **New Endpoint:** `/api/user/external_messages` – Allows querying of the current user’s SMS and WhatsApp message histories.
* **Endpoint Removal:** `/api/test_email` – This endpoint has been removed. System administrators can now use `/api/admin/notification/test_email`, and tenant administrators can use `/api/tenant/notification/test_email` as alternatives.
* **Updated Endpoint:** `/api/admin/notification` – Added the `enable_tenant_access` option, which allows tenants to use the system administrator’s mail server settings to send email notifications.
* **Updated Endpoint:** `/api/tenant/notification/test_email` – Added the `enable_system_email_server` option, which indicates whether the tenant has permission to use the system administrator’s mail server settings to send email notifications.
***
### Changes for Release v22.0.42
Date: Jan 16, 2025
* Fixed an issue where the client app’s username was displayed incorrectly when the app was offline but push notifications were enabled.
* Resolved an issue where inbound calls to a queue via a trunk were not routed to an agent if the trunk’s ACK response was delayed.
* Corrected a bug where the outbound caller ID specified in a REST API call was not properly recorded in the CDR.
#### REST API Changes
* Added `/api/calllogs`to query the CDR logs.
***
### Changes for Release v22.0.39
Date: Jan 2, 2025
* Fixed an issue where inbound rules were not being applied correctly when a holiday was configured.
* Resolved a bug with Advanced Routing, where the “all” option was not properly matching year/month parameters.
* Corrected an issue where exception forwarding rules failed to match the caller number under certain scenarios.
* Fixed a display issue where the caller’s display name was incorrect when calling into a ring group or queue.
***
### Changes for Release v22.0.38
Date: Dec 12, 2024
* Optimized performance: 2 cores, 4GB memory for up to 1,000 online users, supports \~500 simultaneous calls
* PortSIP ONE app: Available for WebRTC, Windows, iOS, and Android (macOS support coming soon)
* SSO login: Support for Microsoft 365 accounts across WebRTC, Windows, iOS, and Android apps
* Messaging features: Group chat, offline messaging, sync messages across devices, support for SMS and WhatsApp messaging
* Call management: Optimized for blind and attended call transfers, Call Flip and Call Park features within the app, Call Park notifications for easy retrieval, Visual voicemail in the app
* Customization options: Themes and emoji support, customizable caller ID for calls and SMS, manage personal and company contacts, easy import of contacts
* Synchronization across devices and apps: Sync presence and custom status, sync DND status across apps and IP phones, auto-sync extension users and CDR across apps
* VoIP trunk and SMS API integrations: Pre-configured trunks for Vonage, QuestBlue, VoIP.ms, Voxtelesys, Wavix, Twilio, Telnyx, Aire Networks, VoiceMeUp
* Phone support: Support for FANVIL DECT Phones (MODE and V66 models), SNOM phones, Yealink W73B DECT Phones, auto-provisioning for Grandstream GXP2604, HTEK phones
* Security and routing enhancements: STIR/SHAKEN support for enhanced call security, call routing based on extension presence status
* Administrative features: Tenant admins can manage Speed Dial 8 and Speed Dial 100 settings
* Operating system support: Linux (Debian 11/12, Ubuntu 22.04/24.04), Windows (10 1903/19H1 or higher, Windows Server 2022 or higher)
* Language support: Japanese language support
* WSI Pub/Sub integration: Provides **global\_\*** event notifications for system integration
#### REST API Changes
* Removed `/api/login/by_extension`.
* Removed `/api/tenants/:id/dealer`.
* Removed `/api/tokens`.
* Removed `/api/tokens/by_extension`.
* Removed `/api/tokens/refresh`.
* Removed `/api/tokens/destroy`.
* Removed `/api/user/chats/sessions`.
* Removed `/api/user/chats/sessions/:id/messages`.
* Removed `/api/user/chats/sessions/:id/messages/set_read`.
* Removed `/api/user/contacts/version`.
* Removed `/api/call_queues/:id/agents/:agent_number/login`.
* Removed `/api/call_queues/:id/agents/:agent_number/logout`.
* Removed `/api/call_queue_blacklist_prompts/:level`.
* Removed `/api/contacts/version`.
* Removed `/api/contact_groups`.
* Removed `/api/contact_groups/:id`.
* Removed `/api/contact_groups/:id/destroy`.
* Removed `/api/contact_groups/:id/contacts`.
* Removed `/api/contact_groups/:id/contacts/:contact_id`.
* Removed `/api/contact_groups/:id/contacts/:contact_id/destroy`.
* Removed `/api/files/:id/metadata`.
* Removed `/api/files/:id/data`.
* Removed `/api/files/uploads`.
* Removed `/api/files/uploads/:id/append`.
* Removed `/api/files/uploads/:id/complete`.
* Removed `/api/files/uploads/:id/status`.
* Removed `/api/files/uploads/:id/destroy`.
* Added `/api/user/presence` to manage the presence status of extension users.
* Added `/api/tenants/:id/dealers`, `/api/tenants/:id/dealers/:dealer_id`, `/api/tenants/:id/dealers/:dealer_id/destroy` to manage tenant-dealer relationships.
* Added `/api/im`, `/api/im/token`, `/api/im/token/destroy` to manage IM service-related features.
* Added `/api/sms`, `/api/sms/:id`, `/api/sms/:id/destroy` to manage SMS service-related features.
* Added `/api/whatsapp`, `/api/whatsapp/:id`, `/api/whatsapp/:id/destroy` to manage WhatsApp service-related features.
* Added `/api/user/cdrs/sync_tokens`, `/api/user/cdrs/sync_tokens/:token/diff` to sync extension user CDRs.
* Added `/api/user/meetings/:id/status`, `/api/user/meetings/:id/start`, `/api/user/meetings/:id/stop` to manage extension user meetings.
* Added `/api/user/contacts/:id/favorite`, `/api/user/contacts/:id/unfavorite` to manage personal contacts' favorites for extension users.
* Added `/api/user/contacts/sync_tokens`, `/user/contacts/sync_tokens/:token/diff` to sync personal contacts for extension users.
* Added `/api/user/business_contacts/:id/favorite`, `/api/user/business_contacts/:id/unfavorite` to manage business contacts' favorites for extension users.
* Added `/api/user/business_contacts/sync_tokens`, `/user/business_contacts/sync_tokens/:token/diff` to sync business contacts for extension users.
* Added `/api/user/extension_contacts/:id/favorite`, `/user/extension_contacts/:id/unfavorite` to manage extension contacts' favorites for extension users.
* Added `/api/user/extension_contacts/sync_tokens`, `/user/extension_contacts/sync_tokens/:token/diff` to sync extension contacts for extension users.
* Added `/api/user/outbound_caller_ids` to retrieve all outbound caller IDs for extension users.
* Added `/api/user/ring_groups` to retrieve all ring groups associated with extension users.
* Added `/api/users/:id/ms365_binding`, `/users/:id/ms365_binding/destroy` to bind and unbind extension users to Microsoft 365 integration.
* Added `/api/users/:id/speed_dial_8`, `/users/:id/speed_dial_8/:dial_id`, `/users/:id/speed_dial_8/:dial_id/destroy` to manage Speed Dial 8 for specific extension users.
* Added `/api/users/:id/speed_dial_100`, `/users/:id/speed_dial_100/:dial_id`, `/users/:id/speed_dial_100/:dial_id/destroy` to manage Speed Dial 100 for specific extension users.
* Renamed `/api/user/meetings/:id/members` to `/user/meetings/:id/participants`.
* Renamed `/api/user/meetings/:id/members/layout` to `/user/meetings/:id/participants/layout`.
* Renamed `/api/user/meetings/:id/members/:extension_number` to `/user/meetings/:id/participants/:participant_id`.
* Renamed `/api/user/meetings/:id/members/:extension_number/invite` to `/user/meetings/:id/participants/invite`.
* Renamed `/api/user/meetings/:id/members/:extension_number/mute` to `/user/meetings/:id/participants/:participant_id/mute`.
* Renamed `/api/user/meetings/:id/members/:extension_number/unmute` to `/user/meetings/:id/participants/:participant_id/unmute`.
* Renamed `/api/user/meetings/:id/members/:extension_number/chairman` to `/user/meetings/:id/participants/:participant_id/chairman`.
* Renamed `/api/user/meetings/:id/members/:extension_number/order` to `/user/meetings/:id/participants/:participant_id/position`.
* Renamed `/api/user/meetings/:id/members/:extension_number/destroy` to `/user/meetings/:id/participants/:participant_id/destroy`.
* Renamed `/api/conference_rooms/:id/members` to `/api/conference_rooms/:id/participants`.
* Renamed `/api/conference_rooms/:id/members/layout` to `/api/conference_rooms/:id/participants/layout`.
* Renamed `/api/conference_rooms/:id/members/:extension_number` to `/api/conference_rooms/:id/participants/:participant_id`.
* Renamed `/api/conference_rooms/:id/members/:extension_number/invite` to `/api/conference_rooms/:id/participants/invite`.
* Renamed `/api/conference_rooms/:id/members/:extension_number/mute` to `/api/conference_rooms/:id/participants/:participant_id/mute`.
* Renamed `/api/conference_rooms/:id/members/:extension_number/unmute` to `/api/conference_rooms/:id/participants/:participant_id/unmute`.
* Renamed `/api/conference_rooms/:id/members/:extension_number/chairman` to `/api/conference_rooms/:id/participants/:participant_id/chairman`.
* Renamed `/api/conference_rooms/:id/members/:extension_number/order` to `/api/conference_rooms/:id/participants/:participant_id/position`.
* Renamed `/api/conference_rooms/:id/members/:extension_number/destroy` to `/api/conference_rooms/:id/participants/:participant_id/destroy`.
* Renamed `/api/tariffs` to `/call_rates`.
* Renamed `/api/tariffs/:id` to `/call_rates/:id`.
* Renamed `/api/tariffs/:id/destroy` to `/call_rates/:id/destroy`.
* Renamed `/api/tariffs/export` to `/call_rates/export`.
* Modified `/api/admin/notification`: Added `auth`, `enable_starttls_auto` to configure SMTP authentication methods.
* Modified `/api/admin/settings`: Added properties `user_equal_required_for_auth_name`, `stir_shaken_cert`, `stir_shaken_key`; Modified property: `session_timer_duration` (default value changed to 3600).
* Modified `/api/call_park` (GET method): Removed property `prompt_file_id`.
* Modified `call_queue_blacklist_prompts` (GET method): Removed properties `level1_prompt_file_id`, `level2_prompt_file_id`.
* Modified `/api/call_queues`: Added properties `enable_paid`, `enable_prid`, `extension_number_as_to_header`.
* Modified `/api/call_queues/:id` (GET method): Removed properties `moh_prompt_file_id`, `intro_prompt_file_id`.
* Modified `/api/cdrs`: Added properties `service_number`, `user_data`.
* Modified `/api/cdrs/:id`: Added property `service_number`.
* Modified `completed_call_reports`: Removed property `file_id`.
* Modified `completed_call_reports`: Added property `file_url`.
* Modified `/api/conference_rooms`: Added properties `internal_invitees`, `external_invitees`.
* Modified `/conference_rooms/:id/recordings`: Removed property `file_id`.
* Modified `/conference_rooms/:id/recordings`: Added property `duration`.
* Modified `/api/contacts`: Removed property `pager`; Added properties `title`, `notes`.
* Modified `/api/dealers`: Added property `tenant_full_access`.
* Modified `/api/dect_phones`: Added property `region`.
* Modified `/api/hotdesking`: Added properties `external_ringtone`, `serial_number`.
* Modified `/api/media_servers`: Added property `custom_options`.
* Modified `/api/moh_server/musics`: Removed property `file_id`.
* Modified `/api/ms365` (GET method): Added property `sbc_redirect_uri`.
* Modified `/api/providers`: Added properties `enabled`, `brand`, `registration`, `stir_shaken_signature_required`; Modified properties: `inbound_parameters` (Added sub-properties: `enable_stir_shaken_validation`, `pai_header_parameter_name`, `drop_calls_with_verification_status`, `pass_api_header_to_uad`), `outbound_variable_user` (Added value: `OUTBOUND_CALLER_ID_AND_ORIGINATOR_CALLER_ID`), `outbound_variable_host` (Added value: `SIP_DOMAIN`), `status` (Removed values: `REGISTERED`, `UNREGISTERED`; Added values: `ONLINE`, `OFFLINE`).
* Modified `/api/ring_groups`: Added properties `enable_paid`, `enable_prid`, `extension_number_as_to_header`.
* Modified `/api/shared_voicemails/:id/greetings` (GET method): Removed properties `file_id`, `filename`.
* Modified `/api/shared_voicemails/:id/voicemails`: Added property `duration`.
* Modified `/api/tenants`: Removed properties `enable_concurrent_login`, `enable_queue_blacklist_first_level`, `enable_queue_blacklist_second_level`, `avatar`, `avatar_file_id`; Added properties `enable_billing`, `enable_feature_billing`, `enable_feature_call_statistics`, `enable_feature_contact_center`, `enable_feature_message_channels`, `enable_feature_microsoft_teams`, `enable_feature_trunks`, `enable_feature_whats_app`, `im_disk_quota`, `extension_im_disk_quota`, `stir_shaken_cert`, `stir_shaken_key`; Modified properties: `contact_match_type` (default value changed to `MATCH_EXACTLY`), `contact_update_interval` (default value changed to 720).
* Modified `/api/tenant@notification`: Added properties `auth`, `enable_starttls_auto`.
* Modified `/api/tenants`: Removed properties `enable_concurrent_login`, `enable_queue_blacklist_first_level`, `enable_queue_blacklist_second_level`, `deleted_at`, `avatar`, `avatar_file_id`; Added properties `enable_billing`, `enable_feature_billing`, `enable_feature_call_statistics`, `enable_feature_contact_center`, `enable_feature_message_channels`, `enable_feature_microsoft_teams`, `enable_feature_trunks`, `enable_feature_whats_app`, `im_disk_quota`, `extension_im_disk_quota`, `stir_shaken_cert`, `stir_shaken_key`; Modified properties: `contact_match_type` (default value changed to `MATCH_EXACTLY`), `contact_update_interval` (default value changed to 720).
* Modified `/api/tenants/switch`: When status is 200 OK, no longer returns a new token.
* Modified `/api/test_email`: Added properties `auth`, `enable_starttls_auto`.
* Modified `/api/user`: Removed properties `twitter`, `facebook`, `linkedin`, `instagram`, `avatar`, `avatar_file_id`, `online_no_answer_forward_rule`, `online_busy_forward_rule`; Added properties `address`, `department`, `sms`, `available_office_hours_forward_rule`, `available_non_office_hours_forward_rule`, `available_no_answer_forward_rule`, `busy_office_hours_forward_rule`, `busy_non_office_hours_forward_rule`, `busy_no_answer_forward_rule`, `dnd_office_hours_forward_rule`, `dnd_non_office_hours_forward_rule`, `away_office_hours_forward_rule`, `away_non_office_hours_forward_rule`, `lunch_office_hours_forward_rule`, `lunch_non_office_hours_forward_rule`, `trip_office_hours_forward_rule`, `trip_non_office_hours_forward_rule`.
* Modified `/api/user/cdrs`: Added properties `service_number`, `user_data`.
* Modified `/api/user/cdrs/:id`: Added property `service_number`.
* Modified `/api/user/contacts`: Removed property `pager`; Added properties `title`, `notes`.
* Modified `/api/user/greetings`: Removed properties `file_id`, `filename`.
* Modified `/api/user/meetings` (POST method): Removed properties `extension_number`, `capacity`, `close_on_chairman_exit`, `close_on_endtime`; Added properties `internal_invitees`, `external_invitees`; Modified property: `timezone` (required).
* Modified `/api/user/phones`: Added properties `external_ringtone`, `serial_number`, `door_password1`, `door_password2`.
* Modified `/api/user/recordings`: Removed properties `file_id`, `filename`; Added property `duration`.
* Modified `/api/users`: Removed properties `twitter`, `facebook`, `linkedin`, `instagram`, `avatar`, `avatar_file_id`, `online_no_answer_forward_rule`, `online_busy_forward_rule`; Added properties `address`, `department`, `sms`, `available_office_hours_forward_rule`, `available_non_office_hours_forward_rule`, `available_no_answer_forward_rule`, `busy_office_hours_forward_rule`, `busy_non_office_hours_forward_rule`, `busy_no_answer_forward_rule`, `dnd_office_hours_forward_rule`, `dnd_non_office_hours_forward_rule`, `away_office_hours_forward_rule`, `away_non_office_hours_forward_rule`, `lunch_office_hours_forward_rule`, `lunch_non_office_hours_forward_rule`, `trip_office_hours_forward_rule`, `trip_non_office_hours_forward_rule`; Modified property: `display_name` (required).
* Modified `/api/users/:id/greetings`: Removed properties `file_id`, `filename`.
* Modified `/api/users/:id/phones`: Added properties `external_ringtone`, `serial_number`, `door_password1`, `door_password2`.
* Modified `/api/voicemails`: Removed properties `file_id`, `filename`; Added property `duration`.
* Modified `/api/default_email_templates`: Modified property `name` (Added `TRUNK_CONNECTED`, `TRUNK_DISCONNECTED`).
* Modified `/api/custom_email_templates`: Modified property `name` (Added `TRUNK_CONNECTED`, `TRUNK_DISCONNECTED`).
* Modified `/api/feature_access_codes`: Modified property `code` (Added `CALL_FLIP`, `CALL_TRANSFER`, `CLEAR_PUSH`, `RESET_CALLS`).
* Modified password property: Minimum length restriction changed to 6 (previously 8).
* Modified outbound\_caller\_ids property: Added sub-property `description`.
***
# v16.x Release Notes
{% hint style="warning" %}
Please follow the [guide ](/portsip-communications-solution/portsip-pbx-administration-guide/1-installation-of-the-portsip-pbx/installation-of-portsip-pbx-v22.x/upgrade-to-the-latest-version-within-v22.x)to upgrading your PBX to the latest version.
{% endhint %}
### Changes for Release v16.4.8
Date: November 6, 2025
#### Enhancements
* Optimized log file management to improve storage efficiency and system stability.
* Enhanced CDR query performance for faster data retrieval and reporting.
* Improved audit log information to improve performance
#### Bug Fixes
* Fixed the bug where the trunk DID pool management and rule handling to address a condition where editing inbound or outbound rules could prevent calls from being routed through the trunk.
* Fixed an issue where filesystem inodes were not released correctly after file operations in Linux, which could lead to unnecessary disk space consumption over time.
***
### Changes for Release v16.4.7
Date: September 10, 2025
**Enhancements**
* Reimplemented the webhook, more stable.
***
### Changes for Release v16.4.6
Date: August 1, 2025
**Bug Fixes**
* Fixed a queue abandoned report issue where if the agent refers the call to the queue again causes the number of abandoned calls to be incorrect.
***
### Changes for Release v16.4.5
Date: July 1, 2025
#### Enhancements
* Reimplemented the webhook engine to enhance performance.
* Optimized system file cleanup operations. Cleanup time can now be configured (e.g., 2:00 AM) via `system.ini`. See the guide: [Configure File Vacuum Time](/portsip-communications-solution/faq/configuring-the-automatic-vacuum-schedule).
#### Bug Fixes
* Fixed a call routing issue where a SIP trunk call, auto-answered by a queue, could fail to offer the call to an agent if the trunk delayed a reply with an ACK.
* Fixed an issue where queue agents or ring group members could remain in the "ON CALL" status without active calls under certain conditions.
* Corrected CDR display where Virtual Receptionist calls showed the DID number instead of the IVR number.
* Resolved an issue where the trunk registered to the PBX, and changed its IP during re-registration, but the PBX still used the old IP.
* Fixed incorrect CDR direction labeling for trunk-to-trunk calls (`INBOUND_OUTBOUND_CALL`).
* Addressed a bug where only the last Advanced Routing Rule in an inbound rule took effect.
* Fixed incorrect or missing recording files issue if a REST API–initiated call that the caller did not answer to end the call by timed out.
* Fixed a Ring Group bug where a call was hung up if the last member declined the call with "Repeat" enabled for the no answer.
***
### Changes for Release v16.4.4
Date: Nov 25, 2024
* Fixed an issue where the call direction was incorrect when calls were initiated via the REST API.
* Resolved a bug where blacklisted numbers set to "permanent" were not properly affected.
* Addressed an issue causing no voice when a call launched via the REST API failed on the first trunk route but succeeded on the second.
* Fixed a bug where outbound caller IDs outside the trunk DID pool were still used during calls.
* Resolved an issue where outbound caller IDs were not recorded in CDRs for calls initiated via the REST API to trunks.
* Removed trunk information from CDRs for calls between internal extensions.
* Fixed a queue bug where the last agent did not receive calls in queue "ring simultaneously" mode when all agents were available.
* Resolved an issue in version 16.4.3 where the PBX used an incorrect IP address in the call SDP when making calls to trunks over the internet in a High Availability (HA) setup.
***
### Changes for Release v16.4.3
Date: Sep 10, 2024
* Users can now efficiently locate IVRs within the IVR list page by utilizing the search functionality.
* Fixed a crash issue that occurred when using a domain for the trace server host.
* Fixed a bug affecting calls using the G.723.1 codec.
***
### Changes for Release v16.4.2
Date: Jul 24, 2024
* Fixed a crash bug in the IVR Server.
* Fixed a bug where video might lag behind audio in a video call recording file.
* Fixed a crash bug that occurred when the RTP port was already in use by another application.
* Fixed a bug that could cause calls to hang up automatically.
* Fixed a bug where system notification emails were incorrectly using the tenant’s template.
* Fixed an issue where the MOH music file might be incorrectly used by another tenant.
* Fixed a bug where making a large number of calls could result in a new call having only one voice channel.
* Fixed a bug where deploying the queue server as a cluster might cause the REST API `/api/call_queues/{id}/waiting` to return empty callers.
* Fixed a bug where incorrect codec usage in SNOM M400 and M900 could result in no voice.
***
### Changes for Release v16.4.1
Date: Jun 12, 2024
The following changes are included in this release:
* Support the Microsoft Teams direct routing refer request.
* Upgraded the DB to PostgreSQL 14.12.
* Fix an issue when provisioning the ALE H2P phone via RPS.
* Fix a bug that if an extension registers to PBX from IPv4 and IPv6 devices simultaneously.
* Allow set the Queue and ring group number for the BLF key.
***
### Changes for Release v16.4.0
Date: May 23, 2024
The following changes are included in this release:
* Now the PortSIP SBC supports transcoding.
* Google will stop supporting the legacy FCM APIs for push notifications in June 2024, all PortSIP PBX v16.x installations need to be upgraded to v16.4.0 to make the push notifications work correctly, please reference the article: [Migrate from legacy FCM APIs to HTTP v1 for Android Push Notifications](/portsip-communications-solution/faq/migrate-from-legacy-fcm-apis-to-http-v1-for-android-push-notifications).
* From v16.4, when a trunk is added, the outbound call over this trunk will apply the outbound caller ID to the FROM header by default, no longer needing to make the changes for the outbound parameters manually.
* Limited the file name size to a maximum of 128 characters when uploading the voice prompt files.
* Support French and Russian languages.
#### REST API Changes
1. Updated `/api/mobile_push` series API, removed `android_server_key`, `android_sender_id`, added `android_service_account` to specify the the contents of **Firebase Cloud Messaging service account JSON file**.
***
### Changes for Release v16.3.0
Date: Mar 11, 2024
The following changes are included in this release:
* We’ve moved the Microsoft 365 settings from the global scope to the tenant level. Now, each tenant administrator can configure Microsoft 365 integration independently, without requiring assistance from the System Administrator.
* We’ve redesigned the login page for the PBX Web Portal, Windows app, and WebRTC app.
* New outbound rules will now use their own office hours by default, instead of using the tenant’s office hours.
* We’ve made changes to the username format limitations.
* System Administrators and Dealers are now allowed to change their usernames.
* We’ve updated the SMTP username format validation to be compatible with AWS SES.
* We’ve fixed a bug where, if a call was answered on the IP Phone or Desktop app, the mobile app would continue ringing for a while.
* Tenant administrators can now subscribe to the CDR event for the entire tenant scope.
* We’ve added an option for the trunk to remove the SRTP line, resolving compatibility issues with some trunks.
* We’ve introduced a new permission to control access to company contacts.
* Tenant administrators can now clear device registration and app push information on the Web Portal for an extension.
* We’ve added a new feature that allows re-provisioning of all phones for a tenant.
* Fix a bug count the concurrent calls are incorrect on a trunk for some special scenarios.
* Support the English UK language.
#### REST API Changes
* Remove `GET /api/token`.
* Remove `POST /api/token/refresh`.
* Remove `POST /api/token/destroy`.
* Add POST `/api/login/by_microsoft` for Microsoft 365 integrated login.
* Add GET `/api/login` for users to get their current login status.
* Modify `GET /api/info` to accept an optional query parameter `domain`. When the `domain` parameter is specified in the request, the server will additionally return the public properties `name`, `domain`, `website`, `avatar_url`, `enable_ms365_integration`, `ms365_authorization_endpoint` of the corresponding tenant.
* Add GET `/api/users/:id/status/:instance_id/destroy_status` to clear the login information of a specified user.
* Rename `POST /api/phones/{mac}/reprovsion` to `POST /api/phones/{mac}/reprovision`.
* Add `POST /phones/reprovision` to reconfigure all phones.
* Add a configurable property `remove_srtp_info` for the Trunk.
* Modify the username format validation rules to allow a sequence of 1-64 characters that can include uppercase and lowercase letters, numbers, underscores, hyphens, periods, and single quotes. However, periods are not allowed at the beginning or end.
* Add `POST /api/admin/username` for users to change the system administrator's username.
* Add `POST /api/dealer/username` to change the dealer's username.
* Add `GET /api/user/call_queues` to get the list of call queues that the currently logged-in user belongs to.
* Add `GET /api/user/call_queues/:id/agent` to get the agent status of the specified call queue that the currently logged-in user belongs to.
* Add `POST /api/user/call_queues/:id/agent` to set the agent status of the specified call queue that the currently logged-in user belongs to.
* Add `GET /api/users/:id/call_queues` to get the list of call queues that a specified user belongs to.
* Add `GET /api/users/:id/call_queues/:queue_id/agent` to get the agent status of the specified call queue that a specified user belongs to.
* Add `POST /api/users/:id/call_queues/:queue_id/agent` to configure the agent status of the specified call queue that a specified user belongs to.
***
### Changes for Release v16.2.0
Date: Jan 18, 2024
The following changes are included in this release:
* Supports SNOM M series and Yealink W series DECT phones.
* Adds support auto provisioning for Fanvil i504(W), i505(W), i506W, and i507W devices.
* Changes the SNOM phone configuration file to HTM format.
* Enables playing of call recording voice prompts for inbound calls.
* Allows setting of office hours and holidays for each IVR DTMF input.
* If an extension is registered to PBX from multiple devices, once one of the devices rejects the incoming call by **486**, the PBX will also hang up the call on other ringing devices.
* Adds an option for the trunk to allow or disallow the PBX to adjust the SDP direction when holding the call.
* Supports auto-provisioning of emergency numbers to the IP phones, allowing the IP phone to dial the emergency number even when the phone keys are locked.
* No longer displays the offline agent in the Contact Center Wallboard.
* Removes the Offline status in the BLF settings.
* Supports creating the transport on the port which is less than 1024 (limited permissions by some Linux).
* Displays the Feature Access Code in the WebRTC and Windows Client.
* Updates the apps (iOS, Android, Windows, WebRTC) to synchronize the status between the apps and IP Phones. The statuses include:
* Online
* Ringing
* On call
* Away
* Do Not Disturb
* Business Trip
* Supports synchronization of the Do Not Disturb (DND) status by pressing the DND button on the IP phone.
* Adjust the REST API rate limit to 5,000 per minute.
* Changed the WSI (Web Socket Interface) events so subscribers more easily watch the extension status.
* Resolved an issue that was preventing new voicemail alerts on SNOM phones.
* Fixed a bug that could prevent the Queue prompt voice from playing to the caller when the Queue servers are configured as a cluster.
***
### Changes for Release v16.1.0
Date: Nov 2, 2023
The following changes are included in this release:
* Improved security; now each extension's IP Phone configuration file is stored in a separate directory with a random name to prevent guessing even if the phone MAC address is leaked
* Integrated Microsoft 365 and enabled Single Sign-On (SSO)
* Implemented Contact Center Wallboards
* Introduced skill-based routing for ring groups
* Introduced skill-based routing for queues
* Added support for Last Called Agent Routing for the queue
* Supported setting agent status to Not Ready after the agent completes a Non-ACD call
* Introduced Queue Manager Role
* Changed the CTI menu name to Contact Center
* Implemented custom headers at tenant level, allowing the adding of custom SIP headers for a call and relaying of specified custom headers for a call
* Optimized High Availability (HA) for On-Premise and AWS deployments
* Enabled scaling of the Media server, Queue server, Virtual Receptionist Server, and Meeting server as a cluster
* Implemented Direct Inward System Access (DISA)
* Added support for meeting invitations and joining meetings via link
* Added support for Hotdesking
* Introduced the FAC `*70` and `*71` for Hotdesking
* Added theme support, allowing customers to adjust the themes of the WebRTC Client, PBX Web Portal, and SBC Web portal to fit their business style
* Added support for Italian and Spanish languages and voice prompts
* Added support for Speed Dial 8 and Speed Dial 100
* Added functionality to resend welcome emails to extensions
* Enabled voicemail PIN authorization by default
* Allowed contact's phone number to be empty
* Refactored the WSI (WebSocket Subscribe Interface)
* Enabled changing the user's presence status via BLF key
* Fixed a bug preventing SNOM phones from picking up calls via BLF key
* Introduced Advanced Routing for inbound rule that allows routing of inbound calls based on years, months, days, weekdays, and any time shifts
* Added a notification template for meeting invitations
* Implemented max concurrent call limits for trunks at both global and tenant levels
* Added functionality to send notification emails when max concurrent calls on a trunk are reached
* Introduced user personal contacts feature
* Implemented the User-Agent blacklist
* Added support for associating IP addresses with CIDR format for a trunk
* Optimized performance for WebRTC, outbound calls, and video meetings
* Introduced Recipients for Shared Voicemail that sends email notifications to them
* Allowed specifying outbound caller ID for the outbound rule
* Supported random routes for an outbound rule
* With the PortSIP PBX setup wizard, the web domain field is now mandatory to enter
* Adjusted the REST API rate to 1,000 requests per minute per IP address
* Added Virtual Group Park in the BLF keys, supporting Fanvil, Yealink, and Dinstar phones
* Added support for more new models of Fanvil IP Phones and intercom devices
* Added support for more new models of Yealink IP Phones
* Added support for more new models of SNOM IP Phones
* Allowed recharging with a negative amount to reduce the balance
* Made some other minor changes and improvements
* Fixed some minor bugs
***
### Changes for Release v16.0.4
**Date**: August 8, 2023
* Fixed a security issue.
* Fixed a bug that can't hear early media when launching the call by REST API.
***
### Changes for Release v16.0.3
**Date**: July 17 2023
The following changes are included in this release:
* Fixed a bug that caused SNOM phones to fail to download configuration files when auto-provisioned using a custom template. The issue was due to the configuration file name being in lowercase instead of the phone’s MAC address. For more details, please read the article on [Custom IP Phone Templates.](https://support.portsip.com/portsip-pbx-administration-guide/4-phone-device-management/custom-ip-phone-template#snom-phone)
* Fixed a bug that caused mobile app push notifications to expire after 1.5 days. The expiration time has been changed to 60 days.
* Improved compatibility with 2N devices. 2N devices appended a non-standard server port to the TO and FROM headers in REGISTER and INVITE messages, causing calls to ring groups to return a 480 error.
* Fixed a bug that the video meeting recorded is not working.
* Fixed a bug that caused the media server to hang when video call recording was enabled in the PBX.
* Fixed a bug that screen sharing did not work during meetings when the PBX was running on a Linux server.
* Automatically determine if the server’s IPv6 is disabled, and if so, do not attempt to bind the service to the IPv6 interface.
* Added support for configuring the first BLF as a speed dial for Fanvil i series intercom devices via auto-provisioning.
***
### Changes for Release v16.0.2
**Date**: June 1, 2023
The following changes are included in this release:
* Updated the certificates for Apple push notifications. Users must upgrade the PBX to make the PortSIP app work with push notifications.
* Changed the default retain days for recording files, log files, temporary files, and call report files.
* Changed Max-Forwards from 20 to 70.
* Added support for visual park feature with Fanvil IP Phones.
* Improved voice mix in meetings.
* Fixed a bug that did not use new brand name for creating custom phone templates.
* Fixed bug that displayed incorrect presence status.
* Fixed bug that sent NOTIFY for new voicemails.
* Fixed billing bug that added one more billing round if billing time was multiple of 60 seconds.
* Fixed push status display incorrectly on the user list page.
***
### Changes for Release v16.0.1
**Date**: March 30, 2023
The following changes are included in this release:
* If the "Set agent to Ready automatically" option of the queue is disabled, an agent’s status will be restored to their previous status instead of "Wrap up" after they complete a non-queue call.
* The license key will only display the last part and mask other parts with \*.
* A new REST API `GET /api/sessions/directly` has been added which allows launching calls by URL.
* The REST API `POST /api/users/{id}/call` has been removed.
* When a caller presses a DTMF that is not predefined, a prompt will play.
* The MOH file of the queue is no longer mandatory. The queue will use the default MOH file if the user has not uploaded a MOH file for a queue.
* If the user is offline and push notifications are enabled, their status will be displayed as "**PushOnline"** in the Web portal.
* The Web portal will display the language as the browser language.
* The WebRTC client URL port has been changed to 10443. Don’t forget to create the firewall rule for port 10443 on TCP.
* Passwords will be auto-generated when creating a user.
* Custom menus can be used to link to external websites.
* The IP Address will be displayed when viewing the details of an online user.
* If a user signs in to the Web portal with an incorrect password or if the user does not exist, just return the message "**Authentication Error**" and no longer return the detailed reason.
* The issue where auto-provisioning for GrandStream IP Phones the URL is wrong has been fixed.
* The issue where emails failed to send with some SMTP servers has been fixed.
* The issue where there may be no voice after completing an attended transfer has been fixed.
* The issue where extension call forwarding is not affected if the call comes from Virtual Receptionist or Queue has been fixed.
* The issue where the outbound caller ID is set as starting with + and it won’t set to the INVITE message when making a call to the trunk has been fixed.
* The issue where if a user registers to PBX from multiple devices and launches a call from REST API with that user and the call actually answered but the CDR will display as not answered has been fixed.
* The issue where if you launch a call by REST API, one party may have no voice has been fixed.
* In the Webhook and WSI messages, the ID has been changed from in64\_t to string in order to be compatible with JS.
* The billing issue is that if the call duration is multiples of the billing circle, don’t plus more 1 billing round; in the previous version, if the duration is 10 seconds and the billing circle is 5 seconds, we will charge 3 rounds, now just charge 2 rounds.
***
### Changes for Release v16.0.0
**Date**: January 16, 2023
The following changes are included in this release.
* New Admin web portal
* New rebranding engine
* Rewritten all REST APIs
* Introduced dealer system, support distributor, sub-distributor, reseller
* Support call park and group call park
* Support group pickup
* Support shared voicemail
* Support automatic callback
* Support queue callback
* Support rich call reports
* Notifications, ability to configure the types of email notifications that the system sends to users
* Custom notifications template
* Custom IP Phone template
* Roles Based Permissions
* Custom Role
* Feature Access Codes (Dial Codes)
* Password policy
* Integrated SBC
* Support Microsoft Teams Direct Routing
* Billing on tenant
* Billing on user
* Online charging
* Offline charging
* Multiple office hours per day
* Route calls based on the DID number range
* Visual IVR Editor
* Voice Announcement
* Audit log viewer
* Trunk-Based Outbound Caller ID
* Outbound caller ID for tenant
* User Profile Picture
* RFC3323 Privacy Mechanism
* Priority for outbound rules
# Prepare the AWS Environment for Deployment
If you plan to deploy PortSIP PBX on Amazon Web Services (AWS), follow the steps below to prepare the required EC2 instance, Elastic IP, and security groups.
Proper AWS resource preparation is critical to ensure stable SIP signaling, high-quality media processing, and reliable system performance in production environments.
***
### Step 1: Sign In to the AWS Management Console
1. Log in to the [AWS Management Console](https://aws.amazon.com/console/).
2. Select the **AWS region** and **availability zone** where you want to deploy the PortSIP PBX instance.
> ❗ **Important**\
> Choose a region geographically close to your users and SIP trunk providers to minimize network latency, reduce jitter, and improve overall call quality.
***
### Step 2: Launch an EC2 Instance
1. Open the **EC2 Dashboard**.
2. Navigate to **Instances > Instances**.
3. Click Launch instances in the upper-right corner. The Launch an instance configuration page will appear.
***
### Step 3: Choose the Operating System and Instance Type
1. In the **Name and tags** section, assign a descriptive name, such as **PortSIP PBX Server**.
2. In the **Application and OS Images (Amazon Machine Image)** section, select **Ubuntu 24.04 LTS**.
3. In the **Instance type** section, choose an instance based on your expected workload, such as:
* `m3.large`
* `m6i.large`
* `m7i.large`
4. Ensure the **architecture** is set to **64-bit (x86)**.
> ❗ **Important**\
> For production deployments, select a general-purpose or compute-optimized instance with sufficient CPU and memory to handle **SIP signaling**, **media processing**, and **concurrent call volume**. Insufficient resources may lead to degraded call quality, audio issues, or dropped calls.
***
### Step 4: Generate an SSH Key Pair
AWS requires an **SSH key pair** to securely access your EC2 instance.
1. In the **Key pair (login)** section of the instance launch wizard, do one of the following:
* If you already have an existing SSH key pair, select it from the drop-down list.
* If you do not have a key pair, click **Create new key pair**.
2. On the **Create key pair** page:
* Enter a descriptive name for the key pair (for example, `portsip-pbx-key`).
* Keep all other settings at their default values.
* Click **Create key pair**.
3. When prompted, download the `.pem` key file and store it securely on your local computer.
> ❗ **Important**\
> The private key file (`.pem`) can only be downloaded once. AWS does not retain a copy.\
> If the key file is lost, you will not be able to access the instance via SSH and may need to recreate the instance or perform key recovery procedures.
Please refer to the screenshot above for visual guidance.
***
### Step 5: Configure Network Settings and Storage
#### Network Settings
1. In the Network settings section, configure the security group:
* If this is your first PortSIP PBX deployment, select Create security group to automatically create a new security group.
* If you already have an existing security group configured for PortSIP PBX, select Select existing security group and choose it from the list.
2. Keep all other network parameters at their default values unless you have specific networking or security requirements.
> ❗ **Important**\
> Ensure that the selected security group allows the required inbound and outbound traffic for **SIP signaling**, **RTP media**, **Web management**, and **SSH access**. Incorrect security group rules are one of the most common causes of call setup failures and one-way audio issues.
***
#### Storage Configuration
1. Allocate **at least 50 GB** of storage for the **root volume**.
2. If you plan to store a large number of call recordings, voicemails, or CDR data, increase the disk size accordingly.
> ❗ **Important**\
> As a general guideline, approximately **1 MB of disk space is required for every 1 minute of audio recording**.\
> Calculate the total required storage capacity based on:
>
> * Average call duration
> * Number of concurrent and daily calls
> * Recording retention period
> Insufficient disk space may result in failed recordings, missing voicemails, or service interruptions.
#### Launch the Instance
After completing the network and storage configuration, click **Launch instance** to start your EC2 server.
***
### Step 6: Configure the Security Group
1. Navigate to **EC2 > Instances** and select your newly created instance.
2. Scroll down to the **Security** tab to view the associated security group\
(for example, `sg-051aa65b609ce7120 (launch-wizard-1)`).
3. Click the **security group** link to open its configuration page.
Please refer to the screenshot above for reference.
***
#### Configure Inbound Rules
1. Under the **Inbound rules** tab, click **Edit inbound rules**.
2. Add the following inbound rules required by **PortSIP PBX**:
**UDP Ports**
* `5060`, `5066`
* `25000–35000`
* `45000–65000`
**TCP Ports**
* `5061`, `5063`, `5065`, `5067`
* `8882–8883`
* `8887–8888`
* `10443`
3. **Keep the default SSH rule (TCP port 22)** unchanged. Do **not** remove or modify it.
> ❗ **Important**
>
> * **UDP 25000–35000** is used by the **SBC**.\
> Skip this rule if the SBC is deployed on a **separate server**.
> * **UDP 45000–65000** is used by the **PBX media server** for RTP media.\
> Skip this rule if the media server runs on a **different host**.
> ❗ **Important**\
> These ports are required to ensure proper **SIP signaling**, **RTP media flow**, and **management access**.\
> Missing or incorrectly configured rules are a common cause of **call failures, one-way audio, or no audio issues**.
#### Apply the Configuration
After adding all required rules, click **Save rules** to apply the changes.
***
### Step 7: Allocate and Associate an Elastic IP
A static public IP address is required to ensure that SIP devices, SIP trunk providers, and external services can consistently reach your PortSIP PBX. On Amazon Web Services, this is achieved using an Elastic IP (EIP).
***
#### Allocate an Elastic IP
1. In the left navigation pane of the EC2 console, go to\
**Network & Security > Elastic IPs**.
2. Click **Allocate Elastic IP address** in the upper-right corner.
3. Keep all default settings and click **Allocate**.
Please refer to the screenshot above for reference.
***
#### Associate the Elastic IP with the EC2 Instance
1. Return to **Network & Security > Elastic IPs**.
2. Select the newly allocated Elastic IP from the list.
3. Click **Actions**, then choose **Associate Elastic IP address**.
4. On the **Associate Elastic IP address** page:
* In the **Instance** field, select your PortSIP PBX EC2 instance.
* Click **Associate**.
> ❗ **Important**\
> A stable public IP address is **mandatory** for SIP-based systems.\
> Without an Elastic IP, the public IP may change after a reboot or stop/start operation, which can cause:
>
> * SIP registration failures
> * One-way or no-audio issues
> * Call routing and trunk authentication problems
> ❗ **Important**\
> Always configure your **SIP trunks**, **DNS records**, and **firewall rules** using the **Elastic IP address**, not a dynamic public IP.
***
#### **Result**
Your EC2 instance now has a **persistent public IP address**.\
You can use this **Elastic IP** to:
* Connect to the instance via **SSH**
* Configure SIP trunks and NAT settings
* Allow external SIP devices and services to reliably reach the PBX
***
### Step 8: Verification
After associating the **Elastic IP** and applying the required **security group rules**, verify that your AWS environment is correctly prepared for the PortSIP PBX deployment.
#### Verification Checklist
* The EC2 instance has a **fixed public IP address** (Elastic IP).
* All required ports are open for:
* **SIP signaling**
* **RTP media**
* **Web management access**
* The instance is reachable from the public network.
***
#### Connect to the Instance via SSH
To connect to your EC2 instance using an SSH client:
* **Default username:** `ubuntu`
* **Authentication method:** SSH key pair created in a previous step
**Example SSH command:**
```bash
ssh -i /path/to/your-key.pem ubuntu@
```
> ❗ **Important**\
> Ensure that the SSH private key file (`.pem`) has the correct permissions.\
> On Linux or macOS, you may need to run:
>
> ```bash
> chmod 400 /path/to/your-key.pem
> ```
>
> Incorrect permissions may cause SSH authentication failures.
***
### **Result**
If the SSH connection is successful, your AWS environment is **fully prepared** for the PortSIP PBX deployment.
You can now proceed to the next section: [Installing PortSIP PBX](/portsip-communications-solution/portsip-pbx-administration-guide/1-installation-of-the-portsip-pbx/installation-of-portsip-pbx-v22.x/install-portsip-pbx).
# 1 Installation of the PortSIP PBX
### PortSIP PBX Free Edition
You can install the **PortSIP PBX Free Edition**, which supports up to **3 simultaneous calls** and **10 registered extensions**.
If you require higher capacity—for example, more concurrent calls or additional extensions—please refer to the [PortSIP PBX Pricing](https://www.portsip.com/portsip-pricing/) page for detailed licensing options.
***
### Supported PortSIP PBX Versions
PortSIP PBX currently maintains two active major versions:
* **v22.x** – Actively developed and fully supported
* **v16.x** – In maintenance mode; no new features are being developed
> ❗**Recommendation**\
> For optimal performance, security, and access to the latest features, we strongly recommend installing the latest **v22.x** release.
If you are currently running **v16.x**, we strongly recommend upgrading to **v22.x** to ensure ongoing compatibility and to benefit from continued enhancements and fixes.
***
### PortSIP ONE App Compatibility
Starting with **PortSIP PBX v22.0**, PortSIP introduced the all-new [PortSIP ONE](https://www.portsip.com/portsip-one/) application.
PortSIP ONE provides a modern, unified business communications experience with a comprehensive set of features. However, please note the following compatibility requirements:
* PortSIP ONE is compatible only with PortSIP PBX v22.x
* PortSIP ONE is not compatible with PortSIP PBX v16.x
* The [legacy PortSIP softphone](https://www.portsip.com/portsip-softphone), which worked with **v16.x**, is not compatible with **v22.x**
> ❗**Important**\
> Ensure your PBX version and client applications are compatible before upgrading or deploying new client software.
# Installation of PortSIP PBX v22.x
### Supported Operating Systems
PortSIP PBX can be installed on **Ubuntu** and **Debian** Linux operating systems.
* Ubuntu: 22.04, 24.04(recommended)
* Debian: 12
***
### Instant Messaging (IM) Service
Starting with **PortSIP PBX v22.0**, an integrated **Instant Messaging (IM) service** is available, providing modern collaboration features such as one-to-one messaging and group chat.
On Linux deployments, the IM service requires a **separate installation step**. In some scenarios—particularly in large-scale or high-concurrency environments—you may choose to deploy the IM service on a **dedicated server** to achieve optimal performance and scalability.
***
### Data Flow Service (Call Analytics and Real-Time Metrics)
Starting with **PortSIP PBX v22.3**, PortSIP introduces the **Data Flow service**, which delivers advanced call analytics and real-time metrics.
The Data Flow service is built on **ClickHouse**, a high-performance, column-oriented database designed for analytics workloads. Due to its performance characteristics and resource requirements, the Data Flow service **must be installed on a dedicated, high-performance server** and is deployed as a **separate service** from the core PBX.
This architecture ensures:
* High-throughput analytics processing
* Accurate real-time and historical reporting
* Minimal impact on core call processing performance
***
### Upgrading PortSIP PBX
If you are currently running **PortSIP PBX v16.x** and plan to upgrade to the latest **v22.x**, or if you are upgrading from an earlier **v22.x** release to the latest version, follow the upgrade procedures outlined below.
### Upgrade Path
* Deployments currently running **PortSIP PBX v16.x** must first be upgraded to the **latest v16.x release** before proceeding with an upgrade to the latest **v22.x**.
* Deployments currently running earlier **PortSIP PBX v22.x** can upgrade **directly** to the **latest v22.x** release.
Ensure all required services (PBX core, IM service, and Data Flow service, if deployed) are upgraded in the correct order.
> ❗**Recommendation**\
> Always back up configuration files, call data, and databases before performing any upgrade. For production environments, perform upgrades during a maintenance window and validate services after completion
# Install PortSIP PBX
### Upgrading
This guide applies **only to fresh installations** of the **latest PortSIP PBX v22.x**.
If you are **upgrading from an earlier version**, such as **v16.x**, **v22.1.x**, or **v22.2.x**, please follow the appropriate upgrade guide below:
* [Upgrade to the Latest Version Within v22.x](/portsip-communications-solution/portsip-pbx-administration-guide/1-installation-of-the-portsip-pbx/installation-of-portsip-pbx-v22.x/upgrade-to-the-latest-version-within-v22.x)
* [Upgrade v16.x to the Latest v22.x](/portsip-communications-solution/portsip-pbx-administration-guide/1-installation-of-the-portsip-pbx/installation-of-portsip-pbx-v22.x/upgrade-v16.x-to-the-latest-v22.x)
***
### Minimal Hardware Requirements
The following minimum hardware configuration is required for a basic deployment:
* **CPU:** 2 cores
* **Memory:** 4 GB
* **Disk:** 50 GB
With this configuration, the PBX can support:
* Up to **1,000 online (registered) users**
* Approximately **300–500 simultaneous calls**
***
### Supported Operating Systems
PortSIP PBX v22.x supports the following Linux operating systems:
* **Ubuntu:** 22.04, 24.04
* **Debian:** 12
***
### Preparing the Server for Installation
The following tasks **must be completed before installing PortSIP PBX**.
#### System Preparation
* Ensure the system date and time are correctly synchronized.
* Performing the installation using `sudo` is recommended.
* Assign static IP addresses:
* If the PBX server is on a LAN, assign a static private IP address.
* If the PBX server is on a public network, assign both a static public IP and a static private IP.
* Install all available OS updates and service packs before installing the PBX.
* Do not install PostgreSQL on the PortSIP PBX server.
* Disable all power-saving options for the system and network adapters (set the system to High-Performance mode).
* Do not install TeamViewer, VPN software, or similar tools on the host machine.
* The PortSIP PBX must not be installed on a server acting as a DNS or DHCP server.
***
### Firewall and Network Requirements
The following ports **must be allowed by the firewall** and **must not be used by other applications**.
* **UDP:** 5060, 5066, 25000–34999, 45000–65000
* **TCP:** 5061, 5063, 5065, 5067, 8882, 8883, 8887, 8888, 10443
> ❗**Important**\
> If the PBX is deployed on a **cloud platform** such as AWS, Azure, or other providers, you must also open these ports in the **cloud platform’s firewall or security group**.
***
### Installing PortSIP PBX
> ❗ **Important**\
> Follow every step in this guide in order. Do not skip any steps unless the guide explicitly says you can.
#### Step 1: Download Installation Scripts
Run the following commands to download the installation scripts and initialize the environment:
```bash
sudo mkdir -p /opt/portsip
sudo curl \
https://raw.githubusercontent.com/portsip/portsip-pbx-sh/master/v22.x/init.sh \
-o init.sh
sudo /bin/sh init.sh
```
***
#### Step 2: Set Up the Docker Environment
All commands must be executed in the `/opt/portsip` directory.
Run the following command to install the **Docker and Docker-Compose environment**:
```bash
cd /opt/portsip
sudo /bin/sh install_docker.sh
```
If you are prompted with:
```
cloud.cfg (Y/I/N/O/D/Z) [default=N] ?
```
Enter **Y** and press **Enter** to continue.
***
#### Step 3: Create and Run the PBX Docker Instance
The following command creates and runs the PortSIP PBX Docker instance on a server with the public IP address `66.175.221.120`. If the PBX is deployed on a **LAN without a public IP**, replace `66.175.221.120` with the PBX server’s **private LAN IP address**.
```bash
sudo /bin/sh pbx_ctl.sh run \
-p /var/lib/portsip \
-a 66.175.221.120 \
-i portsip/pbx:22
```
**Command Parameters Explained**
* **`-p`**: Specifies the directory for storing PBX data.
* **`-a`**: Specifies the PBX server IP address (public or private, depending on deployment).
* **`-i`**: Specifies the PBX Docker image version.
* **`-f`** *: (Optional)* Specifies a separate directory for storing call recording files.
The **-f** parameter is optional and allows you to specify a separate path for storing recording files. If this parameter is not specified, the recording files will be stored in the path defined by the **-p** parameter.
For example, if you mount a device or an external NAS device to **`/pbx/recordings`** and want to store the recording files there, you can create and run the PBX Docker instance using the following command:
If you have mounted a local disk or an external NAS device at `/pbx/recordings`, you can store recording files there by running:
```bash
sudo /bin/sh pbx_ctl.sh run \
-p /var/lib/portsip \
-a 66.175.221.120 \
-i portsip/pbx:22 \
-f /pbx/recordings
```
***
### Configure the PortSIP PBX
After the installation completes successfully, access the PBX web portal at:
Click on **"Sign in as the administrator or dealer"** to navigate to the administrator login page, as shown in the screenshot below. Enter **admin** as both the username and password to log in to the web portal.
> ❗**Important**\
> For security reasons, change the default administrator password immediately after logging in.
***
For a new installation, the PBX automatically launches a **Setup Wizard** after the first successful login to the PBX web portal.\
This wizard guides you through the mandatory initial configuration steps.
#### 1. Network Environment
In the **Network Environment** step, configure the PBX IP addresses.
{% hint style="danger" %}
The loopback interface (127.0.0.1) is not suitable for a private IP address. Only the static IP for the LAN where the PBX is located is allowed (do not use a DHCP dynamic IP).
{% endhint %}
**Private IPv4 Address**
* Enter the server’s **private IPv4 address**.
* If the server does **not** have a private IP address, enter the **public IP address** instead.
**Public IPv4 Address**
* If the PBX server has a **static public IP address**, enter it in the **Public IPv4** field.
* If the server does **not** have a static public IP address, leave this field **blank**.
***
**Important Notes on IP Configuration**
* The IP addresses configured here are used by **SIP clients and IP phones** to register with the PBX.
* The configured IP address will act as the **SIP server address** and should be set as the **Outbound Proxy Server** on SIP endpoints.
* **Cloud Deployment:** Both Private IPv4 and Public IPv4 addresses must be entered.
* **LAN Deployment:** Only the Private IPv4 address is required.
***
#### 2. SSL Certificate
To enable TLS transport for SIP and provide secure HTTPS access to the PBX Web Portal and REST API, a trusted SSL certificate must be configured during this step.
**Domain Setup**
You must have a **web domain** for the PBX.\
For example, you can purchase a domain from providers such as **GoDaddy** and point it to your PBX server’s IP address.
***
**SSL Certificate Requirements**
* A **trusted SSL certificate** is strongly recommended to avoid browser security warnings.
* Common certificate providers include:
* DigiCert
* GeoTrust
* GoDaddy
* Other trusted Certificate Authorities (CAs)
> **Note**\
> If you do not have a domain or SSL certificate, you may use the PBX server’s **IP address** as the Web Domain and proceed with the default certificate.\
> However, PortSIP PBX uses a **self-signed certificate by default**, which will cause browsers to block the connection and display security warnings.
***
To purchase and prepare an SSL certificate, follow the guide: [Preparing TLS Certificates for TLS/HTTPS/WebRTC](/portsip-communications-solution/tutorials/certificates-for-tls-https-webrtc).
After completing the steps in that guide, you will have the following certificate files:
* `portsip.pem` — Certificate file
* `portsip.key` — Private key file
***
**Configuring the Certificate**
In this guide, we assume the PBX web domain is `uc.portsip.cc`.
1. In the **Web Domain** field, enter: `uc.portsip.cc`
2. Open the `portsip.pem` file in a text editor (such as Windows Notepad), and copy **the entire contents** into the **Certificate File** field.
3. Open the `portsip.key` file and copy **the entire contents** into the **Private Key File** field.
***
#### 3. Transport Protocol
Click **Add** to create or review the transport protocols. By default, PortSIP PBX uses the following transport ports:
* **UDP:** `5060`
* **TCP:** `5063`
* **TLS:** `5061`
***
**Customizing Transport Ports**
You may change the default transport ports to any values that suit your deployment requirements.
> ❗**Important**
>
> * Ensure the selected port is **not already in use** by another application.
> * Use **TLS** whenever possible to secure SIP signaling.
***
**Firewall and Client Configuration**
After adding or modifying a transport protocol:
* Update your **firewall rules** to allow traffic on the newly assigned port.
* Configure **IP phones and client applications** to use the same **transport protocol and port** when connecting to the PBX.
The transport protocol and port configured here are used by:
* SIP phones
* Desktop and mobile client apps
* Other SIP endpoints registering to the PBX
Click the OK button to complete the setup wizard.
***
### Install the Instant Messaging (IM) Service
Starting with **PortSIP PBX v22.0**, an integrated **Instant Messaging (IM) service** is available, providing modern collaboration features such as:
* One-to-one messaging
* Group chat
The IM service **requires a separate installation step**.
For high-concurrency or large-scale deployments, we recommend installing the IM service on a dedicated server to achieve better performance and scalability.
Please follow the guide below to install and configure the IM service: [Install IM Service](/portsip-communications-solution/portsip-pbx-administration-guide/1-installation-of-the-portsip-pbx/installation-of-portsip-pbx-v22.x/install-im-service)
***
### Install the Data Flow Service
Starting with **PortSIP PBX v22.3.0**, PortSIP introduces the **Data Flow service**, which delivers:
* Advanced data analytics
* Real-time metrics
* Dashboards and wallboards
The Data Flow service is built on **ClickHouse**, a high-performance, column-oriented database optimized for analytics workloads.\
Due to its **resource-intensive nature**, this service **must be installed on a dedicated, high-performance server** and runs independently from the core PBX.
Please follow the guide below to install and configure the Data Flow service: [Install Data Flow Service](/portsip-communications-solution/portsip-pbx-administration-guide/1-installation-of-the-portsip-pbx/installation-of-portsip-pbx-v22.x/install-data-flow-service)
> **Note**\
> Installing the Data Flow service is **optional**.
>
> * Call processing is **not affected** if it is not installed.
> * However, **analytics, wallboards, and certain metrics features** will be unavailable.
***
### Restart the PBX to Apply the SSL Certificate
If in above step [**2. SSL Certificate**](#id-2.-ssl-certificate), you uploaded a **trusted SSL certificate** instead of using the default self-signed certificate, you must restart the PBX to apply the changes.
Run the following commands to restart the PBX:
```bash
cd /opt/portsip
sudo /bin/sh pbx_ctl.sh restart
```
Now that the PortSIP PBX is successfully installed, you can use to access the PortSIP PBX web portal.
***
### Managing PortSIP PBX Docker Instance
After successfully installing the **PortSIP PBX**, you can use the following commands to manage the PBX Docker instance.
All commands must be executed from the following directory:
```bash
cd /opt/portsip
```
#### Show PBX Status
```bash
sudo /bin/sh pbx_ctl.sh status
```
#### Start the PBX
```bash
sudo /bin/sh pbx_ctl.sh start
```
#### Stop the PBX
```bash
sudo /bin/sh pbx_ctl.sh stop
```
#### Restart the PBX
```bash
sudo /bin/sh pbx_ctl.sh restart
```
#### Remove the PBX Container
> This command **does not delete PBX data**.
```bash
sudo /bin/sh pbx_ctl.sh rm
```
***
### Managing PortSIP IM Service Docker Instance
To manage the **PortSIP Instant Messaging (IM) Service** Docker instance, first ensure you are in the `/opt/portsip` directory:
```bash
cd /opt/portsip
```
#### Show IM Service Status
```bash
sudo /bin/sh im_ctl.sh status
```
#### Start the IM Service
```bash
sudo /bin/sh im_ctl.sh start
```
#### Stop the IM Service
```bash
sudo /bin/sh im_ctl.sh stop
```
#### Restart the IM Service
```bash
sudo /bin/sh im_ctl.sh restart
```
#### Remove the IM Service Container
> This command **does not delete IM service data**.
```bash
sudo /bin/sh im_ctl.sh rm
```
***
### Managing PortSIP Data Flow Service Docker Instance
To manage the **PortSIP Data Flow Service** Docker instance, ensure you are in the `/opt/portsip` directory:
```bash
cd /opt/portsip
```
#### Show Data Flow Service Status
```bash
sudo /bin/sh dataflow_ctl.sh status
```
#### Start the Data Flow Service
```bash
sudo /bin/sh dataflow_ctl.sh start
```
#### Stop the Data Flow Service
```bash
sudo /bin/sh dataflow_ctl.sh stop
```
#### Restart the Data Flow Service
```bash
sudo /bin/sh dataflow_ctl.sh restart
```
#### Remove the Data Flow Service Container
> This command **does not delete Data Flow service data**.
```bash
sudo /bin/sh dataflow_ctl.sh rm
```
***
```bash
sudo /bin/sh pbx_ctl.sh restart
```
#### Delete the PBX Docker Instance
This command will not delete the data of the PBX.
sudo /bin/sh pbx_ctl.sh rm
### Managing PortSIP IM Service Docker Instance
First, you will need to at the `/opt/portsip` folder, then you can use the following commands to manage the PortSIP IM Service Docker instance.
```sh
cd /opt/portsip
```
#### Show the IM Service Docker Instance Status
sudo /bin/sh im_ctl.sh status
#### Start the IM Service Docker Instance
```bash
sudo /bin/sh im_ctl.sh start
```
#### Stop the IM Service Docker Instance
```bash
sudo /bin/sh im_ctl.sh stop
```
#### Restart the IM Service Docker Instance
```bash
sudo /bin/sh im_ctl.sh restart
```
#### Delete the IM Service Docker Instance
This command will not delete the data of the PBX.
sudo /bin/sh im_ctl.sh rm
### Managing PortSIP Data Flow Service Docker Instance
First, you will need to be at the `/opt/portsip` folder, then you can use the following commands to manage the PortSIP Data Flow Service Docker instance.
```sh
cd /opt/portsip
```
#### Show the Data Flow Service Docker Instance Status
sudo /bin/sh dataflow_ctl.sh status
#### Start the Data Flow Service Docker Instance
```bash
sudo /bin/sh dataflow_ctl.sh start
```
#### Stop the Data Flow Service Docker Instance
```bash
sudo /bin/sh dataflow_ctl.sh stop
```
#### Restart the Data Flow Service Docker Instance
```bash
sudo /bin/sh dataflow_ctl.sh restart
```
#### Delete the Data Flow Service Docker Instance
This command will not delete the data of the PBX.
sudo /bin/sh dataflow_ctl.sh rm
If you wish to delete the data associated with **Data Flow**, use the following commands:
```bash
sudo rm -rf /var/lib/portsip/dataflow
sudo rm -rf /var/lib/portsip/clickhouse
```
**Note:**\
If you specified a custom path for storing the data instead of using the default path, replace `/var/lib/portsip/dataflow` and `/var/lib/portsip/clickhouse` in the above commands with your specified path that was used during the installation of the Data Flow service.
# Install IM Service
Before proceeding with this guide, ensure that you have already completed **steps 1–4** of the [Install PortSIP PBX](/portsip-communications-solution/portsip-pbx-administration-guide/1-installation-of-the-portsip-pbx/installation-of-portsip-pbx-v22.x/install-portsip-pbx) guide.
You have two options for deploying the **PortSIP IM Server**, depending on your scale and performance requirements:
#### Option 1: Deploy on the Same Server as PortSIP PBX
For environments with a **smaller number of users**, you can install the IM service on the **same server** as the PortSIP PBX.\
This approach simplifies deployment and management but may not deliver optimal performance as user volume and messaging activity increase.
#### Option 2: Deploy on a Separate Server
For better performance and scalability, especially in deployments with a **large number of users** or **heavy usage of chat and file-sharing features**, it is strongly recommended to install the IM server on a dedicated, higher-performance server.
This deployment model helps ensure responsive messaging performance while preventing additional load on the core PBX services.
{% hint style="warning" %}
All commands must be executed in the **`/opt/portsip`** directory.
{% endhint %}
***
### Install IM Service on the Same Server as PortSIP PBX
> ❗ **Important**\
> Follow every step in this guide in order. Do not skip any steps unless the guide explicitly says you can.
Follow the steps below to install the **PortSIP Instant Messaging (IM) Server** on the **same server** as the PortSIP PBX.
#### Step 1: Generate a Token for the IM Server
1. Log in to the **PortSIP PBX Web Portal** as a **System Administrator**.
2. Navigate to **Servers > IM Servers**.
3. Select the **default IM server**.
4. Click **Generate Token**.
5. Copy and securely store the generated token. This token will be required when starting the IM service container.
***
#### Step 2: Create and Run the Instant Messaging Docker Instance
Follow these steps to create and start the IM service Docker container.
1. Navigate to the PortSIP installation directory:
```bash
cd /opt/portsip
```
2. Run the following command to create and start the IM service Docker instance.\
Replace the placeholders with your actual values:
* `-p` : Specifies the directory used to store IM service data
* `-i` : Specifies the PortSIP PBX Docker image version
* `-t` : Specifies the token generated in **Step 1**
```bash
sudo /bin/sh im_ctl.sh run \
-p /var/lib/portsip/ \
-i portsip/pbx:22 \
-t OWMWYWJKZJYTMWM2NI0ZNZJMLWJJZDKTMGVMZDYXNZU1NWI1
```
3. Once the container starts successfully, the **PortSIP PBX Web Portal** will display the IM server IP address under **Servers > IM Servers**, indicating that the IM service is running correctly.
***
#### Installation Complete
The Instant Messaging (IM) Service has now been successfully installed on the same server as the PortSIP PBX.
You can now proceed to Step 6: [Install the Data Flow Service](/portsip-communications-solution/portsip-pbx-administration-guide/1-installation-of-the-portsip-pbx/installation-of-portsip-pbx-v22.x/install-portsip-pbx#step-6-install-the-data-flow-service) in the Install PortSIP PBX guide.
***
### Install IM Service on a Separate Server
> ❗ **Important**\
> Follow every step in this guide in order. Do not skip any steps unless the guide explicitly says you can.
For optimal performance and scalability, it is recommended to install the PortSIP Instant Messaging (IM) service on a separate server, especially in deployments with a large number of users or heavy usage of chat and file-sharing features (including files and images).
The following specifications are suitable for supporting **up to 50,000 concurrent online users** with messaging and file sharing.
***
#### Recommended Hardware Specifications
* **CPU**: 20 cores or higher
* **Memory**: 16 GB RAM
* **Disk**: High I/O performance required (SSD recommended, minimum 256 GB)
* **Network Bandwidth**: 1 Gbps or higher, especially for high message and file transfer volumes
* **Static Private IP**: Required, for example: `192.168.1.25`
* **Static Public IP**: Required for internet-facing deployments, for example: `104.18.36.110`
***
#### Supported Linux Operating Systems
The IM server supports **64-bit Linux operating systems only**:
* Ubuntu 22.04, 24.04
* Debian 12
***
#### Deployment Assumptions
For this guide, the following environment is assumed:
* **PBX Server**
* Static private IP: `192.168.1.20`
* Static public IP: `104.18.36.119`
* **IM Server**
* Static private IP: `192.168.1.25`
* Static public IP: `104.18.36.110`
***
#### Step 1: Prepare the Linux Server for IM Installation
The following tasks **must be completed before installing the IM server**:
* Ensure the system date and time are correctly synchronized.
* Assign a **static private IP address** (example: `192.168.1.25`).
* Assign or route a **static public IP address** (example: `104.18.36.110`).
* Install all available system updates and service packs.
* **Do not install PostgreSQL** on this server.
* Disable all power-saving features (set the system to **High Performance** mode).
* Do **not** install TeamViewer, VPN software, or similar tools.
* The server **must not** act as a DNS or DHCP server.
* If hosted in the cloud (AWS, Azure, GCE), ensure **TCP port 8887** is allowed in firewall rules.\
This port is required for client messaging traffic.
***
#### Step 2: Configure the Firewall on the PBX Server
To allow the IM server (`192.168.1.25`) to communicate with the PBX server (`192.168.1.20`), configure firewall rules on the PBX server.
Run the following commands **on the PBX server**:
```bash
sudo firewall-cmd --permanent --zone=trusted --add-source=192.168.1.25
sudo firewall-cmd --reload
```
To verify the rule:
```bash
sudo firewall-cmd --zone=trusted --list-all
```
Expected output:
```shellscript
[ubuntu@localhost ~]$ sudo firewall-cmd --zone=trusted --list-all
trusted (active)
target: ACCEPT
icmp-block-inversion: no
interfaces:
sources: 192.168.1.25
services:
ports:
protocols:
forward: yes
masquerade: no
forward-ports:
source-ports:
icmp-blocks:
rich rules:
```
***
#### Step 3: Configure the IP Address Whitelist (Mandatory)
This step is **mandatory**. The IM service will not function without it.
To prevent the PBX from applying request rate limits to the IM server:
1. Log in to the **PortSIP PBX Web Portal** as a **System Administrator**.
2. Navigate to **IP Blacklist > Add**.
3. Enter the IM server IP address (`192.168.1.25`).
4. Select a **long expiration date** and save the entry.
***
#### Step 4: Configure Cloud Firewall or Network Security Rules
Skip this step if you are **not** deploying in a cloud environment.
If the PBX and IM server are hosted on **AWS, Azure, or Google Cloud**:
* Create a firewall or security group rule allowing **all TCP traffic** from the IM server IP to the PBX server IP.
> ⚠️ **Note**\
> Restrict this rule to the **internal IP range** of your deployment to maintain security.
***
#### Step 5: Generate a Token for the IM Server
1. Log in to the **PortSIP PBX Web Portal** as a **System Administrator**.
2. Navigate to **Servers > IM Servers**.
3. Select the **default IM server**.
4. Click **Generate Token**.
5. Copy and securely store the generated token.
***
#### Step 6: Create and Run the Instant Messaging Docker Instance
All commands must be executed in the **`/opt/portsip`** directory on the IM server.
**Initialize the Environment**
```bash
sudo mkdir -p /opt/portsip
cd /opt/portsip
sudo curl https://raw.githubusercontent.com/portsip/portsip-pbx-sh/master/v22.x/init.sh -o init.sh
sudo /bin/sh init.sh
```
**Install Docker and Docker Compose**
```bash
sudo /bin/sh install_docker.sh
```
If prompted with:
```
cloud.cfg (Y/I/N/O/D/Z) [default=N] ?
```
Enter **Y** and press **Enter**.
***
**Create the IM Service Docker Instance**
Command parameters:
* `-E` : Extended mode (required for separate server deployment)
* `-p` : IM service data directory
* `-a` : IM server private IP
* `-A` : IM server public IP (required for cloud deployments)
* `-i` : PortSIP PBX Docker image version
* `-x` : PBX server IP (use VIP if PBX is in HA mode)
* `-t` : Token generated in Step 5
* `-f` : Optional directory for storing chat files (must differ from `-p`)
Example:
```bash
sudo /bin/sh im_ctl.sh run -E \
-p /var/lib/portsip/ \
-a 192.168.1.25 \
-A 104.18.36.110 \
-i portsip/pbx:22 \
-x 192.168.1.20 \
-t OWMWYWJKZJYTMWM2NI0ZNZJMLWJJZDKTMGVMZDYXNZU1NWI1
```
Example with a separate directory for chat files:
```bash
sudo /bin/sh im_ctl.sh run -E \
-p /var/lib/portsip/ \
-f /chat/files/ \
-a 192.168.1.25 \
-A 104.18.36.110 \
-i portsip/pbx:22 \
-x 192.168.1.20 \
-t OWMWYWJKZJYTMWM2NI0ZNZJMLWJJZDKTMGVMZDYXNZU1NWI1
```
***
**Restart the IM Service**
Ensure the PBX service is running on the PBX server, then restart the IM service:
```bash
cd /opt/portsip
sudo /bin/sh im_ctl.sh restart
```
If the setup is successful, the **PortSIP PBX Web Portal** will display the IM server IP under **Servers > IM Servers**.
***
#### Installation Complete
The Instant Messaging (IM) Service has been successfully installed on a separate server from the PortSIP PBX.
You can now proceed to Step 6: [Install the Data Flow Service](/portsip-communications-solution/portsip-pbx-administration-guide/1-installation-of-the-portsip-pbx/installation-of-portsip-pbx-v22.x/install-portsip-pbx#step-6-install-the-data-flow-service) in the Install PortSIP PBX guide.
# Install Data Flow Service
### Instructions
Starting with **PortSIP PBX v22.3**, PortSIP introduces a new component: the **PortSIP Data Flow Service,** a high-performance analytics engine built on **ClickHouse**.
The Data Flow service powers the following advanced capabilities:
* [Call Detail Record (CDR) storage and analytics](/portsip-communications-solution/portsip-pbx-administration-guide/20-cdr-and-call-recordings/call-history)
* [Comprehensive call reports](/portsip-communications-solution/portsip-pbx-administration-guide/21-call-reports/call-reports)
* [Real-time data dashboards](/portsip-communications-solution/portsip-pbx-administration-guide/16-call-queue/live-wallboards)
* [Queue wallboards for contact center operations](/portsip-communications-solution/portsip-pbx-administration-guide/16-call-queue/live-wallboards)
ClickHouse is optimized for large-scale analytical workloads, capable of handling billions of CDRs and real-time queue or agent activity data with extremely fast query performance. This makes it ideal for service providers and enterprise-grade deployments.
***
### Deployment Guidelines
Because ClickHouse is **resource-intensive** and optimized for analytics workloads, the **PortSIP Data Flow service must be installed on a separate server**.
Deploying the Data Flow service on the same server as the PBX core may degrade overall system performance due to high CPU, memory, and disk I/O usage during data ingestion and analytics processing.
> ❗ **Important**\
> **Do not install the Data Flow service on the same server as the PortSIP PBX.**\
> Running both services on a single server may negatively impact call processing performance and overall system stability.
***
### Hardware Requirements
The PortSIP Data Flow service can be deployed on either a **physical server** or a **virtual machine**.
For best performance, ensure your hardware meets or exceeds the specifications below.\
For additional reference, see the [**ClickHouse official best practices documentation**](https://clickhouse.com/docs/guides/sizing-and-hardware-recommendations).
#### Minimum Requirements
* **vCPU**: 4 cores
* **Memory**: 8 GB
* **Disk**: 128 GB SSD
***
#### Recommended Requirements
* **vCPU**: 8 cores
* **Memory**: 16 GB
* **Disk**: 256GB or larger (NVMe SSD preferred)
***
#### Hardware Sizing Formula (Large-Scale Deployments)
For large or high-volume environments, use the following guideline:
* **vCPU**: ≥ 8
* **Memory**: vCPU × 4 GB
* **Disk**: Based on expected CDR volume and data retention policy
***
### Supported Operating Systems
The PortSIP Data Flow service supports **64-bit Linux only**.
The following operating systems are officially supported:
* **Ubuntu**: 22.04, 24.04
* **Debian**: 12
***
> ❗ **Important**\
> Follow every step in this guide in order. Do not skip any steps unless the guide explicitly says you can.
### Network Requirements
#### Static IP Address
You must configure a **static private IP address** for the Data Flow server.
* Example private IP: `192.168.1.35`
If a static private IP is not available, the server must have a **static public IP address** and be able to communicate reliably with the PBX server.
#### Configure Cloud Firewall or Network Security Rules
Skip this step if you are **not** deploying in a **cloud environment.**
> ❗**Important**\
> Restrict this rule to the **internal IP range** of your deployment to maintain security.
If the PBX and Data Flow server are hosted on **AWS, Azure, Google Cloud, or other cloud platforms**:
* Ensure the Data Flow server is within the same **VPC/VNet/VLAN**
* Create a **firewall or security group rule** allowing **all TCP traffic** from the **Data Flow server private IP** to the PBX server IP.
> ⚠️ **Note**\
> Restrict this rule to the **internal IP range** of your deployment to maintain security.
***
### Step 1: Generate the Data Flow Token
1. Log in to the **PortSIP PBX Web Portal** as a **System Administrator**.
2. Navigate to **Servers > Data Flow**.
3. Select the **default Data Flow server**.
4. Click **Generate Token**.
5. Copy and securely store the generated token.
***
### Step 2: Configure the Firewall on the PBX Server
To allow the Data Flow server (`192.168.1.35`) to communicate with the PBX server (`192.168.1.20`), configure firewall rules **on the PBX server**.
Execute the following commands on the PBX server:
```bash
sudo firewall-cmd --permanent --zone=trusted --add-source=192.168.1.35
sudo firewall-cmd --reload
```
Verify the firewall rule by execute the command below:
```bash
sudo firewall-cmd --zone=trusted --list-all
```
Expected output:
```shellscript
[ubuntu@localhost ~]$ sudo firewall-cmd --zone=trusted --list-all
trusted (active)
target: ACCEPT
icmp-block-inversion: no
interfaces:
sources: 192.168.1.35
services:
ports:
protocols:
forward: yes
masquerade: no
forward-ports:
source-ports:
icmp-blocks:
rich rules:
```
#### (Optional) Allow the Entire LAN
If required, you may allow the entire LAN subnet:
```bash
sudo firewall-cmd --permanent --zone=trusted \
--add-source=192.168.1.0/24 && \
sudo firewall-cmd --reload
```
***
### Step 3: Create and Run the Data Flow Docker Instance
All commands must be executed in the **`/opt/portsip`** directory on the Data Flow server.
#### Initialize the Environment
```bash
sudo mkdir -p /opt/portsip
cd /opt/portsip
sudo curl https://raw.githubusercontent.com/portsip/portsip-pbx-sh/master/v22.x/init.sh -o init.sh
sudo /bin/sh init.sh
```
***
#### Install Docker and Docker Compose
```bash
sudo /bin/sh install_docker.sh
```
If prompted with:
```shellscript
cloud.cfg (Y/I/N/O/D/Z) [default=N] ?
```
Enter **Y** and press **Enter**.
***
#### Create the Data Flow Service Docker Instance
Command parameters:
* `-p` : Path for storing Data Flow and ClickHouse data (required)
* `-d` : ClickHouse Docker image
* `-a` : **Private IP address** of the Data Flow server
* `-A` : Public IP address (**only use if the server has no private IP**)
* `-i` : PortSIP PBX Docker image version (required)
* `-x` : PBX server **private IP address**
* If PBX is deployed in **HA mode**, use the **Virtual IP (VIP)**
Example command:
```bash
sudo /bin/sh dataflow_ctl.sh run \
-p /var/lib/portsip/ \
-a 192.168.1.35 \
-i portsip/pbx:22 \
-x 192.168.1.20
```
***
#### Notes and Operational Considerations
* If the **PBX IP address changes**, you must delete and recreate the existing Data Flow Docker instance.
* If a **new authentication token** is generated, the Data Flow Docker instance must be deleted and recreated.
* After upgrading the **PBX to a new version**, you must remove and recreate the Data Flow Docker instance to ensure compatibility.
The above operations **do not affect or erase existing analytics data** stored in ClickHouse.
***
### Installation Complete
The **Data Flow Service** has now been successfully installed.
You can now proceed to [Step 7: Reboot to Apply the Certificate](/portsip-communications-solution/portsip-pbx-administration-guide/1-installation-of-the-portsip-pbx/installation-of-portsip-pbx-v22.x/install-portsip-pbx#step-7-reboot-to-apply-the-certificate) in the Install PortSIP PBX guide.
# Upgrade to the Latest Version Within v22.x
### Back Up Before Upgrading
Before performing any upgrade, ensure that you have a complete backup of your PBX and SBC.
Please follow the guide [**Backup and Restore: An Essential Guide**](/portsip-communications-solution/tutorials/backup-and-restore) to back up both the PortSIP PBX and PortSIP SBC.
> **Note**\
> If all upgrade steps are followed correctly, your PBX data will remain intact throughout the upgrade process.
#### Attention
* After upgrading from an earlier version to **v22.2.x or a later version**, the SBC token is automatically regenerated.\
To ensure continued operation, you must update the SBC Web Portal with the new token.
* If you upgrade from a version earlier than **v22.3.0** to **v22.3.x or a later version**, you must install the Data Flow service after the upgrade.\
Please follow the guide[ Install Data Flow Service](/portsip-communications-solution/portsip-pbx-administration-guide/1-installation-of-the-portsip-pbx/installation-of-portsip-pbx-v22.x/install-data-flow-service) to complete the installation.
* If you upgrade from a version **earlier than v22.3.0** to **v22.3.x or a later version**, the extension phone provisioning settings for the BLF keys for Change Status to **Do Not Disturb (DND)** and **Available** will be **cleared**. After the upgrade, you must **reconfigure these BLF key settings**.
***
### High Availability Upgrade
If your PortSIP PBX is deployed in High Availability (HA) mode, follow the guide [**Upgrading High Availability Installation**](/portsip-communications-solution/high-availability-v22.x/high-availability-and-scalability-on-premise/upgrading-high-availability-installation).
> ❗ **Important**\
> Do **not** use this standard upgrade procedure for HA deployments.
***
### Upgrading Within v22.x
> ❗ **Important**\
> Follow every step in this guide in order. Do not skip any steps unless the guide explicitly says you can.
All commands in this section must be executed in the following directory:
```bash
/opt/portsip
```
#### Update the Installation Scripts
> ❗ **Important**\
> This step is **mandatory**, don't skip this step!
Run the following commands to download and apply the latest upgrade scripts on every server!
```bash
sudo curl https://raw.githubusercontent.com/portsip/portsip-pbx-sh/master/v22.x/init.sh -o init.sh
sudo /bin/sh init.sh
```
***
#### Upgrading the PBX
If you are currently running **PortSIP PBX v22.x** and want to upgrade to the latest v22.x release, run:
```bash
cd /opt/portsip && sudo /bin/sh pbx_ctl.sh upgrade -i portsip/pbx:22
```
***
#### Upgrading the SBC
If you are running **PortSIP SBC** and want to upgrade to the latest version, run:
```bash
cd /opt/portsip && sudo /bin/sh sbc_ctl.sh upgrade -i portsip/sbc:11
```
> ❗ **Important**\
> After upgrading to **v22.2.x or later** from an earlier version, the **SBC token is regenerated automatically**.\
> You must update the **SBC Web Portal** with the new token to restore SBC functionality.
***
#### Upgrading the IM Service
**IM Server Installed on the Same Server as PBX:**
Run the following command:
```bash
cd /opt/portsip && sudo /bin/sh im_ctl.sh upgrade -i portsip/pbx:22
```
***
**IM Service Installed on a Separate Server:**
On the IM server, first update the scripts:
```bash
sudo curl https://raw.githubusercontent.com/portsip/portsip-pbx-sh/master/v22.x/init.sh -o init.sh
sudo /bin/sh init.sh
```
Then run the upgrade command:
```bash
cd /opt/portsip && sudo /bin/sh im_ctl.sh upgrade -i portsip/pbx:22
```
***
#### Install the Data Flow Service
If you upgrade from a version **earlier than v22.3.0** to **v22.3.x**, you must install the **PortSIP Data Flow service** after completing the PBX upgrade.
Please follow the guide [**Install Data Flow Service**](/portsip-communications-solution/portsip-pbx-administration-guide/1-installation-of-the-portsip-pbx/installation-of-portsip-pbx-v22.x/install-data-flow-service) to complete the installation.
***
#### Upgrade the Data Flow Service
If you are upgrading from an existing **v22.3.x** release to a **newer v22.x** version, follow the steps below to upgrade the Data Flow service.
On the **Data Flow server**, run the following commands:
```bash
sudo curl https://raw.githubusercontent.com/portsip/portsip-pbx-sh/master/v22.x/init.sh -o init.sh
sudo /bin/sh init.sh
```
Then run the upgrade command:
```shellscript
cd /opt/portsip && sudo /bin/sh dataflow_ctl.sh \
upgrade -i portsip/pbx:22 -d portsip/clickhouse:26.3
```
# Upgrade v16.x to the Latest v22.x
### Important Notice
After upgrading from **PortSIP PBX v16.x to v22.x**, the **legacy PortSIP Softphone is no longer compatible** with v22.x.
To continue using the PBX without interruption, all users must install the new [PortSIP ONE app](https://www.portsip.com/portsip-one/), which is fully compatible with v22.x and designed to support the latest PBX features and architecture.
***
### Overview
This guide provides step-by-step instructions for upgrading an existing **PortSIP PBX v16.x deployment** to the latest **v22.x release**.
\
It covers required preparations, upgrade procedures, and post-upgrade actions to ensure a smooth and reliable transition.
***
### Processing Feature Access Code (FAC) Conflicts Before Upgrading
Starting with v22.x, PortSIP PBX introduces new default Feature Access Codes (FACs). Before upgrading, it is **mandatory** to verify that no tenant-defined custom FACs conflict with these new defaults.
#### Newly Introduced FACs
**v22.0**
* Call Flip: `*11`
* Reset Calls: `*12`
* Clear Push Information: `*13`
* Call Transfer: `*54`
**v22.2**
* Night Mode: `*16`
* PIN-Based Calling: `*20`
* Set Default Outbound Caller ID: `*64`
#### Important Notes
* Prior to upgrading from **v16.x to the latest v22.x**, confirm with **all tenants** whether custom FACs have been configured.
* Custom FACs must **not overlap** with any of the new default codes listed above.
* If a conflict exists, the **upgrade process will fail**.
* To avoid upgrade issues, review and modify **any conflicting custom FACs** before proceeding.
> ❗ **Important**\
> Follow every step in this guide in order. Do not skip any steps unless the guide explicitly says you can.
***
### Backup
Before starting the upgrade, ensure that **both the PBX and SBC are fully backed up**.
Please follow the guide [**Backup and Restore: An Essential Guide**](/portsip-communications-solution/tutorials/backup-and-restore) to complete the backup process.
> If all steps are followed correctly, your PBX data will remain intact throughout the upgrade.
***
### Prerequisites for Upgrading from v16.x
* If your current PBX version is **earlier than v16.4.8**, you must first upgrade to **v16.4.8** by following the guide [**Upgrading to the Latest v16.x Release**](/portsip-communications-solution/portsip-pbx-administration-guide/1-installation-of-the-portsip-pbx/installation-of-portsip-pbx-v16/upgrade-portsip-pbx-to-v16.x)**.**
* Once upgraded to the latest v16.x version, proceed with the steps below to prepare for the v22.x upgrade.
* All commands must be executed in the `/opt/portsip` directory.
***
> ❗ **Important**\
> Follow every step in this guide in order. Do not skip any steps unless the guide explicitly says you can.
### Update the Upgrade Scripts
Download and apply the latest upgrade scripts by running the following commands:
> ❗ **Important**\
> This step is **mandatory**, don't skip this step!
```bash
sudo rm -rf /opt/portsip/*.sh
sudo curl \
https://raw.githubusercontent.com/portsip/portsip-pbx-sh/master/v22.x/init.sh \
-o init.sh
sudo /bin/sh init.sh
```
***
### Upgrading the PBX
> **Important**\
> If your deployment uses **PBX High Availability (HA)**, do **not** follow this section.\
> Instead, refer to [**Upgrading PortSIP PBX HA v16.x to v22.x.**](https://support.portsip.com/portsip-communications-solution/portsip-pbx-administration-guide/1-installation-of-the-portsip-pbx/installation-of-portsip-pbx-v22.x/pages/tQSAD03Ta07eoB98jj5D#upgrading-portsip-pbx-ha-v16.x-to-v22.x)
This guide applies **only to standalone PBX deployments**.
To upgrade the PBX to v22.x, run:
```bash
cd /opt/portsip && sudo /bin/sh pbx_ctl.sh upgrade -i portsip/pbx:22
```
***
### Upgrading the SBC
If you are currently running **PortSIP SBC v11.x** and want to upgrade to the latest release, execute the following command:
```bash
cd /opt/portsip && sudo /bin/sh sbc_ctl.sh upgrade -i portsip/sbc:11
```
***
### Installing the Instant Messaging (IM) Service
Starting with **PortSIP PBX v22.0**, a dedicated Instant Messaging (IM) service is introduced, providing modern collaboration capabilities such as one-to-one and group chat.
The IM service requires a **separate installation step** and is **not installed automatically** as part of the PBX upgrade.
After completing the PBX upgrade, please follow the [**Install IM Service**](/portsip-communications-solution/portsip-pbx-administration-guide/1-installation-of-the-portsip-pbx/installation-of-portsip-pbx-v22.x/install-im-service) guide to complete the IM service installation and configuration.
***
### Installing the Data Flow Service
Starting with **PortSIP PBX v22.3**, PortSIP introduces a new component: the **PortSIP Data Flow Service,** a high-performance analytics engine built on **ClickHouse**.
If you upgraded from **v16.x** to **v22.3.x**, you need to install the **PortSIP Data Flow service** after completing the PBX upgrade.
Please follow the guide [**Install Data Flow Service**](/portsip-communications-solution/portsip-pbx-administration-guide/1-installation-of-the-portsip-pbx/installation-of-portsip-pbx-v22.x/install-data-flow-service) to complete the installation.
***
### Post-Upgrade Tasks (Required When Upgrading from v16.x to v22.x)
After completing the upgrade, perform the following actions to ensure full system functionality.
> ❗ **Warning**\
> By default, when you provision IP phones and other devices using **RPS**, PortSIP PBX uses **PortSIP’s RPS account** with each supported phone vendor’s RPS service. This means the device provisioning information (for example, the provisioning/configuration URL) is stored under the vendor RPS account created for PortSIP.
If you do not want your provisioning information stored under PortSIP’s vendor RPS account, configure and use **your own private RPS account** instead. For instructions, see [Configuring Private RPS Account](/portsip-communications-solution/portsip-pbx-administration-guide/4-phone-device-management/configuring-private-rps-account).
> ❗ **Warning**
>
> **Upgrade note (v16.x → v22.x):** If you configured a private RPS account in **v16.x**, the private RPS account settings are **not retained after upgrading to v22.x**. After the upgrade, you must follow [Configuring Private RPS Account](/portsip-communications-solution/portsip-pbx-administration-guide/4-phone-device-management/configuring-private-rps-account) to set it up again. Otherwise, any new device auto-provisioning entries will be stored under **PortSIP’s RPS account** by default.
***
#### Re-generate User QR Codes
1. Navigate to **Call Manager > Users**.
2. Click **Send All Welcome Email**.
This action re-generates QR codes for all users, allowing them to sign in successfully using the **PortSIP ONE app**.
***
#### Reconfigure Microsoft 365 Integration
If Microsoft 365 integration was configured in v16.x, it must be **reconfigured** after upgrading.
Follow the **Microsoft 365 Integration Guide** and complete the following steps:
* Remove all previously configured callback URIs in Microsoft 365.
* Add the **two new callback URIs** as specified in the guide.
***
#### Regenerate XML Phone Books for IP Phones
For each tenant:
1. Log in to the PBX Web Portal as a **Tenant Administrator**.
2. Navigate to **Advanced > Contacts**.
3. Select any contact, make a minor edit, and click **OK**.
This action triggers the PBX to regenerate the **XML phone book**, allowing IP phones to download the updated directory successfully.
***
#### Review SMTP Email Configuration
Starting with v22.0, **SMTP configuration behavior has changed**.
* Existing SMTP settings from earlier versions are now treated as a **Generic Email Provider**.
* Review your email configuration carefully and update it if required to ensure proper email delivery.
***
#### Review Phone BLF Key Configuration
The extension phone provisioning settings for the BLF keys for Change Status to **Do Not Disturb (DND)** and **Available** will be **cleared**. After the upgrade, you must **reconfigure these BLF key settings**.
# Installation of PortSIP PBX v16.x
## Downloading PortSIP PBX
You can always find and download the latest free edition of [PortSIP PBX](https://www.portsip.com/portsip-pbx/) on the [PortSIP website](https://www.portsip.com/download-portsip-pbx/). The software is compatible with both 64-bit Windows and Linux operating systems. Please note that a 32-bit version is not available.
The free edition supports up to 3 simultaneous calls and allows for 10 extension registrations. If you need additional capacity for more simultaneous calls or extensions, please visit the [PortSIP PBX Pricing](https://www.portsip.com/portsip-pbx-pricing/) page for further details.
Once the download is complete, you will receive the installer file.
## Installing PortSIP PBX on Linux
### **Supported Linux OS**
* Ubuntu 20.04, 22.04, 24.04
* Debian 11.x, 12.x
It only supports 64-bit OS.
### Minimal Hardware Requirements
The PortSIP PBX requires at least 2 cores, 4G memory, and 30GB HDD.
### **Preparing the Linux Host Machine for Installation**
Tasks that MUST be completed before installing PortSIP PBX
* **Ensure the server date-time is synced correctly**.
* If the Linux on which PBX will be installed is located on a LAN, assign a**`static private IP address`**to the PBX server; if it's on a public network, assign a**`static public IP address`** and a **`static private IP`** to the PBX server.
* Install all available updates and service packs before installing PortSIP PBX.
* Do not install PostgreSQL on your PortSIP PBX Server.
* Ensure that all power-saving options for your system and network adapters are disabled (by setting the system to High-Performance mode).
* Do not install TeamViewer, VPN, or other similar software on the host machine.
* The PortSIP PBX must not be installed on a host that is a DNS or DHCP server.
* The below ports must be permitted by your firewall.
* UDP: 5060, 5066, 25000-34999, 45000–65000
* TCP: 5061, 5063, 5065, 5067, 8882, 8883, 8885, 8887, 8888, 8889, 10443. please also ensure the above ports have not been used by other applications.
* Must execute all Linux commands as the root user. please `su root` first.
{% hint style="danger" %}
If the PBX runs on a cloud platform such as AWS and the cloud platform has its own firewall, you **must** also open the ports on the cloud platform's firewall.
{% endhint %}
### **Step 1 Download the Installation Scripts**
{% hint style="warning" %}
All commands must be executed in the **`/opt/portsip`** directory.
{% endhint %}
Execute the below commands to download the installation scripts.
{% hint style="danger" %}
You need to use the command `su -` rather than the `su root`
{% endhint %}
```shell
su -
mkdir -p /opt/portsip
cd /opt/portsip
```
```bash
curl https://raw.githubusercontent.com/portsip/portsip-pbx-sh/master/v16.x/new/install_docker.sh \
-o install_docker.sh
```
```bash
curl https://raw.githubusercontent.com/portsip/portsip-pbx-sh/master/v16.x/new/pbx_ctl.sh \
-o pbx_ctl.sh
```
### **Step 2 Setup the Docker Environment**
Execute the below command to install the `Docker-Compose` environment. If you get the prompt likes`*** cloud.cfg (Y/I/N/O/D/Z) [default=N] ?`, enter the **Y** and then press the **Enter** button.
```shell
/bin/sh install_docker.sh
```
### Step 3 Create and Run the PortSIP PBX Docker Container Instance
The below command is used to create and run the PBX on a server whose **public IP address** is`66.175.221.120`. If running the PBX in a LAN without the public IP address, just replace the IP `66.175.221.120` with the PBX server's **LAN private IP address**.
{% hint style="danger" %}
If your PBX server has a public IP, you must use it in the below command for the `-a` parameter. If not, the PBX won’t work with the internet trunk.
{% endhint %}
```shell
/bin/sh pbx_ctl.sh \
run -p /var/lib/portsip \
-a 66.175.221.120 \
-i portsip/pbx:16
```
Now you can use`https://66.175.221.120:8887` to access the PBX Web portal; the default system administrator name and password are`admin`.
After successfully creating the PBX docker instance, you can use the below commands to manage it.
## Managing PortSIP PBX Docker Instance
First, you will need to at the `/opt/portsip` folder, then you can use the following commands to manage the PortSIP PBX docker instance.
```sh
cd /opt/portsip
```
### Show the PBX Docker Instance Status
```
/bin/sh pbx_ctl.sh status
```
### Start the PBX Docker Instance
```bash
/bin/sh pbx_ctl.sh start
```
### Stop the PBX Docker Instance
```bash
/bin/sh pbx_ctl.sh stop
```
### Restart the PBX Docker Instance
```bash
/bin/sh pbx_ctl.sh restart
```
### Delete the PBX Docker Instance
```bash
/bin/sh pbx_ctl.sh rm
```
## Installing PortSIP PBX on Windows
### **Supported Windows OS**
* Windows 10, 11
* Windows Server 2016, 2019, 2022
It only supports 64-bit OS.
### **Preparing the Windows Host Machine for Installation**
Tasks that MUST be completed before installing PortSIP PBX
* **Ensure server date-time is synced correctly.**
* If the Windows PC / server on which PBX will be installed is located in LAN, assign a **`static LAN private IP address`**for the server; if it's in a public network, assign a **`static public IP address`** and a **`static private IP address`** for the server.
* Install all available Windows updates & service packs before installing PortSIP PBX. The reboot after installing Windows updates may reveal additional updates. Pay particular attention to installing all updates for Microsoft .Net before running the PortSIP PBX installation.
* Anti-virus Software should not scan the following directories to avoid complications and write access delays: `C:\Program Files\PortSIP`; `C:\Programdata\PortSIP`
* Do not install VPN and TeamViewer software on your PortSIP PBX Server
* Do not install `PostgreSQL` on your PortSIP PBX Server
* Ensure the **`Windows Firewall`** service has been started.
* Ensure that all power-saving options for your System and Network adapters are disabled (by setting the system to High-Performance mode).
* Disable Bluetooth adapters if it is a Windows client PC.
* PortSIP PBX must not be installed on a host which is a DNS or DHCP server, or that has MS SharePoint or Exchange services installed.
* The below ports must be permitted by your firewall.
* UDP: 5060, 5066, 25000-35000, 45000–65000
* TCP: 5061, 5063, 5065, 5067, 8882, 8883, 8885, 8887, 8888, 8889, 10443. Please also ensure the above ports have not been used by other applications.
* Ensure your Windows firewall is enabled.
{% hint style="danger" %}
If the PBX runs on a cloud platform such as AWS and the cloud platform has its own firewall, you **must** also open the ports on the cloud platform's firewall.
{% endhint %}
### **Step 1 Installing a fresh PortSIP PBX for Windows**
The PBX installer can be downloaded at[ PortSIP Website](https://www.portsip.com/download-portsip-pbx/).
To install PortSIP PBX, you only need to double-click the installer, which will guide you through the installation process.
PortSIP PBX services will automatically start after successful installation (and thereafter every time your computer starts up).
{% hint style="danger" %}
The following two folders must not be the same when selecting the PBX folders during installation!
{% endhint %}
## **Configuring Firewall Rules**
After having successfully installed PortSIP PBX, the PortSIP PBX ports have been opened automatically for Windows and Linux.
The below ports must be permitted on the firewall in order to make the PortSIP PBX work properly.
* UDP: 5060, 5066, 25000-35000, 45000–65000
* TCP: 5061, 5063, 5065, 5067, 8882, 8883, 8885, 8887, 8888, 8889, 10443. Please also ensure the above ports have not been used by other applications.
You also need to open the port that you are using for adding new transport:
* Assume you have added a TLS transport on port 5070, you must open TCP port 5070 in your Firewall.
* Assume you have added a TCP transport on port 5071, you must open TCP port 5071 in Firewall.
* Assume you have added a UDP transport on port 5078, you must open UDP port 5078 in your Firewall.
The below example is for creating the firewall rule that allows port 5070 on TCP.
```bash
sudo firewall-cmd --permanent --service=portsip-pbx \
--add-port=5070/tcp \
--set-description="PortSIP PBX"
```
```bash
sudo firewall-cmd --permanent --add-service=portsip-pbx
sudo firewall-cmd --reload
```
The below example is for creating the firewall rule that allows port 5078 on UDP.
```bash
sudo firewall-cmd --permanent --service=portsip-pbx \
--add-port=5078/udp \
--set-description="PortSIP PBX"
```
```bash
sudo firewall-cmd --permanent --add-service=portsip-pbx
sudo firewall-cmd --reload
```
The commands below are used to check the ports that are currently opened for PortSIP PBX.
```
firewall-cmd --info-service=portsip-pbx
```
{% hint style="danger" %}
If the PBX runs on a cloud platform such as AWS and the cloud platform has its firewall or security rules, you **must** also open the ports on the cloud platform's firewall.
{% endhint %}
## Uninstall PortSIP PBX
Please follow the steps below to uninstall the PortSIP PBX for Linux.
### Uninstall the PBX
Use the following commands to stop and delete the PBX Docker instances Note, that the PBX data will not lost with the uninstall of the PortSIP PBX.
```bash
cd /opt/portsip
/bin/sh pbx_ctl.sh stop
/bin/sh pbx_ctl.sh rm
```
### Delete the PBX Data
If you want to delete the PBX data, please perform the below commands.
{% hint style="danger" %}
The following commands will DELETE all your PBX data from the server that can't recover, please be careful.
{% endhint %}
```sh
cd /var/lib/portsip
rm -rf pbx
rm -rf postgresql
```
For the PBX Windows installation, just uninstall it from the Windows Control Panel.
# Upgrade to the Latest v16.x Release
This guide provides step-by-step instructions for upgrading your current PortSIP PBX **v16.x** installation to the latest release within the **v16.x** series. Before beginning, please ensure that your existing installation is version **16.x**.
## Important
> This guide is specifically for upgrades within the **v16.x** series. If you need to upgrade from v16.x to v22.x, please refer to the [Upgrading to the Latest v22.x Release](broken://pages/HYNilqLl52W9urfWCLid).
## **Upgrading PBX for Linux**
We recommend backing up your PBX data. The data file path is usually `/var/lib/portsip`. You can also back up the entire VM server or take a snapshot of the VM server.
Please follow the article [Backup and Restore: An Essential Guide](/portsip-communications-solution/tutorials/backup-and-restore).
{% hint style="warning" %}
All commands must be executed in the **`/opt/portsip`** directory.
{% endhint %}
## High Availability Upgrading
If your PortSIP PBX was deployed with High Availability mode, please follow the guide [Upgrading High Availability Installation](/v16.x-maintenance-mode/high-availability-v16.x/high-availability-and-scalability-on-aws/upgrading-high-availability-installations) to upgrade it.
### Step 1 Stop PBX Docker Instance
Perform the following commands as root to stop the current PBX Docker instance:
{% hint style="danger" %}
You must use the su - rather than su root
{% endhint %}
```sh
su -
cd /opt/portsip && /bin/sh pbx_ctl.sh stop
```
### Step 2 Delete the PBX Docker Instance
Perform the following command to delete the PBX Docker instance:
```sh
/bin/sh pbx_ctl.sh rm
```
### Step 3 List the PBX Docker Images
Perform the following command to list the PBX Docker images:
```sh
docker image list
```
You will get a similar result shown in the below screenshot.
#### Delete the PBX Docker Images
You can use the following command to delete Docker images using the first 4 digits of the IMAGE ID for `PBX` and `Postgresql`, in this case, is `03b8` and `d569`.
```sh
docker image rm 03b8 d569
```
### Step 4 Delete the PBX Scripts
```sh
rm install_pbx_docker.sh
rm install_docker.sh
rm pbx_ctl.sh
```
### Step 5 **Download the Latest Installation Scripts**
```sh
curl https://raw.githubusercontent.com/portsip/portsip-pbx-sh/master/v16.x/new/install_docker.sh \
-o install_docker.sh
```
```sh
curl https://raw.githubusercontent.com/portsip/portsip-pbx-sh/master/v16.x/new/pbx_ctl.sh \
-o pbx_ctl.sh
```
### Step 6 **Setup the Docker Environment**
Execute the below command to install the `Docker-Compose` environment. If you get the prompt likes`*** cloud.cfg (Y/I/N/O/D/Z) [default=N] ?`, enter the **Y** and then press the **Enter** button.
```sh
/bin/sh install_docker.sh
```
### Step 7 Create and Run the PortSIP PBX Docker Container Instance
The below command is used to create and run the PBX on a server whose IP is`66.175.221.120`. If running the PBX in a LAN without the public IP, replace the IP `66.175.221.120` with the PBX server's LAN private IP.
{% hint style="danger" %}
Please replace the IP address 66.175.221.120 in the command below with your own PBX server’s IP address.
{% endhint %}
{% hint style="info" %}
Please be patient during this step, especially if your PBX contains a large amount of data. Do not cancel the process.
{% endhint %}
```sh
/bin/sh pbx_ctl.sh \
run -p /var/lib/portsip \
-a 66.175.221.120 \
-i portsip/pbx:16
```
Your PBX has now been successfully upgraded to the latest version.
## Upgrading Cluster Servers
{% hint style="danger" %}
It’s crucial to keep your cluster servers updated in line with the latest PortSIP PBX releases. This ensures that all features function as expected and that your system maintains optimal performance and security.
{% endhint %}
If you have set up your PBX as a cluster following [this guide](/v16.x-maintenance-mode/pbx-cluster), it’s mandatory to upgrade those servers whenever the PBX is updated. Please refer to the article [Managing Cluster](/v16.x-maintenance-mode/pbx-cluster/managing-cluster#upgrading-servers) for the upgrade process.
## Upgrading PBX for Windows
1. We suggest backing up your PBX data. The data file path is usually `c:\programdata\portsip`. You can follow the article [Backup and Restore: An Essential Guide](/portsip-communications-solution/tutorials/backup-and-restore).
2. Download the latest installer from the [PortSIP website](https://www.portsip.com/download-portsip-pbx/).
3. Double-click the installer to install it and the upgrade will be performed automatically.
# 2 PortSIP PBX Management
### Configure PortSIP PBX
> **Note**\
> If you have already completed the [Configuring PBX in Install PortSIP PBX](/portsip-communications-solution/portsip-pbx-administration-guide/1-installation-of-the-portsip-pbx/installation-of-portsip-pbx-v22.x/install-portsip-pbx#configure-the-portsip-pbx), you may skip this section.
***
### Accessing the PBX Web Portal
Once the **PortSIP PBX** installation is complete, open a web browser and navigate to: [https://66.175.221.120:8887](https://66.175.221.120:8887/)
If your browser displays an SSL certificate warning, you may safely ignore it and continue. This warning occurs when a self-signed certificate is used.
You will be redirected to the login page.
#### Administrator Login
1. Click **Sign in as the administrator or dealer** to access the administrator login page.
2. Enter the following credentials to sign in to the PBX Web Portal
* **Username:** `admin`
* **Password:** `admin`
> ❗**Important**\
> For security reasons, you must change the default administrator password immediately after logging in.
***
After logging in for the first time, PortSIP PBX automatically launches the **Setup Wizard** to guide you through the mandatory initial configuration.
### Step 1: Network Environment
#### Private IPv4 Address
* Enter the **private IPv4 address** of the PBX server.
* If the server does not have a private IP address, use the **public IP address** instead.
#### Public IPv4 Address
* If the PBX server has a **static public IP address**, enter it here.
* If the server does not have a static public IP, leave this field blank.
> ❗The loopback address (`127.0.0.1`) is **not allowed**. Only use a **static IP address** assigned to the LAN where the PBX is located. **Do not use DHCP dynamic IP addresses.**
These IP addresses must be reachable by SIP clients and IP phones. The configured IP will be used as the **SIP server address** and should be configured as the **Outbound Proxy Server** on clients.
**Deployment Scenarios**
* **Cloud Deployment**\
Both static Private IPv4 and Public IPv4 addresses must be configured. If you have only a public IP address, treat it as the private IP address as well.
* **LAN Deployment**\
Only the Private IPv4 address is required.
***
### Step 2: SSL Certificate
To enable **TLS transport for SIP** and secure **HTTPS access** to the Web Portal and REST API, an SSL certificate must be configured.
#### Domain Setup
You need a domain name that points to your PBX server IP address.\
For example, you may purchase a domain from providers such as [GoDaddy ](https://www.godaddy.com)and configure its DNS records accordingly.
#### SSL Certificate Requirements
A **trusted SSL certificate** is strongly recommended to avoid browser security warnings.\
Common certificate providers include [DigiCert](https://www.digicert.com), [GeoTrust](https://www.geotrust.com), [GoDaddy](https://www.godaddy.com), and others.
If you **do not have a trust domain or SSL certificate**, you may:
* Use the PBX IP address as the Web Domain
* Proceed with the **default self-signed certificate**
> ❗**Note**\
> The default self-signed certificate will cause browsers to display security warnings and may block access unless manually allowed.
#### Preparing the Certificate
Follow the guide [Preparing TLS Certificates ](/portsip-communications-solution/tutorials/certificates-for-tls-https-webrtc/preparing-tls-certificates)to obtain the certificate files:
* `portsip.key`
* `portsip.pem`
#### Configuring the Certificate
In this guide, we assume the use of the domain **uc.portsip.cc** for the PBX web domain.
1. In the **Web Domain** field, enter **uc.portsip.cc**.
2. Open the **portsip.pem** file in a text editor (such as Windows Notepad), and copy the entire contents into the **Certificate File** field.
3. Similarly, open the **portsip.key** file, and copy its entire contents into the **Private Key File** field.
***
### Step 3: Transport Protocol
Configure the SIP transport protocols by clicking **Add**.
Default transport ports are:
* **UDP:** 5060
* **TCP:** 5063
* **TLS:** 5061
You may change these ports if required, provided the selected ports are not already in use by other services.
> ❗**Important**\
> After adding or modifying transport protocols, update your firewall rules to allow traffic on the configured ports.\
> IP phones and client applications will use these ports to connect to the PBX.
***
### Step 4: Reboot to Apply SSL Certificate
If you uploaded a trusted SSL certificate (instead of using the default self-signed certificate), you must restart the PBX to apply the changes.
Run the following commands:
```bash
cd /opt/portsip
sudo /bin/sh pbx_ctl.sh restart
```
After the restart, you can now access the PBX Web Portal at:
***
### Managing the PortSIP PBX Docker Instance
After installation, you can manage the **PortSIP PBX Docker instance** using the following commands.
```bash
cd /opt/portsip
```
#### Show PBX Status
```bash
sudo /bin/sh pbx_ctl.sh status
```
#### Start PBX
```bash
sudo /bin/sh pbx_ctl.sh start
```
#### Stop PBX
```bash
sudo /bin/sh pbx_ctl.sh stop
```
#### Restart PBX
```bash
sudo /bin/sh pbx_ctl.sh restart
```
#### Remove PBX Container
> This command does **not** delete PBX data.
```bash
sudo /bin/sh pbx_ctl.sh rm
```
***
### Managing the PortSIP IM Service Docker Instance
```bash
cd /opt/portsip
```
#### Show IM Service Status
```bash
sudo /bin/sh im_ctl.sh status
```
#### Start IM Service
```bash
sudo /bin/sh im_ctl.sh start
```
#### Stop IM Service
```bash
sudo /bin/sh im_ctl.sh stop
```
#### Restart IM Service
```bash
sudo /bin/sh im_ctl.sh restart
```
#### Remove IM Service Container
> This command does **not** delete PBX data.
```bash
sudo /bin/sh im_ctl.sh rm
```
***
### Managing the Data Flow Service Docker Instance
```bash
cd /opt/portsip
```
#### Show Data Flow Service Status
```bash
sudo /bin/sh dataflow_ctl.sh status
```
#### Start Data Flow Service
```bash
sudo /bin/sh dataflow_ctl.sh start
```
#### Stop Data Flow Service
```bash
sudo /bin/sh dataflow_ctl.sh stop
```
#### Restart Data Flow Service
```bash
sudo /bin/sh dataflow_ctl.sh restart
```
#### Remove Data Flow Service Container
> This command does **not** delete PBX data.
```bash
sudo /bin/sh dataflow_ctl.sh rm
```
# Administrator Management
### Built-in System Administrator
By default, the PBX creates a built-in **System Administrator** account with the username **admin**.
You can view this account by navigating to **Administrators** in the PBX web portal menu. Select the **admin** account and click **Edit** to configure its **Email Address** and **Display Name**.
To change the administrator’s login name or personal profile information, click the **profile picture** in the upper-right corner of the web portal and update the profile settings.
***
### Administrator Roles
Starting with **PortSIP PBX v22.3**, the system supports **multiple System Administrators** and introduces **role-based access control (RBAC)** for administrators.
The PBX includes three predefined administrator roles, each designed for different operational responsibilities.
#### System Admin
The **System Admin** has the **highest level of privilege** in the PBX.
* Full access to all system functions and settings
* Can manage all administrators, roles, users, tenants, trunks, and system configurations
* Can create additional System Administrators
> ⚠️ **Best Practice:** Creating multiple System Administrators should be done with caution and limited to trusted personnel only.
***
#### Operation Admin
The **Operation Admin** has slightly fewer privileges than the System Admin and is intended for day-to-day operational management.
* Has full access to most PBX management functions
* **Does not** have access to:
* System.Settings
* System.Users
* System.Roles
* System.Integrations
All other permissions are equivalent to those of the System Admin.
***
#### Site Admin
The **Site Admin** has fewer privileges than the Operation Admin and is typically used for site-level or delegated administration.
The Site Admin has access to the following permissions:
* System.Information (View Only)
* Analytics (Full Access)
* System.Tenants
* Trunks (Full Access)
* System.Dealers
* System.Features
This role is suitable for administrators who manage specific tenants or operational areas without full system control.
***
#### Viewing Role Permissions
You can view the detailed permissions assigned to each administrator role by navigating to the menu:
**Advanced > Roles**
***
### Creating New Roles
In addition to the predefined roles, you can create **custom administrator roles** to meet your specific operational requirements.
To create a new role:
1. Navigate to **Advanced > Roles**
2. Click **Add**
3. Enter a **Role Name** and **Description**
4. Assign at least one permission to the role
5. Click **OK** to create the role
***
### Creating a New Administrator
You can create additional administrators and assign different roles to distribute management responsibilities more effectively.
To create a new administrator:
1. Navigate to **Administrators**
2. Click **Add**
3. Enter the **Display Name**, **Username**, **Password**, **Email Address**, and other required information
4. Select an appropriate **Role** for the administrator
5. Click **OK** to complete the creation
After the administrator is successfully created, they can sign in to the PBX web portal and manage the system according to the permissions granted by their assigned role.
***
### Permission List
The following section provides a **detailed explanation of each administrator permission**, including access levels and functional scope.
#### System.Information
* **View Only**\
Allows viewing system status, version information, license details, and basic platform health data. No configuration changes are permitted.
***
#### Analytics
* **View Only**\
Allows access to dashboards and reports for monitoring system usage, call statistics, and performance metrics.
* **Full Access**\
Allows configuring analytics settings, creating or modifying reports, dashboards, filters, and exporting data.
***
#### System.Dealers
* **View Only**\
Allows viewing dealers and associated information without making changes.
* **Full Access**\
Allows creating, editing, disabling, or deleting dealers and managing dealer-related settings.
***
#### System.Tenants
* **View Only**\
Allows viewing tenant information and configuration details without modification.
* **Full Access**\
Allows creating, editing, disabling, and deleting tenants, as well as managing tenant-level settings.
***
#### Integrations
* **View Only**\
Allows viewing configured integrations and their status.
* **Full Access**\
Allows configuring, modifying, enabling, or disabling integrations with external systems and services.
***
#### System.Devices
* **View Only**\
Allows viewing of the phone device templates.
* **Full Access**\
Allows adding and editing phone device templates.
***
#### Trunks
* **View Only**\
Allows viewing trunk configurations, status, and usage information.
* **Full Access**\
Allows creating, editing, enabling, disabling, and deleting trunks settings.
***
#### Features
* **View Only**\
Allows viewing system features such as Audit Trail, Events.
* **Full Access**\
Allows managing system features such as Audit Trail, Events.
***
#### System Settings
* **View Only**\
Allows viewing global system configuration and parameters.
* **Full Access**\
Allows modifying global system settings that affect platform behavior and services.
***
#### Roles
* **View Only**\
Allows viewing existing roles and their assigned permissions.
* **Full Access**\
Allows creating, editing, and deleting roles and configuring permission assignments.
***
#### Users
* **View Only**\
Allows viewing of administrators and related information.
* **Full Access**\
Allows creating, editing, disabling, and deleting administrators, and managing their settings.
# 3 Tenant Management
**PortSIP PBX** is built on a **true multi-tenant architecture**, purpose-designed for service providers, operators, and enterprises that need to host and manage multiple independent customers on a single, centralized platform.
Unlike traditional single-tenant PBX deployments, this architecture enables one PortSIP PBX system to securely serve **multiple tenants (customers),** each operating as an independent PBX, while efficiently sharing the same underlying infrastructure.
***
### What Is a Tenant?
In PortSIP PBX, a **tenant** represents an independent organization or customer. Each tenant functions as a fully self-contained PBX environment with:
* Its own extensions, users, and tenant administrators
* Independent call routing, trunks, and numbering plans
* Dedicated call queues, IVRs, auto attendants, and voicemail
* Isolated call recordings, CDRs, reports, and analytics
* Tenant-specific policies, features, and branding
From the tenant’s perspective, the system behaves exactly like a **dedicated private PBX**, even though it runs on shared infrastructure.
***
### Key Benefits of the Multi-Tenant Design
#### **True Logical Isolation and Tenant Transparency**
Each tenant is **completely isolated and invisible to other tenants** on the platform. Tenants cannot see, access, or interact with any other tenant’s users, data, numbers, or configuration.
This **tenant-to-tenant transparency** ensures:
* Strong security and data privacy
* No risk of configuration leakage or cross-tenant impact
* A clean, dedicated PBX experience for every customer
For end users and tenant administrators, the presence of other tenants is entirely transparent—they experience the system as if it were deployed exclusively for their organization.
#### **Centralized Management for Service Providers**
Service providers can manage all tenants from a **single PortSIP PBX instance**, dramatically reducing operational complexity, infrastructure costs, and maintenance overhead.
**Scalable by Design**
The platform is engineered to scale horizontally, allowing service providers to host **tens of thousands of tenants** while maintaining consistent performance and reliability.
#### **Role-Based Administration**
PortSIP PBX supports a clear administrative hierarchy:
* **System administrators** manage the global platform and tenants
* **Tenant administrators** manage only their own organization
This separation of responsibilities aligns perfectly with Cloud PBX and UCaaS operational models.
#### **Ideal for Cloud PBX, UCaaS, and CCaaS**
Thanks to its true multi-tenant foundation, PortSIP PBX is ideally suited for delivering:
* Cloud PBX services
* UCaaS platforms
* CPaaS and CCaaS solutions
* Hosted contact center and unified communications services
***
### Summary
PortSIP PBX’s multi-tenant capability is a **core architectural principle**, not an add-on. Each tenant is fully isolated, completely transparent to others, and operates as a dedicated PBX, while service providers benefit from centralized control, scalability, and operational efficiency.
# Managing Tenants
After completing the **Configuration Wizard**, you can manage **PortSIP PBX** through the **Web Portal**. From here, administrators can configure and manage all core PBX features, including:
* Tenants
* Users (extensions)
* Call routing and call forwarding
* Feature Access Codes (FAC)
* SIP trunks
* Queues and ring groups
* And more
***
### Creating a Tenant
To create a new tenant:
1. Sign in to the **PBX Web Portal** as a System Administrator.
2. Navigate to **Tenants** from the left-hand menu.
3. Click **Add**.
When creating a tenant, you can configure key tenant profile settings such as Name, SIP Domain, Office Hours, and Storage quotas.
Once created, a tenant’s profile can be modified at any time by a System Administrator through the Web Portal.
***
#### Tenant General Settings
The **General** tab allows you to define the tenant’s identity and resource limits.
**Basic Information**
* **Name**\
The display name used to identify the tenant (for example, *ABC Company*).
* **SIP Domain**\
A unique SIP domain used to distinguish extensions across tenants.\
This domain **does not need to exist or be resolvable** and may be a dummy domain.
**Example:**
* Tenant A SIP domain: `test1.com` → Extension URI: `sip:101@test1.com`
* Tenant B SIP domain: `test2.com` → Extension URI: `sip:101@test2.com`
This mechanism ensures complete SIP namespace isolation between tenants.
> ❗**Important**\
> Do **not** configure the PBX server IP address as a tenant SIP domain.
**Capability (Resource Limits)**
The **Capability** section allows you to control how many resources a tenant may consume, including:
* Maximum number of extensions
* Maximum concurrent calls
* Maximum ring groups
* Maximum call queues
* Maximum meetings
* Maximum virtual receptionist
* Other tenant-level limits
This enables precise capacity control in multi-tenant environments.
**AI Transcription**
* **AI Transcription:** Enable or disable AI transcription for the tenant.
* **Daily Transcription Quota:** Define daily usage limits to control costs and resource consumption.
For more details, please refer to [Tenant Feature Management](#tenant-feature-management).
***
#### Tenant Options
The **Options** tab allows you to configure operational and regional settings.
* **Enable This Tenant:** If disabled, the tenant and all associated extensions become inactive.
* **Allow Concurrent Logins:** Allows tenant administrators to sign in from multiple devices simultaneously.
* **Country:** Specifies the tenant’s country.
* **Timezone:** Defines the tenant’s timezone for call routing, reports, and logs.
* **Currency:** Used for billing and reporting purposes.
* **Enable Extension Audio Recording:** Forces audio recording for all extensions, regardless of individual extension settings.
* **Enable Extension Video Recording:** Forces video recording for all extensions.
* **Night Mode:** When enabled, all IVRs, queues, and ring groups follow night-mode routing rules.
* **Office Hours:** Defines global office hours for the tenant.\
If extensions, inbound rules, or outbound rules are set to *follow global office hours*, call routing will respect these settings.
* **Holidays:** Defines tenant-wide holidays.\
When the current date falls within a holiday period, call routing follows the configured holiday rules.
***
#### Storage Settings
The **Storage** tab allows administrators to manage tenant-level storage usage.
* **Disk Quota (MB):** Maximum total storage allocated to the tenant.
* **Chat File Quota:** Configure chat file limits per user and per tenant.
**Auto Cleaning**
You can define automatic cleanup policies for:
* Call recordings
* Call reports
* Chat files
* Voicemail messages
This helps maintain predictable storage usage.
***
#### Apps Control
The **Apps** tab allows you to control which client applications tenant extensions may use:
* PortSIP ONE App
* PortSIP Team Phone App
* Limit App Logins
* Disabled: No application usage limits
* Enabled: Specify how many extension users may use each app
Setting a value to **0** means no users in that tenant may use the corresponding app.
For more details, please refer to [Tenant Feature Management](#tenant-feature-management).
***
#### Tenant Feature Management
The **Features** tab allows you to enable or disable major functional modules per tenant, including:
* Billing
* Call Statistics
* Contact Center
* Message Channels
* Trunks
* Microsoft Teams Integration
* CRM Integration
This provides flexible service packaging for different customer tiers.
For more details, please refer to [Tenant Feature Management](#tenant-feature-management).
***
### Deactivating a Tenant
To deactivate or reactivate a tenant:
1. Navigate to **Tenants** in the left menu.
2. Locate the tenant in the list.
3. Toggle the **ON/OFF** switch in the **Status** column.
When deactivated, all extensions and services under the tenant are disabled.
***
### Deleting a Tenant
To delete a tenant:
1. Navigate to **Tenants**.
2. Select the tenant.
3. Click **Delete**.
> ❗**Note**\
> Deleting a tenant may take some time, as all associated resources (extensions, recordings, reports, messages, etc.) must be removed.\
> The tenant **will remain visible** in the list until the deletion process is fully completed.
***
### Managing a Tenant
A **System Administrator** can manage tenants and their extensions directly.
1. Sign in to the **PBX Web Portal**.
2. Navigate to **Tenants**.
3. Select the tenant and click **Manage**.
This allows the System Administrator to temporarily assume the role of the tenant administrator and configure tenant settings and extensions.
#### Switching Back to System Administrator
After completing tenant management tasks:
1. Click the profile picture in the top-right corner.
2. Select **Switch to Administrator**.
This returns you to the System Administrator role **without requiring logout and re-login**.
# Password and Sign-In Security
This section allows administrators to configure **password policies** and **sign-in security settings** for extension users within a tenant. These controls help protect user accounts, reduce the risk of unauthorized access, and enforce consistent security standards across the organization.
Configurable options include password length, complexity requirements, and two-factor authentication (2FA).
***
### Password Policy
To configure the password policy:
1. Sign in to the **PBX Web Portal**.
2. Navigate to **Company** from the left-hand menu.
3. Select the **Password Policy** tab.
From here, you can customize the tenant’s password requirements, including:
* **Minimum password length**
* **Maximum password length**
* **Password complexity rules** (for example, uppercase letters, lowercase letters, numbers, and special characters)
These settings apply to all extension users within the tenant and help enforce strong password practices.
***
### Two-Factor Authentication (2FA)
**PortSIP PBX** supports **two-factor authentication (2FA)** for extension users by sending a one-time verification code via email.
#### Enabling 2FA
When the **Enable two-step verification** option is enabled:
* All extension users under the tenant must provide:
1. Their username and password
2. A verification code sent to their registered email address
This additional verification step significantly enhances account security.
#### Mail Server Requirement
Because 2FA relies on email delivery, it is **critical** that the **Mail Server settings** are correctly configured and fully operational.
> **Important**\
> If the mail server is not properly configured, users will not receive the verification code and will be unable to sign in.
#### Verification Warning
After enabling 2FA and clicking **OK** to save the configuration, the PBX Web Portal will display a **warning message** prompting you to verify the mail server settings. This ensures administrators confirm email delivery before enforcing two-factor authentication for users.
# Tenant Feature Management
**T**enant Feature Management allows the PBX Administrator to centrally activate or deactivate specific features for individual tenants. This provides the PBX owner with a flexible and scalable way to manage tenant capabilities, control resource usage, and offer value-added features as paid options to increase revenue.
By enabling or disabling features at the tenant level, service providers can easily implement service tiers, add-on features, or usage-based charging models.
The PBX Administrator can activate or deactivate the following features for each tenant.
***
### AI Transcription
Controls tenant access to the **AI transcription** feature and its usage limits.
* **Activate / Deactivate**\
When deactivated, the tenant cannot use AI transcription under any circumstances.
* **Daily Quota Limit**\
When activated, a daily transcription quota can be assigned to the tenant.\
Once the tenant reaches the daily quota, AI transcription is automatically suspended until the **next day**, when the quota resets.
This allows precise cost control and supports usage-based billing models.
You can access this option by navigating to **Tenants**, selecting the desired tenant, and then either **double-clicking the tenant** or clicking **Edit**.\
In the **General** tab, scroll to the bottom to locate the **AI Transcription** section. From there, you can **enable or disable AI Transcription** and configure the **daily quota**, as shown in the screenshot below.
***
### App Usage
Controls how many users within a tenant can register using the **PortSIP ONE UC App** and **PortSIP ONE Teams Phone App**.
* If **disabled** or the maximum user count is set to **0**, no extensions under the tenant can register using these applications.
* If a maximum value (for example, **100**) is configured, only that number of extension users are allowed to register using the PortSIP ONE apps.
This feature is commonly used to enforce **per-user licensing limits**.
You can access this option by navigating to **Tenants**, selecting the desired tenant, and then either **double-clicking the tenant** or clicking **Edit**.\
In the **Apps** tab, enable **App Usage Limitation** and specify the maximum number of users allowed to use the applications. A value of **0** means that no extension users are permitted to use the apps.\
Refer to the screenshot below for details.
***
To limit other features for a tenant, navigate to **Tenants**, select the desired tenant, and then either **double-click the tenant** or click **Edit**.\
In the **Features** tab, you can enable or disable features as required.\
Refer to the screenshot below for details.
### Billing
Controls access to **billing and charging features** for the tenant.
* When **deactivated**, the tenant cannot configure or access any billing-related settings.
* When **activated**, billing features become available to the tenant administrator.
***
### Call Statistics and Data Analytics
Controls tenant access to **call statistics and analytics features**, including:
* Call Reports
* Call Detail Records (CDRs)
* Call Recordings
* Data Analytics dashboards
When this option is deactivated, the tenant cannot access any analytics or reporting data.
***
### Contact Center
Controls access to **Contact Center features**, such as:
* Wallboards
* Queue monitoring
* Contact Center analytics
When deactivated, all Contact Center–related features are unavailable to the tenant.
***
### Message Channels
Controls tenant access to **messaging channels**, including:
* SMS configuration
* WhatsApp integration
When this option is deactivated, the tenant cannot configure or use messaging features.
***
### Trunks
Controls whether a tenant can manage its **own SIP trunks**.
* When deactivated, the tenant cannot access trunk configuration or create tenant-level trunks.
* When activated, the tenant can configure and manage its own trunk settings.
This is commonly used when trunks are **centrally managed by the service provider**.
***
### Microsoft Teams
Controls access to **Microsoft Teams Direct Routing** configuration.
* When deactivated, the tenant cannot configure Microsoft Teams Direct Routing.
* When activated, Teams integration options become available.
***
### CRM Integrations
Controls access to **CRM integration features**.
* When deactivated, the tenant cannot configure or use CRM integrations.
* When activated, supported CRM platforms can be configured and used.
***
### Best Practice Recommendation
> It is recommended to enable only the features required by each tenant and offer advanced capabilities as **optional, chargeable add-ons**. This approach improves security, simplifies tenant management, and maximizes service revenue.
# 4 Phone Device Management
### Configuring Desk IP Phones
PortSIP PBX allows you to easily configure and provision desk IP phones.
Supported IP phones from [Fanvil](https://www.fanvil.com), [Yealink](https://www.yealink.com), [Grandstream](https://www.grandstream.com), [Snom](https://www.snom.com), [Gigaset](https://www.gigaset.com), and [Dinstar ](https://www.dinstar.com)have been fully tested with PortSIP PBX and support automatic provisioning.
***
PortSIP PBX supports the following IP phone provisioning methods:
* [Managing Phones](/portsip-communications-solution/portsip-pbx-administration-guide/4-phone-device-management/managing-phones)
* [Auto-Provisioning Security](/portsip-communications-solution/portsip-pbx-administration-guide/4-phone-device-management/auto-provisioning-security)
* [Custom IP Phone Templates](/portsip-communications-solution/portsip-pbx-administration-guide/4-phone-device-management/custom-ip-phone-template)
* [Bulk Import Users and Auto-Provision IP Phones](/portsip-communications-solution/portsip-pbx-administration-guide/4-phone-device-management/bulk-importing-users-and-auto-provisioning-ip-phones)
* [Zero-Touch Provisioning](/portsip-communications-solution/portsip-pbx-administration-guide/4-phone-device-management/zero-touch-provisioning-phones)
* [Provision Phones Using Plug and Play (PnP)](/portsip-communications-solution/portsip-pbx-administration-guide/4-phone-device-management/provision-phone-using-pnp)
* [PnP Auto-Provisioning Multicast Debug](/portsip-communications-solution/portsip-pbx-administration-guide/4-phone-device-management/pnp-auto-provisioning-ip-phone-multicast-debug)
* [Provision Phones Using RPS](/portsip-communications-solution/portsip-pbx-administration-guide/4-phone-device-management/provision-phone-using-rps)
* [HTTP/HTTPS Provisioning Link (via the phone web interface; recommended for legacy phones such as Polycom, Cisco, and Aastra)](/portsip-communications-solution/portsip-pbx-administration-guide/4-phone-device-management/provision-phone-using-pnp#provisioning-phones-using-the-provisioning-link-manually)
* [Provision Phones Using DHCP Option 66](/portsip-communications-solution/portsip-pbx-administration-guide/4-phone-device-management/provision-phone-using-dhcp-option-66)
* [Provision Phones Using TFTP](/portsip-communications-solution/portsip-pbx-administration-guide/4-phone-device-management/provision-phone-using-tftp)
* [Provision Cisco 79xx IP Phones](/portsip-communications-solution/portsip-pbx-administration-guide/4-phone-device-management/provisioning-cisco-79xx-ip-phones)
* [Provision Fanvil DECT IP Phones](/portsip-communications-solution/portsip-pbx-administration-guide/4-phone-device-management/provision-fanvil-dect-ip-phones)
* [Provision Yealink DECT IP Phones](/portsip-communications-solution/portsip-pbx-administration-guide/4-phone-device-management/provision-yealink-dect-ip-phones)
* [Provision Snom DECT IP Phones](/portsip-communications-solution/portsip-pbx-administration-guide/4-phone-device-management/provision-snom-dect-ip-phones)
* [Provision Gigaset DECT IP Phones](/portsip-communications-solution/portsip-pbx-administration-guide/4-phone-device-management/provision-gigaset-dect-ip-phones)
* [Configuring Private RPS Account](/portsip-communications-solution/portsip-pbx-administration-guide/4-phone-device-management/configuring-private-rps-account)
# Managing Phones
PortSIP PBX provides a centralized and efficient way to monitor, manage, and secure IP phones and softphones across your network.
The Call **Manager > Phones** menu in the PortSIP PBX Web Portal allows administrators to:
* View all phones on the network, including IP addresses and MAC addresses
* View all PortSIP clients connected in softphone mode
* Check the firmware version currently running on each phone
* Remotely reboot one or multiple phones
* Re-provision phones to apply updated configurations
* Launch the phone’s web-based administration interface
* Monitor the security strength of extension passwords and PINs
> ❗ **Important**\
> Weak extension passwords and PINs are one of the **most common causes of PBX security breaches**.\
> Regularly review phone and extension security settings to reduce the risk of unauthorized access and toll fraud.
***
### Adding Phones
You can add phones to PortSIP PBX using the following methods:
* **Plug and Play (PnP)**\
Simply connect the IP phone to the local LAN. The PBX will automatically detect and provision the device.
* **Remote Provisioning Service (RPS)**\
Use RPS to provision phones that are located **outside the local network**, such as remote or home-office devices.
***
### Changing Phone Settings
Configuration changes made under the **User**, **Extension**, or **Phone Provisioning** tabs are not applied to IP phones immediately. To force a phone to retrieve the updated configuration, you must **re-provision** the device.
#### Re-provisioning a Phone
Use re-provisioning when configuration changes have been made and need to take effect immediately:
1. Navigate to **Call Manager > Phones**.
2. Select the provisioned phone you want to update.
3. Click **Reprovision**.
* If a reboot is required, the phone will **restart automatically**.
* The updated configuration will be **downloaded and applied automatically**.
> ❗ **Important**\
> Re-provisioning ensures configuration consistency and is recommended after changes to **extensions, codecs, SIP credentials, or security settings**.
# Auto Provisioning Security
### Introduction
Auto-provisioning simplifies IP phone deployment by allowing devices to be configured automatically via a web-based mechanism. This eliminates the need for manual configuration on each phone.
When a user activates a phone, the PBX or service provider automatically delivers the necessary configuration settings, enabling the phone to register with the system. This process significantly reduces deployment time and operational overhead.
***
### How Auto-Provisioning Works
#### Overview
Auto-provisioning streamlines phone setup by letting users activate their devices through a web interface. Users do not need to manually enter SIP credentials or device configuration parameters.
#### PBX Configuration Files
In a standard PBX implementation:
1. Extension phone configuration files are stored in a dedicated provisioning directory.\
Example: `ac2fbb80c5da60e`
2. Within this folder, the PBX generates **one configuration file per phone**, named using the phone’s **MAC address**.
#### Provisioning URL Mechanism
The provisioning workflow follows these steps:
1. The PBX sends a **SIP NOTIFY** message to the IP phone.
2. The message contains a **base provisioning URL**, e.g.:\
`https://www.pbxhost.com/provision/ac2fbb80c5da60e`
3. The IP phone appends its MAC address to form the full configuration file path, e.g.:\
`https://www.pbxhost.com/provision/ac2fbb80c5da60e/cc5ef641b794.xml`
4. The phone downloads the configuration file and uses it to **register with the PBX**.
***
### Security Consideration: Credential Exposure
⚠️ **Traditional provisioning models can be insecure.**
* If an attacker knows or can guess another phone’s MAC address, they may download that phone’s configuration file.
* These files often contain sensitive information in **plain text**, including:
* SIP extension number
* SIP authentication password
> ❗ **Important:**\
> This design flaw can lead to **credential leakage, unauthorized registrations, and toll fraud**, making it one of the most common vulnerabilities in legacy auto-provisioning systems.
***
### PortSIP PBX Secure Auto-Provisioning
#### Enhanced Security Architecture
PortSIP PBX addresses these risks by:
1. Creating a **separate provisioning folder for each user**.
2. Using **long, randomly generated folder names**.
3. Preventing predictable or guessable provisioning URLs.
✅ **Result:**\
Even if a phone’s MAC address is publicly known, it is practically impossible to access another user’s configuration file.
> ❗ **Important:**\
> Secure auto-provisioning is essential to protect SIP credentials and maintain overall system security.
***
#### Using Your Own RPS Account
By default, when a phone is auto-provisioned via the **Remote Provisioning Server (RPS)**, its configuration link resides under PortSIP-managed accounts at the phone vendor.
**Best Practice for Security and Compliance:**
1. Contact each phone vendor to create **your own RPS account** for every phone brand you use.
2. Follow the guide: [Configuring Private RPS Account](https://support.portsip.com/portsip-communications-solution/portsip-pbx-administration-guide/4-phone-device-management/configuring-private-rps-account)
3. Once your RPS accounts are set up, when you use the RPS to auto-provision your IP Phone, the configuration link is stored in your own RPS account.
> ❗ **Strong Recommendation:**\
> Always configure your own RPS accounts to ensure secure auto-provisioning.
***
#### Activate PIN Verification for IP Phone Auto-Provisioning
By default, when an IP phone is auto-provisioned, its configuration file may be downloaded through the provisioning URL without additional verification. This means that if someone obtains the phone provisioning URL, they may be able to download the phone configuration file and access sensitive information, such as the extension’s SIP credentials.
**Best Practice for Security and Compliance:**
To improve provisioning security, we strongly recommend that PBX System Administrators or Tenant Administrators enable **PIN Verification for IP Phone Auto-Provisioning**.
Please follow the guide: [PIN Verification for IP Phone Auto-Provisioning.](/portsip-communications-solution/portsip-pbx-administration-guide/4-phone-device-management/pin-verification-for-ip-phone-auto-provisioning)
After PIN verification is enabled, users must enter their voicemail PIN when auto-provisioning an IP phone. The phone can download its configuration from PortSIP PBX only after the PIN is verified successfully.
> ❗ **Strong Recommendation:** Always enable **PIN Verification for IP Phone Auto-Provisioning** to help protect phone configuration files and ensure secure auto-provisioning.
***
### DHCP Option 66 and Legacy Device Compatibility
#### Background
PortSIP PBX’s secure provisioning uses **per-user isolated folders**, which may conflict with legacy IP phones that only support **DHCP Option 66**.
**DHCP Option 66 Limitation:**
* Requires a **single, shared provisioning URL**
* All configuration files must reside in **the same directory**
* Conflicts with PortSIP PBX’s default per-user isolated folder structure
***
#### Optional Compatibility Setting
To support legacy devices while maintaining flexibility, PortSIP PBX offers an **optional configuration switch**.
**How to Temporarily Disable Secure Folder Isolation (Not Recommended):**
1. Log in to the **PortSIP PBX Web Portal**
2. Navigate to: `Advanced > Settings`
3. Open the **General** page
4. In the **Custom Options** field, add:
```json
{"disable_auto_provision_security": true}
```
5. Click **OK** to save changes
**Effect of This Option:**
| Option Setting | Behavior |
| ------------------ | ------------------------------------------------------------------------------------------- |
| `true` | All configuration files stored in a shared directory; DHCP Option 66 provisioning supported |
| `false` or removed | Secure, per-user provisioning folders are used |
❗ **Critical Security Warning:**\
Enabling `disable_auto_provision_security` **reintroduces serious security risks**, including:
* SIP credential leakage
* Unauthorized phone registrations
* Toll fraud and other security breaches
**Recommendation:**\
Only enable this option temporarily and solely for legacy device compatibility. Return to **secure folder isolation** as soon as possible.
***
### Summary
PortSIP PBX provides a **secure-by-design auto-provisioning system** that:
* Protects user credentials
* Minimizes operational overhead
* Supports optional legacy device compatibility via DHCP Option 66
**Key Takeaways:**
* Use **per-user provisioning folders** for maximum security.
* Configure **your own RPS accounts** for each phone brand.
* Enable DHCP Option 66 only when necessary, and revert to secure defaults immediately afterward.
Balancing **security and compatibility** ensures safe and efficient IP phone deployments with PortSIP PBX.
***
✅ **Recommendation for Administrators:**\
Maintain a consistent, secure provisioning workflow while documenting any exceptions made for legacy devices. This approach aligns with **modern VoIP and UC industry standards**.
# Configuring Private RPS Account
> ❗ **Warning**
By default, with PortSIP PBX, if an IP phone is auto-provisioned via the RPS (Remote Provisioning Server), its configuration link is stored in the IP phone vendor’s RPS under the PortSIP-managed account.
**Best Practice for Security and Compliance:**
1. Contact each phone vendor to create **your own RPS account** for every phone brand you use.
2. Follow the guide: [Configuring Private RPS Account](https://support.portsip.com/portsip-communications-solution/portsip-pbx-administration-guide/4-phone-device-management/configuring-private-rps-account)
3. Once your RPS accounts are set up, when you use the RPS to auto-provision your IP Phone, the configuration link is stored in your own RPS account.
> ❗ **Strong Recommendation:**\
> Always configure your own RPS accounts to ensure secure auto-provisioning.
***
### Overview
PortSIP PBX allows customers to configure their own **private Remote Provisioning Server (RPS)** accounts for automatic IP phone provisioning.\
Using a private RPS simplifies device management and improves security by giving you direct control over IP phone provisioning credentials and workflows.
***
### Prerequisites
* Administrator access to the PBX host
* RPS credentials provided by the IP phone vendor(s) you plan to use
* Permission to restart PBX services
***
### Step 1: Locate the Configuration File
Open the **system.ini** file on your PBX server:
* **Linux:** `/var/lib/portsip/pbx/system.ini`
***
### Step 2: Add RPS Configuration
Append the relevant sections below to **system.ini**, based on the IP phone brands you want to configure.\
Save the file after making your changes.
{% hint style="info" %}
Please contact Yealink to enable access to the `addDevicesByMac` API for your RPS account.
{% endhint %}
#### Yealink
```ini
[yealink]
accesskey_id = xxxx
accesskey_secret = xxxx
rps_host = https://wwww.xxx.com
```
#### ALE (Alcatel-Lucent Enterprise)
```ini
[ale]
accesskey_id = xxxx
accesskey_secret = xxxx
```
#### Grandstream
```ini
[grandstream]
username = xxxx
password = xxxx
# The value of the password field must be: sha256(md5(password))
api_id = xxxx
api_secret = xxxx
site_id = xxxx
```
#### Fanvil
```ini
[fanvil]
username = xxxx
password = xxxx
# The value of the password field must be: md5(md5(password))
```
#### Htek
```ini
[htek]
username = xxxx
password = xxxx
```
#### Snom
```ini
[snom]
username = xxxx
password = xxxx
```
***
> **Security Note**\
> Always follow the vendor-specific password hashing requirements exactly.\
> Storing improperly hashed passwords will cause provisioning failures.
***
### Step 3: Restart the Provisioning Service
After updating the configuration file, restart the provisioning service to apply the changes.
#### Linux
1. Open a terminal.
2. Navigate to the PortSIP directory:
```bash
cd /opt/portsip
```
3. Restart the provisioning service:
```bash
sudo /bin/sh pbx_ctl.sh restart -s portsip.provision
```
# PIN Verification for IP Phone Auto-Provisioning
Starting from **PortSIP PBX v22.6**, PortSIP PBX supports PIN verification during IP phone auto-provisioning.
When this feature is enabled, users must enter a PIN before the IP phone can download its provisioning configuration file. This helps protect IP phone provisioning security. Even if someone obtains the provisioning file URL, they cannot access the configuration file without the required PIN.
> ❗**Important:** We strongly recommend that PBX System Administrators or Tenant Administrators enable this feature to improve IP phone provisioning security.
***
### Overview
PortSIP PBX supports PIN verification for auto-provisioning at two levels:
| Level | Description |
| ---------------- | ------------------------------------------------------------------------------------------------------------------------- |
| **System Level** | Applies to all tenants and all extension users in the PBX system. |
| **Tenant Level** | Applies only to the current tenant. Tenant-level settings are affected only when the system-level setting is not enabled. |
***
### How System-Level and Tenant-Level Settings Work
#### System-Level Setting
If the PBX System Administrator enables **Require Voicemail PIN Verification for Auto-Provisioning** at the system level, all extension users in all tenants must verify their PIN during IP phone auto-provisioning.
This requirement applies even if the tenant-level setting is not enabled.
#### Tenant-Level Setting
If the PBX System Administrator does not enable this feature at the system level, each Tenant Administrator can enable it for their own tenant.
When enabled at the tenant level, only users in that tenant must verify their PIN during IP phone auto-provisioning.
***
### Configuring PIN Verification for Auto-Provisioning
#### For PBX System Administrators
1. Sign in to the PBX Web Portal as a **System Administrator**.
2. Navigate to **Advanced > Security**.
3. Click the **Password Policy** tab.
4. In the **Phone Auto Provisioning** section, turn on **Require Voicemail PIN Verification for Auto-Provisioning**.
5. Save the changes.
After this option is enabled, all tenants and extension users must verify their PIN when provisioning supported IP phones.
#### For Tenant Administrators
1. Sign in to the PBX Web Portal as a **Tenant Administrator**.
2. Navigate to **Company**.
3. Click the **Password Policy** tab.
4. In the **Phone Auto Provisioning** section, turn on **Require Voicemail PIN Verification for Auto-Provisioning**.
5. Save the changes.
After this option is enabled, users in the tenant must verify their PIN when provisioning supported IP phones.
> **Note:** If the System Administrator has already enabled this feature at the system level, the setting applies to all tenants. In that case, the tenant-level setting may not be required.
***
### Excluded Phone Brands
Some legacy IP phones may not support PIN verification during auto-provisioning.
To allow these phones to continue provisioning, the System Administrator can add the phone brand to the **Excluded Phone Brands** list.
When a phone brand is excluded, PortSIP PBX does not require PIN verification for phones of that brand during auto-provisioning.
> **Note:** Excluding a phone brand reduces provisioning security for those devices. Only exclude brands that cannot support PIN verification.
***
### User Experience During Auto-Provisioning
When PIN verification is enabled, the IP phone displays a prompt during auto-provisioning.
The user must enter the required PIN. After the PIN is verified successfully, the phone continues the provisioning process and downloads its configuration from the PBX.
If the PIN is incorrect, the provisioning process cannot continue.
***
### PIN Code Usage
PortSIP PBX uses different PIN fields depending on the device or provisioning scenario.
| Provisioning Scenario | PIN Used for Verification |
| ------------------------------- | --------------------------------------------- |
| Extension IP phone provisioning | The extension’s voicemail PIN |
| DECT phone provisioning | The device’s **Provisioning PIN** |
| Hot Desking provisioning | The Hot Desking device’s **Provisioning PIN** |
#### Extension IP Phones
When provisioning an IP phone for an extension, PortSIP PBX uses the extension’s **voicemail PIN** for verification.
Users must enter the voicemail PIN assigned to their extension.
#### DECT Phones and Hot Desking
Starting from **PortSIP PBX v22.6**, DECT phones and Hot Desking devices include a new field named **Provisioning PIN**.
When provisioning a DECT phone or Hot Desking device, PortSIP PBX uses this **Provisioning PIN** instead of an extension voicemail PIN.
***
### Upgrade Considerations
If you upgrade from a version earlier than **v22.6** and then enable PIN verification for auto-provisioning, review your DECT phones and Hot Desking devices.
You must set the **Provisioning PIN** for each DECT phone and each Hot Desking device before users can complete PIN-verified provisioning.
***
### Best Practices
* Enable PIN verification for auto-provisioning whenever possible.
* Use strong voicemail PINs and provisioning PINs.
* Avoid simple PINs such as `0000`, `1234`, or the extension number.
* Exclude phone brands only when they cannot support PIN verification.
* Review DECT phones and Hot Desking devices after upgrading to v22.6 or later.
* Keep provisioning URLs private, even when PIN verification is enabled.
***
### Important Notes
* This feature is available from **PortSIP PBX v22.6**.
* System-level settings apply to all tenants.
* Tenant-level settings apply only when the system-level setting is not enabled.
* For extension IP phones, the extension’s voicemail PIN is used for verification.
* For DECT phones and Hot Desking devices, the **Provisioning PIN** is used for verification.
* If a phone brand is added to **Excluded Phone Brands**, phones of that brand do not require PIN verification during auto-provisioning.
# Verifying the Provisioning PIN for DECT Phones
Some DECT base stations do not have a built-in screen. In addition, some DECT phone brands and models do not support entering the provisioning password from the handset screen.
This guide explains how to verify the provisioning PIN when auto-provisioning a DECT phone.
***
### Prerequisites
Before you begin, enable the PIN verification feature for IP phone auto-provisioning.
For details, see [PIN Verification for IP Phone Auto-Provisioning](/portsip-communications-solution/portsip-pbx-administration-guide/4-phone-device-management/pin-verification-for-ip-phone-auto-provisioning).
***
### Configuring the Provisioning PIN for a DECT Phone in PBX Web Portal
Use the following steps to configure the provisioning PIN for a DECT phone in PortSIP PBX.
#### To configure the provisioning PIN
1. Sign in to the PortSIP PBX web portal as a **System Administrator** and select the tenant you want to manage.\
Alternatively, sign in directly as the **Tenant Administrator**.
2. Go to **Call Manager > DECT Phones**.
3. Click **Add** to configure a new DECT phone, or select an existing DECT phone to edit it.
4. In the **Provisioning PIN** field, enter the PIN that will be used to verify the provisioning request.
5. Configure the extensions for the handsets as the guide:
1. Fanvil: [Provision Fanvil DECT IP Phones](/portsip-communications-solution/portsip-pbx-administration-guide/4-phone-device-management/provision-fanvil-dect-ip-phones).
2. Yealink: [Provision Yealink DECT IP Phones](/portsip-communications-solution/portsip-pbx-administration-guide/4-phone-device-management/provision-yealink-dect-ip-phones).
3. Snom: [Provision Snom DECT IP Phones](/portsip-communications-solution/portsip-pbx-administration-guide/4-phone-device-management/provision-snom-dect-ip-phones).
4. Gigaset: [Provision Gigaset DECT IP Phones](/portsip-communications-solution/portsip-pbx-administration-guide/4-phone-device-management/provision-gigaset-dect-ip-phones).
6. Save the changes.
**Expected outcome**
The DECT phone has a provisioning PIN assigned. This PIN must be provided by the phone during auto-provisioning.
***
### Verifying the PIN for Fanvil LINKVIL DECT Phones
After you configure a Fanvil LINKVIL DECT phone in PortSIP PBX, use the following steps to configure PIN verification on the phone.
In the PortSIP PBX web portal, copy the phone provisioning URL.\
See the screenshot below for reference.
1. Sign in to the Fanvil LINKVIL web portal.
2. Go to **System > Auto Provision > Static Provisioning Server**.
3. Paste the copied provisioning URL into the **Server Address** field.
4. In the **Configuration File Name** field, enter the configuration file name in the following format:
```
{MAC}.cfg
```
For example:
```
0c383e5fdcf8.cfg
```
See the screenshot below:
5. Go to **System > Auto Provision > Basic Settings**.
6. In the **Authentication Name** field, enter any text value for it.
7. In the authentication password field, enter the **Provisioning PIN** that you configured in PortSIP PBX.
8. Click **Apply** to save the changes and restart the DECT phone base station.
**Expected outcome**
The Fanvil LINKVIL DECT phone sends the provisioning PIN during auto-provisioning. PortSIP PBX verifies the PIN before allowing the phone to download its provisioning configuration.
***
### Verifying the PIN for Yealink DECT Phones
After you configure a Yealink DECT phone in PortSIP PBX, use the following steps to verify the provisioning PIN on the phone.
Yealink DECT phones can be provisioned in either of the following ways:
* **Provision via RPS**
* **Provision manually**
***
#### Provision via RPS
Use this method if you enabled **Save to RPS** when configuring the Yealink DECT phone in PortSIP PBX.
**To provision the Yealink DECT phone via RPS**
1. Restart the Yealink DECT base station.
2. Wait for the base station to restart.
3. After the base station restarts, it starts the provisioning process. If prompted on the handset, enter the username and provisioning PIN to verify the provisioning request.
After the PIN is verified successfully, the Yealink DECT phone downloads and applies its provisioning configuration.
***
#### Provision Manually
Use this method if you did not enable **Save to RPS** when configuring the Yealink DECT phone in PortSIP PBX.
**To manually configure provisioning PIN verification**
1. In the PortSIP PBX web portal, copy the phone provisioning URL.\
See the screenshot below for reference.
2. Sign in to the Yealink DECT phone web portal.
3. Go to **Settings > Auto Provision**.
4. Paste the copied provisioning URL into the **Server URL** field.
5. In the **Username** field, enter any text value.
6. In the **Password** field, enter the **Provisioning PIN** that you configured in PortSIP PBX.
7. Click **Apply** to save the changes.
8. Restart the Yealink DECT base station.
After the base station restarts, it receives the provisioning information from the Yealink RPS service and is provisioned automatically.
***
### Verifying the PIN for Snom DECT Phones
After you configure a Snom DECT phone in PortSIP PBX, use the following steps to configure PIN verification on the phone.
In the PortSIP PBX web portal, copy the phone provisioning URL.\
See the screenshot below for reference.
**M100:**
1. Sign in to the M100 web portal.
2. Go to the **Provisioning** menu.
3. Paste the copied provisioning URL into the **Server URL field**.
4. In the **Server Authentication Name** field, enter any text value for it.
5. In the **Server Authentication Password** field, enter the **Provisioning PIN** that you configured in PortSIP PBX.
6. Save the changes and restart the DECT phone base station.
**M400:**
1. Sign in to the M400 web portal.
2. Go to the **Management Settings**.
3. In the **HTTP Management username** field, enter any text value for it.
4. In the **HTTP Management password** field, enter the **Provisioning PIN** that you configured in PortSIP PBX.
5. Paste the copied provisioning URL into the **Configuration Server Address** field.
6. In the Filename field, enter the **snomM400-{mac}.htm.**
7. Save the changes and restart the DECT phone base station.
**M500:**
1. Sign in to the M500 web portal.
2. Go to the **SERVICING > Provisioning > Provisioning Server**.
3. Paste the copied provisioning URL into the **Server URL** field.
4. In the **Server Authentication Name** field, enter any text value for it.
5. In the **Server Authentication Password** field, enter the **Provisioning PIN** that you configured in PortSIP PBX.
6. Save the changes and restart the DECT phone base station.
**M900:**
1. Sign in to the M900 web portal.
2. Go to the **Management Settings**.
3. In the **HTTP Management username** field, enter any text value for it.
4. In the **HTTP Management password** field, enter the **Provisioning PIN** that you configured in PortSIP PBX.
5. Paste the copied provisioning URL into the **Configuration Server Address** field.
6. In the Filename field, enter the **snomM900-{mac}.htm.**
7. Save the changes and restart the DECT phone base station.
***
### Verifying the PIN for Gigaset DECT Phones
After you configure a Gigaset DECT phone in PortSIP PBX, use the following steps to configure PIN verification on the phone.
In the PortSIP PBX web portal, copy the phone provisioning URL.\
See the screenshot below for reference.
1. Sign in to the Gigaset DECT phone web portal.
2. Go to the menu **SETTINGS >System > Provisioning and configuration**.
3. Paste the copied provisioning URL into the **Server Address** field and save changes.
4. Go to menu **SETTINGS >System > Security**.
5. In the **HTTP digest username** field, enter any text value for it.
6. In the HTTP digest password field, enter the **Provisioning PIN** that you configured in PortSIP PBX.
7. Save the changes and restart the DECT phone base station.
**Expected outcome**
The Gigaset DECT phone sends the provisioning PIN during auto-provisioning. PortSIP PBX verifies the PIN before allowing the phone to download its provisioning configuration.
# Customing IP Phone Template
PortSIP PBX allows you to customize IP phone provisioning templates, enabling you to deliver a branded user experience and apply your own corporate identity to supported IP phones.
By creating custom templates, service providers and enterprises can present IP phones under their own brand while maintaining full provisioning and management functionality.
***
### Copying a Base Phone Template
1. Sign in to the PortSIP PBX Web Portal as the System Administrator.
2. Navigate to **Advanced > Phone Templates**.
3. From the **Select a Template** drop-down list, choose the **default template** you want to copy.
4. Verify that the phone models you intend to customize are included in the selected template.
5. Click **Copy**, enter a **new template name**, and click **OK**.
A new, editable phone template is created and ready for customization.
***
### Editing the Custom Phone Template
After copying the template, you can edit the following sections to apply your branding:
#### Template Name
* Update the `` section to reflect your brand\
**Example:** `PortSIP IP Phone`
***
#### Models Section (Optional)
* Update the `ua=xxx` value if required (not mandatory).
* Edit the **model description** to match your branding.
**Example changes:**
* `Fanvil V62` → `PortSIP V62`
* `Fanvil V65` → `PortSIP V65`
***
#### Description Section
* Update the template description to your branding name.
***
#### Friendly Device Name
Most templates include a section similar to the following:
```xml
phonePortSIP Phone
```
* Replace the **friendly name** with your branded phone name.
***
### SNOM Phone Templates (Special Requirement)
If your custom template is copied from a **SNOM** base template, you must add an additional tag.
SNOM phones require configuration files named using **uppercase MAC addresses**. Because it is not always obvious whether a template originated from a SNOM base, you must explicitly declare the original brand.
#### Required SNOM Tag
Add the following line to the custom template:
```xml
snom
```
> ❗ **Important**\
> This tag is required for proper provisioning of SNOM phones.\
> Without it, SNOM devices may fail to download or apply configuration files correctly.
Please refer to the example shown in the screenshot for reference.
***
### Saving the Custom Template
1. After completing all required edits, click **Save**.
2. The new custom template will appear in the template list.
When a tenant performs **auto-provisioning** for an IP phone, the **custom-branded phone models** will now be available for selection.
***
### Provisioning Phones with the Custom Template
* Select the desired **custom-branded phone model**
* Provision the device using the same workflow as a standard phone template
No additional steps are required during user or extension provisioning.
***
### Making Changes to Templates
Any changes made to a phone template in the **PBX Web Portal** will directly affect IP phones.
> ❗ **Important**\
> Always test template changes using a **sample device in a non-production environment** before deploying them system-wide.
***
#### Template Content Boundaries
Within the template file:
* The provisioning content starts **after** the following marker:
```xml
❗ **Critical Warning**\
> Editing content above `
> * The custom template to disappear from the Web Portal
> * Extension settings to become inaccessible
> * The need to restore a backup or delete and recreate extensions
***
### Provisioning Precautions and Best Practices
* Avoid **duplicate provisioning parameters** for the same device.
* Always refer to the **vendor’s official provisioning guide**.
* If a value must be reverted to the device default, **explicitly set it back**—do not simply delete the parameter.
* When unsure, contact the **IP phone vendor** or **PortSIP support** for guidance.
***
### Yealink Phone-Specific Template Behavior
Yealink phones differ from most vendors and require **two configuration files** during provisioning.
As a result, Yealink templates contain **two ` ❗ **Important**\
> When modifying Yealink templates, you must review and update **both ` From Text/CSV**
7. Select the exported CSV file, and then choose **Transform Data** instead of loading the file directly.
8. In the Power Query Editor, review the columns before loading the data.
Set the data type to **Text** for:
* Any column that contains an internal PortSIP PBX ID or other long numeric identifier.
* Any ID column whose value must remain exactly the same as exported.
* The **extension\_number** column, especially if extension numbers may contain leading zeros or long numeric values.
This is required to prevent Excel from converting these values to scientific notation, removing leading zeros, or changing their numeric precision.
**Important:** Do not modify internal PBX ID values unless the documentation for that field specifically instructs you to do so.
9. After confirming that these columns are set to **Text**, load the data into Excel.
10. Edit the template to add or modify users as required. You can copy the example user and update fields such as:
* Username
* Password
* Extension number
* Office hours
* Forwarding settings
* IP phone settings
* BLF keys
When editing the CSV file, preserve the format of fields that contain JSON data.
11. After completing the changes, save the file as a **CSV UTF-8** file.
In Excel, choose:
**File > Save As > CSV UTF-8 (Comma delimited) (\*.csv)**
12. Import the saved CSV file into PortSIP PBX.
13. After saving the CSV file, **do not open it again directly in Excel before importing it into PortSIP PBX**.
If you need to verify the CSV content, use a plain text editor such as Notepad++, Visual Studio Code, or another UTF-8-compatible text editor.
Reopening the CSV file directly in Excel may cause long numeric IDs or other numeric identifiers to be automatically converted again, which can corrupt the data and cause the import to fail.
#### Recommended Workflow
```
Export CSV from PortSIP PBX
→ Open Microsoft Excel first
→ Create a blank workbook
→ Data > From Text/CSV
→ Transform Data
→ Set internal ID and long numeric identifier columns to Text
→ Set extension_number to Text
→ Load the data into Excel
→ Edit or duplicate users
→ Save as CSV UTF-8
→ Import the CSV into PortSIP PBX
```
Do not use the following workflow:
```
Export CSV
→ Double-click the CSV file to open it in Excel
→ Edit
→ Save
→ Reopen it in Excel
→ Import
```
This workflow may cause Excel to modify internal PBX IDs, long numeric identifiers, extension numbers, or other values that must remain unchanged.
If a CSV file has already been opened directly in Excel and contains long numeric IDs, **do not continue editing that file**. Export a new copy from PortSIP PBX and import it into Excel using **Data > From Text/CSV** as described above.
### CSV File Format
The CSV file must be saved in **UTF-8** format.
When using Microsoft Excel, always save the edited file as:
**CSV UTF-8 (Comma delimited) (\*.csv)**
Do not change the CSV column names or remove required columns unless specifically instructed by the PortSIP documentation.
### **Template Columns** Explanation
The CSV file header columns are described below:
* **name**: This is the username that the user will enter to access the PBX web portal. It should consist of numbers and letters.
* **enabled**: This indicates whether this user is enabled or not. The value can be TRUE or FALSE. The user will be disabled if it is set to FALSE.
* **password**: This is the password for the user to log in to the PBX web portal. It must meet the tenant’s password policy, otherwise, the importing will fail.
* **extension\_number**: This is the extension number of the user. It only accepts numbers and is limited to a maximum of 64 digits.
* **extension\_password**: This is the password for the extension to register to PBX from the SIP endpoint. It must meet the tenant’s password policy, otherwise, the importing will fail.
* **email**: This is the email address of the user.
* **display\_name**: This is the full name of the user, for example: Jim Keeny.
* **enable\_audio\_recording**: This indicates whether to enable the audio call recording or not for the user. **TRUE** for enabled and **FALSE** for disabled.
* **enable\_video\_recording**: This indicates whether to enable the video recording or not for the user. **TRUE** for enabled and **FALSE** for disabled.
* **enable\_acb**: This indicates whether to enable the automatic callback or not for the user. **TRUE** for enabled and **FALSE** for disabled.
* **enable\_dnd**: This indicates whether to enable the Do Not Disturb or not for the user. **TRUE** for enabled and **FALSE** for disabled.
* **enable\_hot\_desking**: This indicates whether to enable the Hot Desking or not for the user. **TRUE** for enabled and **FALSE** for disabled.
* **office\_hours**: This specifies the office hours for the user. It can use the global office hours from the tenant level, or create custom office hours for this user only. The office hours are defined in JSON format.
If the **mode** is "**CUSTOM"**, it means to use the specified office hours for that user. For each weekday, if the key **enabled** is true, it means that the day is open, and the ranges is a JSON array used to define the time shifts for office hours. If the ranges is empty, it means the whole day is opened; if the key **enabled** is false, it means that the whole day is closed, and the ranges will be ignored.
```json
{
"mode": "CUSTOM",
"monday": {
"enabled": true,
"ranges": [{
"from": "09:00",
"to": "11:00"
}, {
"from": "12:00",
"to": "17:00"
}]
},
"tuesday": {
"enabled": true,
"ranges": [{
"from": "09:00",
"to": "17:00"
}]
},
"wednesday": {
"enabled": true,
"ranges": []
},
"thursday": {
"enabled": true,
"ranges": []
},
"friday": {
"enabled": true,
"ranges": []
},
"saturday": {
"enabled": false,
"ranges": []
},
"sunday": {
"enabled": false,
"ranges": []
}
}
```
If the **mode** is set to "**GLOBAL"**, it means that the user's office hours will follow the tenant's office hours.
```json
{
"mode": "GLOBAL",
"monday": {
"enabled": true,
"ranges": []
},
"tuesday": {
"enabled": true,
"ranges": []
},
"wednesday": {
"enabled": true,
"ranges": []
},
"thursday": {
"enabled": true,
"ranges": []
},
"friday": {
"enabled": true,
"ranges": []
},
"saturday": {
"enabled": true,
"ranges": []
},
"sunday": {
"enabled": true,
"ranges": []
}
}
```
* **anonymous\_outbound\_calls**: Indicates whether anonymous outbound calling is enabled for the user. **TRUE** means enabled; **FALSE** means disabled.
* **delivery\_outbound\_cid**: Indicates whether the user part of the **From** header in the SIP INVITE is rewritten with the outbound caller ID when the user places a call through a trunk. **TRUE** means enabled; **FALSE** means disabled.
* **sms**: Specifies the user’s permission to send SMS and WhatsApp messages. The available values are **DISABLE**, **ALLOW\_WITH\_SENDER\_ID**, and **ALLOW**. This field is applicable only to PortSIP PBX v22.0 and later.
* **voicemail\_prompt**: Specifies the language used for voicemail prompts. The value must be a BCP 47 language tag, for example, **en-US**.
* **enable\_voicemail\_pin**: Indicates whether the voicemail PIN must be verified when the user accesses voicemail by dialing a Feature Access Code (FAC). **TRUE** means enabled; **FALSE** means disabled.
* **voicemail\_pin**: Specifies the voicemail PIN. This field is mandatory. The PIN must contain only numeric digits and comply with the configured voicemail PIN policy.
* **voicemail\_play\_datetime**: Indicates whether the date and time are played when the user accesses voicemail. **TRUE** means enabled; **FALSE** means disabled.
* **enable\_voicemail\_notify**: Indicates whether an email notification is sent to the user’s email address when a new voicemail message is received. **TRUE** means enabled; **FALSE** means disabled.
* **online\_no\_answer\_forward\_rule**: Specifies the forwarding rule to apply when the user is online but does not answer an incoming call within the configured timeout. It is a JSON object that includes the following keys:
* **action**: Specifies the action to take. Supported values are `FORWARD_TO_NUMBER`, `FORWARD_TO_VOICEMAIL`, and `HANGUP`.
* **timeout**: Specifies the maximum ringing time, in seconds, before the configured action is taken.
* **number**: Specifies the destination number when **action** is set to `FORWARD_TO_NUMBER`. This field is ignored when **action** is set to any other value.
For example, to forward the call to voicemail if it is not answered within 60 seconds, configure the rule as follows:
```json
{
"action": "FORWARD_TO_VOICEMAIL",
"timeout": 60,
"number": ""
}
```
* **online\_busy\_forward\_rule**: Specifies the forwarding rule to apply when the user is online but is currently on another call. It is a JSON object that includes the following keys:
* **action**: Specifies the action to take. Supported values are `FORWARD_TO_NUMBER`, `FORWARD_TO_VOICEMAIL`, `RING_ANYWAY`, and `HANGUP`.
* **timeout**: This field is ignored for the online busy forwarding rule.
* **number**: Specifies the destination number when **action** is set to `FORWARD_TO_NUMBER`. This field is ignored when **action** is set to any other value.
For example, to have a new incoming call ring the user even when the user is already on another call, set **action** to `RING_ANYWAY`. The `timeout` and `number` fields are ignored. Configure the rule as follows:
```json
{
"action": "RING_ANYWAY",
"timeout": 60,
"number": ""
}
```
* **offline\_office\_hours\_forward\_rule**: Specifies the forwarding rule to apply when the user is offline during office hours. It is a JSON object that includes the following keys:
* **action**: Specifies the action to take. Supported values are `FORWARD_TO_NUMBER`, `FORWARD_TO_VOICEMAIL`, and `HANGUP`.
* **timeout**: This field is ignored for the offline forwarding rule.
* **number**: Specifies the destination number when **action** is set to `FORWARD_TO_NUMBER`. This field is ignored when **action** is set to any other value.
For example, to hang up a new incoming call when the user is offline during office hours, set **action** to `HANGUP`. The `timeout` and `number` fields are ignored. Configure the rule as follows:
```json
{
"action": "HANGUP",
"timeout": 60,
"number": ""
}
```
* **offline\_non\_office\_hours\_forward\_rule**: Specifies the forwarding rule to apply when the user is offline outside of office hours. It is a JSON object that includes the following keys:
* **action**: Specifies the action to take. Supported values are `FORWARD_TO_NUMBER`, `FORWARD_TO_VOICEMAIL`, and `HANGUP`.
* **timeout**: This field is ignored for the offline forwarding rule.
* **number**: Specifies the destination number when **action** is set to `FORWARD_TO_NUMBER`. This field is ignored when **action** is set to any other value.
For example, to forward a new incoming call to **123456** when the user is offline outside of office hours, set **action** to `FORWARD_TO_NUMBER` and **number** to `123456`. The `timeout` field is ignored. Configure the rule as follows:
```json
{
"action": "FORWARD_TO_NUMBER",
"timeout": 60,
"number": "123456"
}
```
* **custom\_forward\_rules**: Specifies custom forwarding rules that act as exceptions and override the standard forwarding rules. The rules are defined in JSON format. To leave this field empty, set it to `[]`. Users can also configure their own exception rules through the PortSIP PBX web portal.
* **blfs**: Specifies the BLF (Busy Lamp Field) keys in JSON format. To leave this field empty, set it to `[]`.
* **interface**: Specifies the network interface address used when generating the QR code. The client application uses this address to connect to the PortSIP PBX. The following values are supported:
* **WEB\_DOMAIN**: The client app uses the PortSIP PBX web domain as the outbound proxy server address.
* **PUBLIC\_IPV4**: The client app uses the PortSIP PBX public IPv4 address as the outbound proxy server address.
* **PUBLIC\_IPV6**: The client app uses the PortSIP PBX public IPv6 address as the outbound proxy server address.
* **PRIVATE\_IPV4**: The client app uses the PortSIP PBX private IPv4 address as the outbound proxy server address.
* **PRIVATE\_IPV6**: The client app uses the PortSIP PBX private IPv6 address as the outbound proxy server address.
* **SBC\_DOMAIN**: The client app uses the PortSIP SBC web domain as the outbound proxy server address and registers with the PortSIP PBX through the PortSIP SBC.
* **preferred\_transport**: Specifies the transport protocol for the PortSIP PBX in the QR code. After scanning the QR code, the client app prioritizes the specified transport protocol when registering with the PortSIP PBX. Supported values are `UDP`, `TCP`, and `TLS`.
* **custom\_options**: Reserved for custom options. This field is typically left empty.
* **role**: Specifies the user’s role. Supported values are `StandardUser`, `StandardInternationalUser`, `QueueManager`, and `Admin`.
* **phones**: Specifies the IP phone auto-provisioning settings for the user. It is a JSON object that includes the following keys:
* **mac**: Specifies the MAC address of the IP phone. The MAC address must use lowercase letters and may use either `:` or `-` as the separator. Ensure that the MAC address is not already assigned to another user; otherwise, provisioning will fail.
* **filename**: Specifies the template file used for the IP phone.
* **vendor**: Specifies the IP phone vendor.
* **interface**: Specifies the PortSIP PBX network interface address used as the outbound proxy server in the IP phone configuration. The supported values are the same as those described for **interface** above.
* **preferred\_transport**: Specifies the transport protocol that the IP phone should prioritize when registering with the PortSIP PBX. Supported values are `UDP`, `TCP`, and `TLS`.
* **model**: Specifies the IP phone model.
* **password**: Specifies the password for the IP phone’s web UI.
* **language**: Specifies the display language for the IP phone. Supported values are `ENGLISH`, `CHINESE`, `DUTCH`, `FRENCH`, `GERMAN`, `GREEK`, `ITALIAN`, `JAPANESE`, `POLISH`, `RUSSIAN`, `SPANISH`, `SWEDISH`, `UKRAINIAN`, and `BULGARIAN`.
* **timezone**: Specifies the time zone for the IP phone.
* **transfer**: Specifies the transfer mode used by the IP phone’s transfer key. Supported values are `ATTENDED`, `BLIND`, and `NEW_CALL`.
* **ringtone**: Specifies the ringtone for incoming calls.
* **queue\_ringtone**: Specifies the ringtone for incoming queue calls.
* **date\_format**: Specifies the date format displayed on the IP phone.
* **time\_format**: Specifies the time format displayed on the IP phone.
* **powerled**: Specifies the behavior of the IP phone’s power LED.
* **backlight**: Specifies the backlight setting for the IP phone display.
* **screensaver**: Specifies the screensaver setting for the IP phone.
* **rps**: Indicates whether the auto-provisioning URL is stored on the IP phone vendor’s RPS server. Set this field to `true` to store the URL on the RPS server or `false` not to store it.
* **https**: Indicates whether the auto-provisioning URL uses HTTPS. Set this field to `true` to generate an HTTPS URL or `false` to generate an HTTP URL.
**For v22.x:**
```json
[
{
"mac": "0c:38:3e:63:fe:e8",
"rps": true,
"https": false,
"model": "V62 Pro",
"codecs": [
"PCMU",
"PCMA",
"G729",
"G722"
],
"vendor": "Fanvil",
"filename": "fanvil.ph.xml",
"language": "English",
"password": "63FEE8",
"powerled": "Both (Voicemail and Missed calls)",
"ringtone": "Default",
"timezone": "GMT+8 China(Beijing)",
"transfer": "BLIND",
"backlight": "30 seconds",
"interface": "WEB_DOMAIN",
"pc_port_id": 254,
"date_format": "15 JAN MON",
"enable_lldp": false,
"screensaver": "",
"time_format": "24-hour clock",
"wan_port_id": 256,
"serial_number": "",
"door_password1": "",
"door_password2": "",
"queue_ringtone": "Ring 1",
"pc_port_priority": 0,
"wan_port_priority": 0,
"enable_vlan_pc_port": false,
"preferred_transport": "UDP",
"enable_vlan_wan_port": false
}
]
```
**For v16.x:**
```json
[{
"mac": "cc:5e:f8:41:b7:95",
"filename": "yealinkT3x.ph.xml",
"vendor": "Yealink",
"interface": "PRIVATE_IPV4",
"preferred_transport": "UDP",
"model": "SIP-T32G",
"password": "365894258",
"language": "English",
"timezone": "GMT-5:00 US Eastern Time, New York",
"transfer": "BLIND",
"ringtone": "",
"queue_ringtone": "Ring 1",
"date_format": "",
"time_format": "",
"powerled": "",
"backlight": "",
"screensaver": "",
"rps": false,
"https": false,
"codecs": ["PCMU", "PCMA", "G729", "G722"],
"enable_lldp": false,
"enable_vlan_wan_port": false,
"wan_port_id": 1,
"wan_port_priority": 0,
"enable_vlan_pc_port": false,
"pc_port_id": 1,
"pc_port_priority": 0
}]
```
### Sample CSV File
We provide a sample CSV file for bulk importing and auto-provisioning four users.
* For v22.x: [Sample CSV file](https://www.portsip.com/provision/portsip_bulk_users_v22.csv)
* For v16.x: [Sample CSV file](https://www.portsip.com/provision/portsip_bulk_users.csv)
After downloading the sample CSV file, sign in to the PortSIP PBX Web Portal and navigate to **Call Manager > Users**. Click **Import**, select the sample CSV file, and import it. The users will then be created automatically with the provisioning settings defined in the CSV file.
Please also reference the article [Zero Touch Provisioning Phones](/portsip-communications-solution/portsip-pbx-administration-guide/4-phone-device-management/zero-touch-provisioning-phones).
# Zero Touch Provisioning Phones
### Zero Touch Provisioning (ZTP) Overview
**Zero Touch Provisioning (ZTP)** enables IP phones and devices to **self-configure out of the box**, eliminating the need for manual setup.
When IP phones are shipped directly from the factory, each device has a **unique MAC address**. **PortSIP PBX** uses this MAC address to associate the phone with its **configuration file URL**, which is stored on the **vendor’s Remote Provisioning Server (RPS)**.
Once the phone is plugged in and connected to the internet, it automatically:
* Retrieves the configuration URL from the vendor’s RPS server
* Connects to PortSIP PBX
* Downloads its configuration
* Registers to the PBX without any user interaction
***
### How Zero Touch Provisioning Works
#### Step 1: Order Placement
* The PBX service provider orders IP phones from the vendor or reseller.
* The seller ships the phones directly to end users (for example, via DHL or FedEx).
* The seller provides the **MAC addresses** of the phones to the service provider.
***
#### Step 2: Configuration Setup
* The service provider creates user extension accounts.
* Phone MAC addresses are associated with users by **importing a CSV file**.
* PortSIP PBX automatically writes each phone’s **configuration URL** to the vendor’s **RPS server**.
***
#### Step 3: Automatic Provisioning
* When users receive and connect their IP phones:
* The phone contacts the vendor’s RPS server
* Retrieves its configuration file URL
* Downloads the configuration from PortSIP PBX
* Registers automatically
With ZTP, large-scale IP phone deployments become **fast, reliable, and error-free**.
***
### Prerequisites
In this example, we demonstrate **Zero Touch Provisioning (ZTP)** using **five IP phones of the Fanvil X303 model**.
* Phones are shipped directly to end users
* The MAC addresses are already known
**MAC addresses used in this example:**
* `CC-5E-F8-41-B7-A1`
* `CC-5E-F8-41-B7-A2`
* `CC-5E-F8-41-B7-A3`
* `CC-5E-F8-41-B7-A4`
* `CC-5E-F8-41-B7-A5`
***
### Exporting a Template File
#### Create a User with Phone Provisioning Information
1. Sign in to the **PortSIP PBX Web Portal**.
2. Navigate to **Call Manager > Users** and click **Add**.
3. Enter:
* Username
* Password
* Email
* Extension number
* Extension password
4. Open the **PHONE PROVISIONING** tab.
5. Click **Add Phone** and configure:
* **Phone model:** Fanvil X303
* **MAC address:** `CC-5E-F8-41-B7-A1`
6. Configure the required parameters:
* **Network interface**
* If the PBX is internet-facing, choose **Web Domain** or **Public IPv4**
* If an SBC is deployed, choose the **SBC base domain or IP**
* **Transport protocol** used for SIP registration
7. Ensure **Save to RPS** is enabled.
8. Click **OK** to save the configuration.
***
#### Export the User as a Template File
1. Go to **Call Manager > Users**.
2. Click **Export**.
3. Download the generated **CSV file**, which contains user and phone provisioning data.
***
### Editing the Template File
#### Open the CSV File
* Locate and open the exported CSV file.
* Identify the row corresponding to the user you created.
***
#### Modify Details for Additional Users
For the **second user**, update the following fields:
* Username
* Password
* Extension number
* Extension password
* IP phone MAC address (for example, `CC-5E-F8-41-B7-A2`)
***
#### Add Remaining Users
1. Copy the existing row.
2. Paste it to create rows for the remaining users.
3. Update the following fields for each new user:
* Username
* Password
* Extension number
* Extension password
* IP phone MAC address
> ❗ **Important**\
> Do **not** include the user and MAC address `CC-5E-F8-41-B7-A1`, as it is already configured in the PBX.
***
#### Save the CSV File
* After completing all changes, save the CSV file.
* The file is now ready for import.
Copy users and change the name, password, extension number, extension password, and phone MAC address
> ❗ **Security Recommendation**\
> Although the same password and extension password can be reused, this is **not recommended**.\
> Use **unique credentials** for each user to reduce security risks.
***
### Importing Users with Phone Information
#### Import Users
1. Navigate to **Call Manager > Users**.
2. Click **Import**.
3. Upload the edited CSV file to import users and their phone provisioning data.
***
### Configuration URL Registration
After a successful import:
* PortSIP PBX automatically writes each IP phone’s **configuration URL** to the vendor’s **RPS server**
* No manual interaction with the RPS platform is required
***
### Automatic Phone Provisioning
Once users receive their IP phones and connect them to the internet:
* Phones contact the vendor’s RPS server
* Retrieve their configuration file URLs
* Download the configuration from PortSIP PBX
* Register automatically to the system
This seamless process ensures **fast, consistent, and large-scale deployments** with minimal operational effort.
***
### Additional Reference
For more information, please also refer to: [Bulk Importing Users and Auto Provisioning IP Phones](/portsip-communications-solution/portsip-pbx-administration-guide/4-phone-device-management/bulk-importing-users-and-auto-provisioning-ip-phones).
# Provision Phone Using RPS
> ### ❗ **Warning**
By default, when you provision IP phones and other devices using **RPS**, PortSIP PBX uses **PortSIP’s RPS account** with each supported phone vendor’s RPS service. This means the device’s provisioning information (for example, the configuration URL/link) is stored under the vendor RPS account created for PortSIP.
If you do not want your provisioning information stored under PortSIP’s vendor RPS account, configure and use **your own private RPS account** instead. For instructions, see [Configuring Private RPS Account.](/portsip-communications-solution/portsip-pbx-administration-guide/4-phone-device-management/configuring-private-rps-account)
***
When the PortSIP PBX is deployed in the cloud, IP phones can be auto-provisioned using **RPS** (Redirection and Provisioning Service).
PortSIP PBX supports RPS for the following IP phone vendors:
* [Fanvil](https://support.portsip.com/portsip-communications-solution/portsip-pbx-administration-guide/4-phone-device-management/www.fanvil.com)
* [Yealink](https://support.portsip.com/portsip-communications-solution/portsip-pbx-administration-guide/4-phone-device-management/www.yealink.com)
* [GrandStream](https://www.grandstream.com/)
* [SNOM](https://support.portsip.com/portsip-communications-solution/portsip-pbx-administration-guide/4-phone-device-management/www.snom.com)
* [ALE](https://www.al-enterprise.com/)
* [Htek](https://www.htek.com/)
* [Gigaset](https://www.gigaset.com/)
If you are using an IP phone from one of the vendors listed above, you can provision the phone automatically without manually copying the provisioning link.\
In this deployment scenario, the PnP method is not available, and RPS must be used instead.
***
### Provisioning a Remote Phone Using RPS
> ❗ **Important**: Before using RPS auto provisioning with PortSIP PBX, ensure that the target IP phone has not been previously provisioned by another PBX using RPS.If a phone is already registered in an RPS (Redirect and Provisioning Service) under a different PBX, auto provisioning with PortSIP PBX will fail.
>
> 1. Verify that the phone is not associated with another PBX in the vendor’s RPS system.
> 2. If the phone was previously provisioned by another PBX using RPS, Delete or unbind the phone from the existing RPS configuration in the other PBX.
To provision a remote IP phone via RPS, follow the steps below.
#### Add a New Phone
1. **Open the Phones page**\
In the PortSIP PBX Web Portal, navigate to **Call Manager > Phones**.
2. **Add the phone**\
Click **Add Phone**.
3. **Select the extension**\
Choose the extension that will be associated with the phone.
4. **Enter the MAC address**\
Enter the phone’s **MAC address**, which is usually printed on the label at the bottom of the device.
5. **Select the phone model**\
Choose the appropriate **phone model** from the drop-down list.
6. **Enter phone credentials**\
Enter the password required to access the **IP phone web portal**.
7. **Set language and time zone**\
Select the **Phone Display Language** and **Time Zone**.
8. **Select network interface and transport**
* Choose the **network interface** the phone will use to connect to the PBX.\
Since the PBX is hosted in the cloud, select the **public IP** network interface.
* This typically corresponds to the **Outbound Proxy Server** used by the phone.
* Select the **transport protocol** (**UDP**, **TCP**, or **TLS**).
* Enable **Save to RPS** to store the provisioning link in the phone vendor’s RPS.
* Enable **HTTPS** if the provisioning URL should be generated using HTTPS.
9. **Configure audio codecs**\
Enable or disable **audio codecs** for the phone by toggling the codec options, as shown in the screenshot below.
10. **Save the configuration**\
Click **OK**. The PortSIP PBX saves the provisioning link to the IP phone’s **RPS**.
***
### Restart the IP Phone
When the IP phone powers on or restarts:
* The phone queries the **RPS server** using its **MAC address**
* The RPS server returns the **provisioning URL**
* The phone downloads the configuration file automatically
* The phone applies the settings and registers with the **PortSIP PBX**
***
### Provisioning Completion
After provisioning is complete:
* The phone is **automatically registered** with the PortSIP PBX
* The phone can be fully **managed from the PortSIP PBX Web Portal**
* You can view the registered phone under **Call Manager > Phones**, as shown in the screenshot below
# Provision Phone Using PnP
### Topology Requirements
PnP provisioning requires that:
* The **PortSIP PBX** is running on the **default SIP port (5060)**.
* The **IP phones** are located on the **same local LAN subnet** as the PortSIP PBX.
***
### Auto-Provisioning Phones with Plug and Play
To provision IP phones automatically using **Plug and Play (PnP)**, follow these steps:
1. **Connect the phone**\
Plug the IP phone into the network.
2. **Phone discovery**\
The phone sends a **multicast message** on the local LAN, which is detected by the PortSIP PBX.
3. **Phone detection in the Web Portal**\
The phone appears as a new device under **Call Manager > Phones** in the Web Portal.
4. **Assign an extension**
* Select the phone and click **Assign Extension** to associate it with an existing extension, **or**
* Click **Add Extension** to create a new extension for the phone.
5. **Configure phone settings**\
Navigate to the extension’s **Phone Provisioning** tab and configure additional settings as needed.
6. **Enter phone credentials**\
Enter the password required to access the **IP phone web portal**.
7. **Set language and time zone**\
Select the **Phone Display Language** and **Time Zone** for the phone.
8. **Select network interface and transport**\
Choose the **network interface** the IP phone uses to connect to the PBX.\
This typically corresponds to the **Outbound Proxy Server** used by the phone.
As shown in the screenshot above, you can also select the **transport protocol** (UDP/TCP/TLS) for the phone.
* **Save to RPS** allows the provisioning link to be saved to the phone’s **RPS (Redirect and Provisioning Server)**.
* **HTTPS** determines whether the provisioning URL is generated using HTTPS.
9. **Configure audio codecs**\
Enable or disable **audio codecs** for the phone by toggling the codec options, as shown in the screenshot below.
10. **Apply settings**\
Click **OK** to save the configuration.
***
#### Provisioning Completion
After the configuration is saved:
* The PBX generates a **provisioning URL** for the phone.
* The phone downloads the **configuration file** using the provisioning link.
* The phone applies the settings and **automatically registers** with the **PortSIP PBX**.
Once provisioning is complete, the phone is fully **managed through the PortSIP PBX Web Portal**.\
You can view the registered phone under **Call Manager > Phones**, as shown in the screenshot below.
***
### Provisioning Phones Using the Provisioning Link Manually
Remote IP phones that are not located on the same LAN as the PortSIP PBX—and therefore cannot broadcast SIP multicast messages—must be provisioned manually using a provisioning link.
To provision a remote phone manually, follow these steps:
1. **Add a new phone**
* In the PortSIP PBX Web Portal, navigate to **Call Manager > Phones**.
* Click **Add Phone**.
2. **Select the extension**
* Choose the extension that will be associated with the phone.
3. **Enter the MAC address**
* Enter the phone’s **MAC address**, which can usually be found on the label at the bottom of the device.
4. **Select the phone model**
* Choose the appropriate **phone model** from the drop-down list.
5. **Enter phone credentials**
* Enter the password required to access the **IP phone web portal**.
6. **Set language and time zone**
* Select the **Phone Display Language** and **Time Zone** for the phone.
7. **Select network interface and transport**
* Choose the **network interface** the IP phone uses to connect to the PBX.\
This typically corresponds to the **Outbound Proxy Server** used by the phone.
* Select the **transport protocol** (**UDP**, **TCP**, or **TLS**) as shown in the screenshot above.
* **Save to RPS** allows the provisioning link to be saved to the phone’s **RPS (Redirect and Provisioning Server)**.
* **HTTPS** determines whether the provisioning URL is generated using **HTTPS**.
8. **Configure audio codecs**
* Enable or disable **audio codecs** for the phone by toggling the codec options, as shown in the screenshot below.
9. **Apply settings**
* Click **OK** to save the configuration.
***
#### Provisioning Completion
After the configuration is saved:
* The PBX generates a **provisioning URL** for the phone.
* The phone downloads the **configuration file** using the provisioning link.
* The phone applies the settings and **automatically registers** with the **PortSIP PBX**.
Once provisioning is complete, the phone is fully **managed through the PortSIP PBX Web Portal**.\
You can view the registered phone under **Call Manager > Phones**, as shown in the screenshot below.
# PnP Auto Provisioning IP Phone Multicast Debug
To enable **PortSIP PBX** to answer PnP provisioning requests, **all** of the following requirements must be met:
* The **PortSIP PBX must be able to join the multicast group**
* The **IP phone and PBX must be on the same local LAN subnet**
* The **network switch/router must support multicast**
* The **IP phone must support PnP provisioning**
> ❗ **Important**\
> PnP provisioning relies on **SIP multicast discovery**. If any requirement above is not satisfied, automatic discovery will fail and the phone must be provisioned manually.
***
### PortSIP PBX Must Be Able to Join the Multicast Group
Depending on the **network interface order**, PortSIP PBX may not be able to listen for multicast events.
> ❗ **Important**\
> **Unused LAN adapters, Wi-Fi, and Bluetooth interfaces must be disabled.**\
> These interfaces cannot be used to join multicast events and may prevent the PBX from listening on the correct network interface.
***
#### Verify Multicast Membership on Windows
1. Open the **Command Prompt** as Administrator.
2. Run the following command:
```cmd
netsh interface ipv4 show join
```
3. Verify that the multicast address **224.0.1.75** appears on the correct network interface.
If your interface does **not** list this address, the PBX is **not ready** for PnP provisioning.
***
#### Fix Multicast Issues on Windows (Interface Metric Adjustment)
1. Open **Control Panel > Network and Internet > Network Connections**.
2. Right-click the active network adapter and select **Properties**.
3. Select **Internet Protocol Version 4 (TCP/IPv4)** → **Properties** → **Advanced**.
4. Edit the **Default Gateway Metric** and try the following values **one at a time**:
* `1`
* `10`
* `12`
* `15`
* `20`
5. After each change:
* Reboot the server
* Re-run `netsh interface ipv4 show join`
* Confirm the multicast join appears
***
#### Verify Multicast Membership on Linux
1. Connect to the PBX server via **SSH**.
2. Switch to the root user.
3. Run the following command:
```bash
netstat -g
```
4. Verify that **`sip.mcast.net`** is listed on the active application interfaces.
If it is not listed, the PBX is not receiving multicast traffic and cannot support PnP discovery.
***
### IP Phone and PBX Must Be in the Same Local LAN Subnet
PnP provisioning **requires multicast message exchange**, which does **not** cross subnets.
#### Supported Example (Will Work)
* PBX: `192.168.1.1` / `255.255.255.0`
* Phone: `192.168.1.28` / `255.255.255.0`
#### Unsupported Example (Will Not Work)
* PBX: `192.168.0.1` / `255.255.255.0`
* Phone: `192.168.1.28` / `255.255.255.0` *(different subnet)*
> ❗ **Important**\
> VLANs, routed networks, or NAT boundaries will prevent multicast discovery.\
> Phones in these environments must be provisioned using **manual provisioning links**.
***
### Network Infrastructure Must Support Multicast
* Switches and routers must allow **multicast traffic**
* IGMP snooping or multicast filtering must be configured correctly
* Multicast must not be blocked by firewall rules
> ❗ **Best Practice**\
> In enterprise environments, verify multicast behavior with your network team before deploying PnP at scale.
***
### IP Phone Must Support PnP Provisioning
The IP phone firmware must support **PnP multicast announcements**.
> ❗ **Important**\
> Some older phone firmware versions do not fully implement PnP discovery.\
> If discovery fails and all other requirements are met, **upgrade the phone to the latest supported firmware** and retry.
***
### Summary
For successful PnP provisioning:
* The PBX must correctly **join the multicast group**
* Phones and PBX must share the **same LAN subnet**
* The network must **permit multicast traffic**
* IP phones must support **PnP and run compatible firmware**
When these conditions are met, IP phones will be discovered automatically and can be provisioned quickly through the **PortSIP PBX Web Portal**.
# Provision Phone Using DHCP Option 66
### What Is DHCP Option 66?
For most environments, **RPS (Redirection and Provisioning Service)** is the simplest way to provision IP phones. However, in scenarios where:
* Internet access is blocked for phones
* Legacy phones are in use
* A large number of phones must be provisioned on a local network
**DHCP Option 66** provides an effective alternative.
> (Despite the name, DHCP Option 66 has nothing to do with the famous Route 66.)
**DHCP Option 66** is a configuration option on a DHCP server that allows you to specify a **provisioning server URL** for devices. In the case of PortSIP PBX, Option 66 is set to the **provisioning root URL** of the PBX.
#### Provisioning Flow with Option 66
The provisioning process works as follows:
1. The phone boots up
2. The phone requests an IP address from the DHCP server
3. The DHCP server returns:
* An IP address
* **DHCP Option 66**, containing the provisioning URL
4. The phone uses this URL to download its configuration file from **PortSIP PBX**, based on its MAC address
***
### Copying the Provisioning Link
> ⚠️ **Security Note**\
> For security reasons, you must **disable Auto-Provisioning Security Enhancement** before provisioning phones using DHCP Option 66.\
> Refer to the article "[**DHCP Option 66 and Auto-Provisioning in PortSIP PBX**](/portsip-communications-solution/portsip-pbx-administration-guide/4-phone-device-management/auto-provisioning-security#dhcp-option-66-and-auto-provisioning-in-portsip-pbx)**"** for details.
Each PortSIP PBX installation uses a **unique provisioning URL**. To obtain it:
1. Sign in to the **PBX Web Portal**
2. Navigate to **Call Manager > Phones**
3. Select a phone and click **Edit**
4. Open the **Phone Provisioning** tab
5. Configure the phone and click **OK**
6. Reopen the **Phone Provisioning** tab
If the phone is successfully configured, the **Provisioning Link** appears at the top of the page (see screenshot below).
***
#### Determining the Provisioning Root Folder
The provisioning link includes a **randomly generated folder name** for security.
**Example:**
```http
http://pbx.portsip.com:8888/provision/R2Xu8aVV20Jka/
```
* `pbx.portsip.com` – Your PBX FQDN
* `R2Xu8aVV20Jka` – Random provisioning folder name
This **root folder URL** should be used for **DHCP Option 66**, unless you are using **SNOM phones**.
***
#### Special Note for SNOM Phones
* If your **PortSIP PBX version is earlier than v16.2**, append `cfg{mac}` to the URL:
```
http://pbx.portsip.com:8888/provision/R2Xu8aVV20Jka/cfg{mac}
```
* If your **PortSIP PBX version is v16.2 or later**, this step is **not required**.
***
### Configuring DHCP Option 66
The example below uses a **Microsoft DHCP Server**, but the concept applies to all DHCP servers.
#### DHCP Scope Options
You can configure Option 66 at different scope levels:
* **Global Scope**\
Applies to all DHCP clients
* **Reservation Scope**\
Applies only to devices matching a specific MAC address
* **Dynamic Scope**\
Uses the Vendor Class Identifier (VCI)
#### Best Practice
* If all phones use the **same provisioning format** (Yealink, Fanvil, Grandstream, Dinstar, ALE, Htek), use a **Global Scope**
* If you also have **SNOM phones**, create **separate reservations** for them, as they require a different URL format
***
#### Steps to Configure Option 66 (Microsoft DHCP Server)
1. Open the **DHCP Server** management console
2. Navigate to **IPv4 > Scope > Scope Options**
3. Right-click and select **Configure Options…**
4. Locate **Option 66 – Boot Server Host Name**
5. Paste the **PortSIP provisioning root URL**
6. Click **OK**
7. Restart the **DHCP Server**
***
### Restart the IP Phones
After configuring DHCP Option 66:
1. Restart the IP phone
2. The phone requests a new IP address
3. The DHCP server supplies Option 66
4. The phone downloads its configuration from PortSIP PBX
5. The phone applies the settings and registers automatically
Once complete, the phone is fully provisioned and ready for use.
# Provision Phone Using TFTP
### What Is TFTP?
**TFTP (Trivial File Transfer Protocol)** is a lightweight file transfer protocol that operates over **UDP port 69**. It is primarily used for **automated file transfers** between devices on a local network.
In a **VoIP environment**, TFTP is commonly used to upload or download **firmware files**, configuration files, and other resources for devices such as:
* IP Phones
* VoIP Gateways
* Routers and other network hardware
***
### Installing a TFTP Server
There are many free and open-source TFTP server applications available, such as:
* **PumpKIN**
Download and install a TFTP server of your choice according to your operating system and requirements.
***
### Configuring PumpKIN
To configure PumpKIN as a TFTP server:
1. Launch PumpKIN.
2. From the PumpKIN menu, navigate to:\
**Options > Server > TFTP file system root**
3. Set the TFTP root directory to the **PortSIP PBX provisioning folder**.\
By default, this path is:
```
C:\ProgramData\PortSIP\pbx\provision\R2Xu8aVV20Jka
```
> `R2Xu8aVV20Jka` is a **randomly generated provisioning folder name** created by PortSIP PBX.
This directory is used to **store files that devices upload to or download from the PBX via TFTP**.
4. Configure additional options as needed, such as:
* **Read and Write Request Behavior** (for prompting before file uploads or downloads)
* **Network port**
* **Timeout values**
With the TFTP server installed, you can now begin updating IP phones, gateways, and routers as required.
> ⚠️ **Security Note**\
> For security reasons, you must **disable Auto-Provisioning Security Enhancement** before provisioning phones using TFP as well.\
> Refer to the article "[**DHCP Option 66 and Auto-Provisioning in PortSIP PBX**](/portsip-communications-solution/portsip-pbx-administration-guide/4-phone-device-management/auto-provisioning-security#dhcp-option-66-and-auto-provisioning-in-portsip-pbx)**"** for details.
# Provisioning Cisco 79xx IP Phones
### Legacy IP Phone Support
PortSIP PBX provides **legacy IP phone support** to simplify migration from an existing PBX system without requiring you to replace all deployed devices.
> **Important Recommendation**\
> Legacy phone support is intended **only for migration purposes**.\
> It is **strongly recommended not to purchase these legacy models as new devices or as replacements**.
***
### Supported Legacy Phone Models and Firmware
The following legacy Cisco IP phones have been tested with PortSIP PBX using the firmware versions listed below:
* **Cisco 7940** – SIP Firmware **8.5.4s**
* **Cisco 7941** – SIP Firmware **8.5.4s**
* **Cisco 7960** – SIP Firmware **8.5.4s**
* **Cisco 7961** – SIP Firmware **8.5.4s**
> **Note**\
> Other firmware versions *may* work with PortSIP PBX, but they have not been officially tested.
***
### Download Firmware and Copy to the Provisioning Directory
You must ensure that the IP phones are running the supported firmware version.\
If the required firmware is not installed, manually upgrade the phone firmware before proceeding.
#### To update the firmware:
1. Download the appropriate **Cisco SIP firmware package**.
2. Locate the **PortSIP PBX provisioning directory**.\
By default, it is located at:
```
C:\ProgramData\PortSIP\pbx\provision\R2Xu8aVV20Jka
```
> `R2Xu8aVV20Jka` is a **randomly generated provisioning folder name** and may differ in your environment.
3. Extract and copy **all contents of the firmware ZIP package** into this provisioning directory.
This firmware bundle will:
* Convert the phone to **SIP mode**
* Upgrade the phone firmware to **version 8.5.4s**
***
### Configure the TFTP Server
To allow the phones to download firmware and configuration files, you must configure a **TFTP server**.
Refer to the following guide for detailed instructions:
* [Configure a TFTP server for PortSIP PBX](/portsip-communications-solution/portsip-pbx-administration-guide/4-phone-device-management/provision-phone-using-tftp)
***
### Factory Reset the IP Phone
Before provisioning, reset the IP phone to factory defaults to remove any residual configuration from a previous PBX system.
#### To factory reset the phone:
1. Power off the device.
2. Press and hold the **`#`** key.
3. While holding **`#`**, power on the device.
4. Continue holding **`#`** until the **line keys flash orange**.
5. While the keys are flashing, press the following keys **in sequence**:
```
1 2 3 4 5 6 7 8 9 * 0 #
```
6. Release the keys and allow the phone to restart.
After the reboot completes, the phone is restored to **factory default settings**.
***
### Configure the Phone in PortSIP PBX
Follow the steps below to configure an IP phone in **PortSIP PBX**.
#### To configure the phone:
1. Sign in to the PortSIP PBX Web Portal.
2. Navigate to **Call Manager > Phones**.
3. Click **Add Phone**.
4. From the **Extension** list, select the extension to which the IP phone will be assigned.
5. Click **OK**.
***
#### Enter Phone Details
6. When prompted, select the **phone model**.
7. Enter the **MAC address** of the IP phone.
8. Click **OK**.
***
#### Configure Optional Settings
9. (Optional) Configure additional phone settings as needed, such as:
* **Time Zone**
* **Phone Web Page Password**
* **Phone Display Language**
* **Codecs**
10. Click **OK** to apply the settings.
***
#### Obtain the Provisioning Link
11. Edit the extension you just configured.
12. Open the **Phone Provisioning** tab.
13. Copy the **Provisioning Link**.
***
### Set the Provisioning Link Using DHCP Option 66
Now the phone needs to know where to pick up the firmware files and configuration information. The only way to do this is to set up **option 66** in your DHCP server.
Follow this guide to [configure your DHCP 66 server](/portsip-communications-solution/portsip-pbx-administration-guide/4-phone-device-management/provision-phone-using-dhcp-option-66) and paste the IP address of the provisioning link that you copied in the previous step. Now your phone will be provisioned automatically.
# Provision Fanvil DECT IP Phones
### Supported Fanvil DECT IP Phone Models
This guide applies to the following **Fanvil DECT models**:
* **W710D**
* **W710H**
***
### Factory Reset the Fanvil DECT System
It is recommended to factory reset the DECT system before provisioning or upgrading firmware.
#### Reset Using the Hardware Button
1. Press and hold the **Reset** button on the device for **at least 10 seconds**.
2. Release the button.
3. The device will reset and reboot automatically.
***
#### Reset via Web Interface (Alternative Method)
You can also perform a factory reset from the web interface:
1. Sign in to the **Fanvil DECT Manager** web portal.
2. Navigate to **System > Configurations > Reset Devices > Reset**.
3. Click **Reset to Factory Settings**.
***
### Upgrade the DECT Base and Handsets to the Latest Firmware
Before provisioning with PortSIP PBX, ensure that both the **DECT base station** and **handsets** are running the **latest supported firmware**.
***
#### Download the Firmware
1. Visit the **official Fanvil website**.
2. Go to **Software**.
3. Select your **Fanvil DECT model**.
4. Download the latest **firmware image file**.
***
#### Upgrade the DECT Base Station Firmware
1. Open a web browser and sign in to the **Fanvil DECT Manager** web interface.
2. Navigate to **System > Upgrade > Software Upgrade > System Image File**.
3. Click **Select**, choose the downloaded firmware image file, then click **Upload**.
4. Wait for the upgrade process to complete. The device may reboot automatically.
***
#### Multiple Base Stations (W710H)
If you are using **Fanvil W710H**:
* Repeat the firmware upgrade process for **each base station** connected to the DECT Manager.
***
#### Upgrade Handset Firmware
Handset firmware can be upgraded using the **same procedure**:
1. Navigate to **System > Upgrade > Software Upgrade > System Image File**.
2. Upload the handset firmware image.
3. Start the upgrade process and allow the handset to reboot if prompted.
> ❗**Important**\
> Before performing the upgrade, ensure the handset is placed in the **charging cradle** and the battery level is **above 50%**.
***
### Add a DECT Phone in PortSIP PBX
Follow the steps below to add a **DECT phone** to **PortSIP PBX**.
#### To add a DECT phone:
1. Sign in to the PortSIP PBX Web Portal.
2. Navigate to **Call Manager > DECT Phones**.
3. Click **Add**.\
The **Add DECT Phone** window appears.
4. Select the **phone model** and enter the **MAC address** of the DECT base station.
5. Click **OK**.
6. Enter a **descriptive name** for the DECT phone to help identify it easily.
7. In the **Network** field, select the **network interface** the DECT phone will use.
8. In the **Country/Region** field, select the appropriate **country and region**.
> The selected country/region **must match the configuration of the DECT base station**.
9. Select the **transport protocol** the phone will use to send and receive SIP signaling with the PBX (for example, **UDP**, **TCP**, or **TLS**).
10. If your PBX is deployed in the cloud, enable **Save to RPS**.
***
### Assign Users to Handsets
After adding the DECT phone, you need to assign users to the handsets.
#### To assign users to handsets:
1. Click the **Users** tab.
2. For each handset, select the **user(s)** you want to assign.
***
### Auto-Provision Handsets via RPS
If your PortSIP PBX is deployed in the **cloud** and you enabled **Save to RPS** when configuring the DECT phone in the previous steps, handset provisioning is performed automatically.
With **Save to RPS** enabled:
* The DECT base station downloads its **configuration file** from the vendor’s **Remote Provisioning Server (RPS)**.
* The base station automatically provisions all associated **handsets**.
* All handsets registered to this DECT base station are **automatically registered with PortSIP PBX**, without manual configuration.
***
### Manually Provision Handsets
If your PortSIP PBX is deployed **on-premises without Internet access**, or if you **disabled the Save to RPS option**, you must provision the DECT handsets manually.
#### To manually provision handsets:
1. Sign in to the PortSIP PBX Web Portal.
2. Navigate to **Call Manager > DECT Phones**.
3. **Double-click** the DECT phone you want to provision.
4. **Copy the provisioning URL**.
***
#### Configure the DECT Base Station
5. Open a web browser and enter the **IP address of the DECT base station**.
6. Sign in to the DECT base station web interface.
7. Navigate to **System > Auto Provision > Static Provisioning Server**.
8. Configure the following fields:
* **Server Address**: Paste the copied **provisioning URL**
* **Configuration File Name**: Enter
```
{mac}.cfg
```
9. Click **Apply** to save the settings.
10. Click **Auto Provision Now** to start the provisioning process.
***
### Pair the Handset with the DECT Base Station
Follow the steps below to pair a handset with the DECT base station.
#### Step 1: Open the DECT Base Station Web Interface
1. Open a web browser.
2. Enter the **IP address of the DECT base station** to access its web interface.
***
#### Step 2: Add the Handset on the Base Station
1. In the web interface, navigate to **Handset > Maintenance**.
2. Click **Add**.
3. Enter the following handset details:
* **IPUI** of the handset
* A **friendly name** to identify the handset
4. Select the corresponding **extension number** for the handset.
5. Click **Confirm** to save the settings.
***
#### Step 3: Verify Country and Region Settings
Ensure that the **Country/Region** selected for the handset (for example, **W601D**) matches the configuration of the DECT base station.
> **Important**\
> If the country or region setting is changed, the system will **restart automatically**.
***
#### Step 4: Connect the Handset to the Base Station
1. On the handset, navigate to **Menu > Networks > Available Networks**.
2. Tap **Scan** to search for available DECT networks.
3. Select the target **base station** from the list.
4. Enter the **password**, then tap **Confirm** to complete the pairing.
# Provision Yealink DECT IP Phones
### Supported Yealink DECT IP Phone Models
This guide applies to the following **Yealink DECT IP phone models**:
* **W60B**
* **W70B**
* **W80B / DM**
* **W90B / DM**
***
### Factory Reset the Yealink DECT System
It is recommended to factory reset the DECT system before provisioning or firmware upgrades.
#### Reset the Yealink DECT Base Station
1. Press and hold the **Reset** button on the base station for **at least 20 seconds**.
2. Release the button.
3. The base station will reset and reboot automatically.
***
#### Reset via Web Interface (Alternative Method)
You can also reset the base station from the web interface:
1. Sign in to the **Yealink DECT Manager** or base station web UI.
2. Navigate to **Settings > Upgrade > Select and Upgrade Firmware**.
3. Click **Reset to Factory Settings**.
***
### Upgrade the Yealink DECT Base and Handsets to the Latest Firmware
Before provisioning Yealink DECT devices with PortSIP PBX, ensure that **both the DECT base station and all handsets** are running the **latest supported firmware**.
#### Download the Firmware
1. Visit the [official Yealink website](https://www.yealink.com/en/solution-detail/resource-for-3cx).
2. Navigate to **Support > Download > Software**.
3. Select your **Yealink DECT model**.
4. Download the latest **firmware image file**.
***
#### Upgrade the DECT Base Station Firmware
1. Open a web browser and sign in to the **Yealink DECT Manager** or base station web interface.
2. Navigate to **Settings > Upgrade > Select and Upgrade Firmware**.
3. Click **Browse**, select the downloaded firmware file, and then click **Upgrade**.
4. Wait for the upgrade to complete. The base station may reboot automatically.
***
#### Multiple Base Stations (W80B / W90B)
If you are using a **W80B or W90B multi-cell DECT system**:
* Repeat the firmware upgrade process for **each base station** connected to the DECT Manager.
***
#### Upgrade Yealink Handset Firmware
> ❗**Important**\
> Before performing the upgrade, ensure the handset is placed in the **charging cradle** and the battery level is **above 50%**.
Handset firmware can be upgraded using the same workflow:
1. Navigate to **Settings > Upgrade > Select and Upgrade Firmware**.
2. Upload the handset firmware image.
3. Start the upgrade process.
4. Allow the handset to reboot if prompted
***
> ❗**Important**\
> Do **not** power off, reset, or disconnect the DECT base station or handsets during the firmware upgrade.\
> Interrupting the upgrade process may cause permanent device failure
***
### Add a DECT Phone in PortSIP PBX
Follow the steps below to add a **DECT phone** to **PortSIP PBX**.
#### To add a DECT phone:
1. Sign in to the **PortSIP PBX Web Portal**.
2. Navigate to **Call Manager > DECT Phones**.
3. Click **Add**.\
The **Add DECT Phone** window appears.
4. Select the **phone model** and enter the **MAC address** of the DECT base station.
5. Click **OK**.
6. Enter a **descriptive name** for the DECT phone to help identify it easily.
7. In the **Network** field, select the **network interface** that the DECT phone will use.
8. Select the **transport protocol** the phone will use to send and receive SIP signaling with the PBX (for example, **UDP**, **TCP**, or **TLS**).
9. If your PBX has **Internet access**, enable **Save to RPS**.
***
### Assign Users to Handsets
After adding the DECT phone, you need to assign users to the handsets.
#### To assign users to handsets:
1. Open the **Users** tab.
2. For each handset, select the **user(s)** you want to assign.
***
### Auto-Provision Handsets via RPS
If your PortSIP PBX is deployed in the **cloud** and you enabled **Save to RPS** when configuring the DECT phone, the provisioning process is fully automatic.
With this option enabled:
* The DECT base station automatically downloads its **configuration file** from the vendor’s **Remote Provisioning Server (RPS)**.
* The DECT base station provisions all associated **handsets**.
* The handsets are automatically **registered to the PortSIP PBX** without manual intervention.
***
### Manually Provision Handsets
If your PortSIP PBX is deployed **on-premises without Internet access**, or if you **disabled the Save to RPS option**, you must provision the DECT handsets manually.
#### To manually provision handsets:
1. Sign in to the PortSIP PBX Web Portal.
2. Navigate to **Call Manager > DECT Phones**.
3. **Double-click** the DECT phone you want to provision.
4. Copy the provisioning URL.
***
#### Configure the DECT Base Station
5. Open a web browser and enter the **IP address of the DECT base station**.
6. Log in to the DECT base station web interface.
7. Navigate to **Settings > Auto Provision**.
8. In the **Server URL** field, paste the **provisioning URL** you copied.
9. Click **Confirm** to save the settings.
10. Click **Auto Provision Now** to start the provisioning process.
***
### Yealink W80 / W90 Only
> ❗**Applies to:** **Yealink W80 and W90 DECT Manager systems only**\
> If you are **not** using a W80 or W90 system, **skip this section**.
***
#### Step 1: Configure the Base Station
1. Open a web browser and enter the **IP address of the Yealink Base Station**.
2. Sign in to the Base Station web interface.
3. Navigate to **Base Mode**.
4. In the **DECT Manager IP Address** field, enter the **IP address of the DECT Manager**.
5. Click **Confirm** to save the settings.
***
#### Step 2: Register the Base Station on the DECT Manager
1. Open a web browser and enter the **IP address of the Yealink DECT Manager**.
2. Sign in to the DECT Manager web interface.
3. Navigate to **Base Station Registration**.
4. Locate the base station you want to associate with the DECT Manager.
5. Click **Register** next to the base station, then click **OK** to confirm.
***
#### Step 3: Verify Base Station Status
1. Navigate to **Base Station Settings**.
2. Confirm that the base station status is shown as **Active** and **Synced**.
***
### Register Yealink Handsets and Assign Users
After assigning users in PortSIP PBX, register the Yealink handsets and associate them with the corresponding extensions.
#### To register handsets and assign users:
1. Open a web browser and enter the **IP address of the Yealink DECT device** (DECT Manager or base station).
2. Sign in to the web interface.
3. Navigate to **Handset & Account > Handset Registration**.
You will see a list of **extension users** that were assigned in the previous step ([Assign Users to the Handsets](#assign-users-to-handsets)).
4. Click the **Edit** icon next to the extension you want to configure.
***
#### Register the Handset
5. Click **Start Register Handset**.
6. On the handset, do one of the following:
* Press the **Reg.** softkey (Easy Pairing), or
* Navigate to **Settings > Registration > Base 1**.
7. From the scan results, select the **DECT base station**.
8. When prompted, enter the **PIN `0000`**, then confirm.
***
#### Repeat for Additional Users
Repeat the steps above for each extension you want to assign to a handset.
# Provision Snom DECT IP Phones
### Supported Snom DECT Models
This guide applies to the following SNOM DECT base stations:
* **M300**
* **M400**
* **M500**
* **M700**
* **M900**
***
### Factory Reset the Snom DECT System
Before provisioning, it is recommended to reset both the **base station** and **handsets** to factory defaults.
***
#### Reset the Snom DECT Base Station
*(M300, M400, M500, M700, M900)*
1. Press and hold the **Reset** button on the base station for **at least 10 seconds**.
2. Release the button and allow the base station to restart.
After the restart, the base station is restored to factory default settings.
***
#### Reset Snom DECT Handsets
*(M25, M65, M70, M80, M85, M90)*
1. Press the **Menu** key on the handset.
2. Navigate to **Settings > Reset settings**.
3. Select **Yes** to confirm.
4. Enter the PIN **0000**, then press **OK**.
5. Wait for the handset to restart.
After the restart, the handset is successfully reset to factory defaults.
***
### Upgrade the Base Station Firmware
Before provisioning your SNOM DECT system with PortSIP PBX, ensure the base station is running the **latest required firmware**.
#### Check and Update Firmware
1. Open a web browser and navigate to the **IP address of the DECT base station**.
2. Log in using the default credentials:
* **Username:** `admin`
* **Password:** `admin`
3. Go to **Home / Status > Firmware Version**.
4. Compare the **Version** and **Branch** with the latest firmware available on the SNOM support website.
5. Navigate to **Firmware Update** and enter the following:
* **Firmware update server address:**\
`http://dect.snom.com`
* **Required Version:**\
Enter the latest firmware version provided by SNOM.
* **Required Branch:**\
Enter the required branch for your model.
> **Example**\
> At the time this guide was written, the latest firmware for the **M900** base station was:
>
> * Version: **670**
> * Branch: **202**
6. Click **Save / Start Update**.
***
#### Firmware Upgrade Process
* The firmware upgrade will begin after a short delay.
* During the upgrade, the **LED on the base station will flash red**, indicating that the update is in progress.
***
> ❗**Important**\
> The firmware upgrade process may take several minutes.\
> **Do not power off, restart, or interrupt** the base station during the upgrade.
***
### Troubleshooting
If you encounter any issues during the firmware upgrade:
* Refer to the **SNOM user guide troubleshooting section**, or
* Contact **SNOM technical support** or your **PortSIP support representative** for assistance.
Here are also the SNOM official guides:
* [How to update M300,M700,M900 DECT Base Station manually](https://service.snom.com/display/wiki/How+to+update+M300%2CM400%2CM700%2CM900+DECT+Base+Station+manually)
* [How to update M-Series - DECT handsets](https://service.snom.com/display/wiki/How+to+update+M-Series+-+DECT+handsets)
***
### Add a DECT Phone in PortSIP PBX
Follow the steps below to add an **SNOM DECT phone** to the **PortSIP PBX**.
#### To add a DECT phone:
1. Sign in to the PortSIP PBX Web Portal.
2. Navigate to **Call Manager > DECT Phones**.
3. Click **Add**.\
The **Add DECT Phone** window appears.
4. Select the **phone model** and enter the **MAC address** of the DECT base station.
5. Click **OK**.
6. Enter a **descriptive name** for the DECT phone to help identify it easily.
7. In the **Network** field, select the **network interface** that the DECT phone will use.
8. Select the **transport protocol** the phone will use to send and receive SIP signaling with the PBX (for example, UDP, TCP, or TLS).
***
### Assign Users to Handsets
After adding the DECT phone, assign users to the handsets to enable calling and user-specific behavior.
#### To assign users to handsets:
1. Open the **Users** tab.
2. For each handset, select the **user(s)** you want to assign.
3. (Optional) To restrict a user to a specific handset, enter the handset’s **IPUI/IPEI** in the corresponding field.
* Leave this field **blank** if you do not want to apply any handset restriction.
4. Click **OK** to save the settings.
> ❗**Important**\
> Verify the **IPUI/IPEI** values carefully before saving. Entering an incorrect value may prevent the user from registering or receiving calls.
***
### Remove IPUI/IPEI Restriction for a User
If you need to remove a handset restriction for a user, you can clear the assigned IPUI/IPEI.
#### To remove the IPUI/IPEI restriction:
1. Locate the user’s **IPUI/IPEI** field.
2. Enter **`FFFFFFFFFF`** in the IPUI/IPEI field.
3. Save your changes.
***
### Enter the Provisioning URL in the DECT Web UI
After configuring the DECT phone in PortSIP PBX, you must enter the **provisioning URL** in the DECT base station’s web interface to provision the handsets.
#### Step 1: Copy the Provisioning URL from PortSIP PBX
1. Sign in to the PortSIP PBX Web Portal.
2. Navigate to **Call Manager > DECT Phones**.
3. Double-click the desired **DECT phone** to open its settings.
4. Copy the **Provisioning URL**.
***
#### Step 2: Configure the DECT Base Station
1. Open a web browser and enter the **IP address of the DECT base station**.
2. Log in to the DECT web interface.
3. Navigate to **Management > Configuration > Configuration Server Address Settings**.
4. Paste the copied **Provisioning URL** into the appropriate field.
5. Click **Save and Reboot**.
***
### Register Snom Handsets and Assign Users
After completing the configuration, register the SNOM handsets with the DECT base station and assign them to users.\
Register the handsets **in the same numerical order** used during the configuration process.
#### To register a handset and assign a user:
1. On the handset, press the **Menu** button.\
*(For the M25 handset, press the **center button** of the navigation circle.)*
2. Navigate to **Connectivity**, then press the **center button** to select it.
3. Select **Register**.
4. When prompted for the **Access Code**, enter **0000**, then press **OK**.
5. Wait for the registration process to complete.
Once registration is successful, the handset is **automatically assigned** to the corresponding user.
#### Repeat for Additional Handsets
Repeat the steps above for each handset you want to register with the base station.
***
### Upgrade Snom Handset Firmware
To upgrade a SNOM handset’s firmware, the handset must already be **paired with the DECT base station** and **registered as an extension**.\
This procedure can be performed **only after**:
* The DECT base station has been upgraded to the required firmware
* The base station has been provisioned by PortSIP PBX
* The handsets have been successfully registered (paired)
> ❗**Important**\
> Before performing the upgrade, ensure the handset is placed in the **charging cradle** and the battery level is **above 50%**.
***
### Check the Current Handset Firmware Version
1. On the handset, press the **Menu** key.
2. Navigate to **Settings > Status > Handset status**.
3. Locate the **SW version**, which indicates the current handset firmware version.
***
### Upgrade the Handset Firmware
1. Open a web browser and enter the **IP address of the DECT base station**.
2. Log in to the web interface:
* **Username:** `admin`
* **Password:** The password you configured when [adding the DECT phone to PortSIP PBX](#add-a-dect-phone-in-portsip-pbx)
3. Navigate to the **Firmware Update** tab.
4. In the **Firmware update server address** field, enter: [http://dect.snom.com](http://dect.snom.com/)
5. Verify that the handset model appears in the **Type** field\
(for example, **M70**).
6. Enter the required firmware information:
* **Required Version:** `670`
* **Required Branch:** `201` *(or the latest branch available for your handset model)*
7. Click **Start Update**.
* The firmware update will begin shortly after you start the process.
* The handset may reboot automatically during the upgrade.
> ❗**Important**\
> Do not power off, reset, or disconnect the DECT base station or handset while the firmware upgrade is in progress. Interrupting the process may cause the handset to become unusable.
# Provision Gigaset DECT IP Phones
### Supported Gigaset DECT IP Phone Models
This guide applies to the following models:
* **N610**
* **N670**
* **N770**
* **N870**
> ❗ Note
>
> For the **N610** and **N670**, this guide applies **only to the “Regular” role** and **does not cover the “Internal Telephony” role**.
***
### Enable DHCP All-in-One Mode
1. Press and hold the **base station button** for **10 seconds** until the LED turns off.
2. When the **green LED** turns on, the device is in **DECT Base** mode.
3. Press the base station button again until **both LEDs turn blue**, indicating **Integrator / DECT Manager and Base** mode.
4. Press and hold the base station button for **5 seconds** to confirm the new mode.
5. The device may take up to **5 minutes** to reboot and come online in **Integrator / DECT Manager and Base** mode with **factory default settings**.
6. After the reboot, the base station LEDs will display **different colors** to indicate the current operating status.
***
### Upgrade to the Required Firmware
Download the latest supported firmware version and install it using the steps below:
1. Enter the **IP address of the device** in your web browser.
2. In **Settings**, navigate to **System > Firmware**.
3. Click **Browse** and select the downloaded firmware file.
4. Click **Upload**, check the **Immediate** option, and then click **Set** to start the firmware upgrade.
***
### Configure the PBX in PortSIP Web Portal
1. Obtain the **MAC address** of the device.
2. In **PortSIP Tenant Management**, navigate to **Call Manager > DECT Phones**.
3. Click **Add**.
4. Select the appropriate **model**, enter the **MAC address**, and click **OK**.
5. Go to the **Users** menu and select the **extension** to bind to the device.
6. Copy the displayed **Provisioning URL** for later use.
***
### Configure the Device Using the Web Interface
1. Enter the **device IP address** in your web browser.
2. In **Settings**, navigate to **System > Provisioning and Configuration**.
3. In the **Provisioning Server** field, paste the **Provisioning URL** copied earlier.
4. Click **Set**, then click **Start auto configuration**.
***
### Register the DECT Handsets
1. Enter the **device IP address** in your web browser and navigate to **Mobile Devices > Administration**.
2. Click **Edit**.
3. Set the **RegStatus** field to **To register**, then click **Register now**.
4. Navigate to **Mobile Devices > Registration Centre**, then click **Start now**.
5. Press the **Register** button on the handset and enter the **PIN code**\
(default: **0000**) to complete handset registration.
# Provisioning Avaya J Series Using DHCP Option 242
This guide explains how to provision an Avaya J-Series IP phone with PortSIP PBX by using **DHCP Option 242** to provide the phone with the required provisioning server information.
The procedure includes the following steps:
1. Configure the Avaya phone for a PortSIP PBX extension.
2. Add DHCP Option 242 to the DHCP server.
3. Create a DHCP reservation for the phone and configure its provisioning parameters.
4. Reset the Avaya phone to factory defaults so that it retrieves the new DHCP and provisioning configuration.
### Version Requirements
Before you begin, ensure that your environment meets the following minimum version requirements:
| Component | Minimum Version |
| ----------------------------- | --------------- |
| PortSIP PBX | v22.6.1 |
| Avaya J-Series phone firmware | 4.1.11.0.9 |
> **Important**
>
> Upgrade PortSIP PBX and the Avaya J-Series phone firmware to the minimum versions listed above or later before following this guide.
***
### Prerequisites
Ensure that the Avaya phone can reach both the DHCP server and the PortSIP PBX provisioning service over the network.
***
### Step 1: Configure the Phone for an Extension
First, assign the Avaya phone to an extension in PortSIP PBX.
1. Sign in to the PortSIP PBX Web Portal.
2. Edit the extension that will use the Avaya phone. In this example, the extension is **1001**.
3. Navigate to the **Phone Configuration** tab, and click **Add**.
4. Select **Avaya J179** as the phone model.
5. Enter the phone's MAC address in the **MAC** field.
6. Complete the remaining phone configuration settings as required, and click **Save**.
7. Copy and note the generated provisioning configuration path. You will need this path later when [configuring DHCP Option 242](#configure-dhcp-option-242-for-the-reservation).
***
### Step 2: Add DHCP Option 242
Avaya phones use **DHCP Option 242** to obtain provisioning server information. Before configuring the option for a phone, add Option 242 as a predefined option on the DHCP server.
#### Add DHCP Option 242 as a Predefined Option
1. Open the DHCP management console.
2. Right-click **IPv4**, and select **Set Predefined Options**.
3. Click **Add**.
4. Configure the new option with the following values:
| Field | Value |
| --------------- | -------------------- |
| **Name** | `Option 242` |
| **Data Type** | `String` |
| **Code** | `242` |
| **Description** | `Avaya provisioning` |
5. Click **OK** to create DHCP Option 242.
***
### Step 3: Create a DHCP Reservation
Create a DHCP reservation for the Avaya phone so that its provisioning parameters can be configured specifically for that device.
#### Create the Reservation
1. In the DHCP management console, right-click **Reservations**, and select **New Reservation**.
2. Enter the reservation details for the phone. For example:
| Field | Example Value |
| -------------------- | ------------------------- |
| **Reservation Name** | `Avaya J179` |
| **IP Address** | `192.168.2.210` |
| **MAC Address** | `c81fea94e095` |
| **Description** | `Avaya J179 provisioning` |
3. Click **Add** to create the reservation.
#### Configure DHCP Option 242 for the Reservation
4. Locate the newly created reservation under **Reservations**.
5. Right-click the reservation and select **Configure Options**.
6. Select **Option 242** from the list of available options.
7. In the **String value** field, enter the provisioning parameters in the following format:
```
HTTPDIR=/provision/out/b92e699f/4007fb8a8b5e7a490541f7c89ecf332c/,HTTPPORT=8888,HTTPSRVR=192.168.1.135,SIG=2
```
The parameters are defined as follows:
| Parameter | Example Value | Description |
| ---------- | ----------------------------------------------------------- | ---------------------------------------------------------------------------------------------------------------------------------------------------------------------- |
| `HTTPDIR` | `/provision/out/b92e699f/4007fb8a8b5e7a490541f7c89ecf332c/` | The secure provisioning path generated by PortSIP PBX, you copied in the [Step 1: Configure the Phone for an Extension](#step-1-configure-the-phone-for-an-extension). |
| `HTTPPORT` | `8888` | The HTTP web port used by the PortSIP PBX provisioning service, such as `80` or `8888`. |
| `HTTPSRVR` | `192.168.1.135` | The IP address or fully qualified domain name (FQDN) of the PortSIP PBX server. |
| `SIG` | `2` | Specifies the signaling software type. `2` indicates SIP. |
> **Important**
>
> For this provisioning workflow, configure `HTTPPORT` with the **HTTP web port** of the PortSIP PBX provisioning service. Do not enter the PBX HTTPS web port.
> **Example**
>
> Replace the example provisioning path, HTTP port, and PBX IP address with the actual values from your PortSIP PBX deployment.
***
### Step 4: Reset the Avaya Phone to Factory Defaults
After completing the DHCP configuration, reset the Avaya phone to factory defaults. This allows the phone to restart, obtain its DHCP settings, retrieve the provisioning server information from DHCP Option 242, and download its configuration from PortSIP PBX.
1. Press the **Menu** button on the Avaya phone.
2. Navigate to **Administration**.
3. Enter the administrator password. The default password is:
```
27238
```
4. Select **Reset to factory defaults**.
5. Confirm the reset when prompted.
The phone automatically reboots. After restarting, it should obtain its network configuration from the DHCP server and use DHCP Option 242 to locate the PortSIP PBX provisioning service.
***
### Expected Result
After the phone restarts successfully:
* The phone obtains its IP configuration from the DHCP server.
* DHCP Option 242 provides the PortSIP PBX provisioning server information.
* The phone downloads its configuration from PortSIP PBX.
* The assigned extension registers successfully with the PBX.
# Configuring an Avaya J Series Phone
Avaya J-Series IP phones are widely used in business communications environments.
This guide explains how to **manually** register an **Avaya J139 IP Phone** with PortSIP PBX in **3PCC mode**. In this mode, the phone is configured for use with a third-party SIP platform rather than being provisioned by an Avaya PBX.
This guide is intended for administrators who need to manually configure an Avaya J139 IP Phone for use with PortSIP PBX.
### Version Requirements
Before you begin, ensure that your environment meets the following minimum version requirements:
| Component | Minimum Version |
| ----------------------------- | --------------- |
| PortSIP PBX | v22.6.1 |
| Avaya J-Series phone firmware | 4.1.11.0.9 |
> **Important**
>
> Upgrade PortSIP PBX and the Avaya J-Series phone firmware to the minimum versions listed above or later before following this guide.
***
### Prerequisites
Before you begin, make sure you have the following information from PortSIP PBX:
| Required Item | Description |
| -------------------------- | ----------------------------------------------------------------------------------- |
| **Extension number** | The PortSIP PBX extension assigned to the phone. |
| **Extension password** | The SIP authentication password for the extension. |
| **Tenant SIP domain** | The tenant SIP domain configured in PortSIP PBX. |
| **SIP server address** | The IP address or fully qualified domain name (FQDN) of the PortSIP PBX SIP server. |
| **SIP port and transport** | The SIP port and transport protocol configured in PortSIP PBX, such as UDP or TCP. |
> **Note**
>
> The default Avaya administrator password shown in this guide is `27238`. If the password has previously been changed, use the current administrator password.
***
### 1. Start the Phone and Skip Auto-Provisioning
1. Power on the Avaya J139 IP Phone.
2. When the phone asks whether to activate auto-provisioning, select **No**.
3. Wait for the phone to finish booting.
***
### 2. Cancel the Server Address Prompt
After the phone finishes booting, it may prompt you to enter a server address.
1. Select **Cancel**.
2. Press **OK** to continue.
***
### 3. Open the Administration Menu
1. Press **More**.
2. Select **Admin**.
3. Enter the administrator password. The default password is `27238`.
4. Press **Enter**.
***
### 4. Find the Phone IP Address
1. In the Administration menu, select **IP Configuration**.
2. Locate the IP address assigned to the phone.
3. Write down the IP address. You will use it to access the phone web interface.
***
### 5. Sign in to the Phone Web Interface
1. Open a web browser from a computer on the same network as the phone.
2. Enter the phone IP address in the browser address bar.
3. Sign in with the following credentials:
| Field | Value |
| -------- | ------------------------------------------------------ |
| Username | `admin` |
| Password | `27238` by default, unless it has already been changed |
4. On first sign-in, the phone requires you to change the administrator password.
5. Enter a new password that meets the phone password requirements.
6. Sign in again with the new password.
> **Password requirement**\
> The new administrator password must be 8 to 31 characters long.
***
### 6. Verify 3PCC Mode
After signing in to the web interface, verify that the phone is running in **3PCC** mode.
1. On the main status page, check the **Server Mode** field.
2. Confirm that the value is **3PCC**.
3. If the phone is not in 3PCC mode, go to **Environment Settings** and enable 3PCC mode first.
***
### 7. Configure SIP Global Settings
1. In the phone web interface, open the **SIP** tab.
2. Go to **SIP Global Settings**.
3. Configure the following settings:
| Setting | Value |
| ------------------ | ---------------------------------------------------------------- |
| SIP Domain | Enter the PortSIP PBX tenant SIP domain. |
| Proxy Policy | Select **Manual**. |
| SIP Proxy / Server | Enter the PortSIP PBX SIP server address in the required format. |
4. For the SIP proxy/server address, use the following format:
```
:;transport=
```
Example:
```
sip.example.com:5060;transport=udp
```
5. Scroll to the bottom of the page.
6. Click **Save**.
> **Note**\
> Use the SIP transport configured on PortSIP PBX. For example, use `transport=udp` for UDP or `transport=tcp` for TCP.
***
### 8. Configure the SIP Account
1. In the **SIP** tab, go to **SIP Account**.
2. Configure the following fields:
| Field | Value |
| ----------------------- | ------------------------------------------------------------------------------------------------------ |
| SIP User ID | Enter the PortSIP PBX extension number. |
| Authentication User ID | Enter the PortSIP PBX extension number, unless your deployment uses a different SIP authentication ID. |
| Authentication Password | Enter the extension SIP password. |
3. Click **Login**.
4. Confirm that the SIP account status shows as registered.
***
### 9. Verify Registration and Test Calls
After the account registers successfully:
1. Confirm the extension status in the PortSIP PBX web portal.
2. Place an outbound test call from the Avaya J139 IP Phone.
3. Place an inbound test call to the extension.
4. Verify two-way audio.
***
### Troubleshooting
#### The phone web interface cannot be opened
* Confirm that the computer and the phone are on the same network.
* Confirm that the phone has a valid IP address.
* Check whether access to the phone web interface is blocked by network security settings.
#### SIP registration fails
* Verify the extension number and SIP authentication password in PortSIP PBX.
* Confirm that the SIP Domain matches the tenant SIP domain.
* Confirm that the SIP server address, port, and transport are correct.
* Make sure the phone is in 3PCC mode.
* Check firewall and NAT rules between the phone and PortSIP PBX.
#### Calls connect but there is no audio
* Verify that RTP traffic is allowed between the phone and PortSIP PBX.
* Check NAT and firewall rules.
* Confirm that the phone and PortSIP PBX have compatible audio codec settings.
***
### Configuration Summary
| Avaya setting | PortSIP PBX value |
| ----------------------- | ------------------------------------------------------------------ |
| SIP Domain | Tenant SIP domain |
| Proxy Policy | Manual |
| SIP Proxy / Server | PortSIP PBX SIP server address, port, and transport |
| SIP User ID | Extension number |
| Authentication User ID | Extension number, unless a different SIP authentication ID is used |
| Authentication Password | Extension SIP password |
# Configuring Grandstream HTxxx
This guide explains how to configure a Grandstream HTxxx V2 analog telephone adapter (ATA) and register one of its FXS ports as an extension on PortSIP PBX.
This guide uses the **Grandstream HT812 V2** as an example. Menu names and available settings may vary slightly depending on the device model and firmware version.
### Prerequisites
Before you begin, make sure you have the following information:
* The IP address of the Grandstream HT812 V2
* The device administrator password
* The PortSIP PBX tenant SIP domain
* The PortSIP PBX server IP address
* The SIP transport protocol and port
* The extension number
* The extension SIP authentication password
***
### Configure the HT812 V2
#### 1. Sign in to the device web interface
1. Open a web browser and enter the IP address of the HT812 V2.
2. Sign in to the device web interface using the following credentials:
* **Username:** `admin`
* **Password:** The default administrator password printed on the device label
After you sign in successfully, the HT812 V2 web administration interface opens.
#### 2. Configure the SIP server
1. Go to **Port Settings > PROFILE 1 > General Settings**.
2. In **Primary SIP Server**, enter the PortSIP PBX tenant SIP domain.
3. In **Outbound Proxy**, enter the PortSIP PBX server IP address.
4. Click **Save and Apply**.
#### 3. Configure the SIP transport and registration interval
1. Go to **Port Settings > PROFILE 1 > SIP Settings**.
2. In **SIP Transport**, select the SIP transport protocol configured on PortSIP PBX.
3. In **Local SIP Port**, enter the corresponding local SIP port.
4. Set **Register Expiration** to `5`. Note: this is minutes, not seconds.
5. Click **Save and Apply**.
> **Note:** The SIP transport protocol and port must match the settings configured on PortSIP PBX. TLS commonly uses a different port from UDP or TCP.
>
> When using TLS, make sure the HT812 V2 trusts the certificate presented by PortSIP PBX or the PortSIP SBC.
#### 4. Configure the FXS port extension account
1. Go to **Port Settings > FXS PORT**.
2. In **SIP User ID**, enter the PortSIP PBX extension number.
3. In **Authenticate ID**, enter the SIP authentication ID assigned to the extension. In most deployments, this is the same as the extension number.
4. In **Authenticate Password**, enter the extension’s SIP authentication password.
5. Click **Save and Apply**.
***
### Verify the Configuration
After applying the configuration:
1. Open the **Status** page on the HT812 V2.
2. Confirm that the configured FXS port displays **Registered** or a similar registration status.
3. Connect an analog phone to the configured FXS port.
4. Place an inbound test call to the extension.
5. Place an outbound test call from the analog phone.
6. Confirm that the calls have two-way audio.
7. Confirm that DTMF input works correctly.
***
### Troubleshooting
If the FXS port fails to register, verify the following settings:
* The tenant SIP domain is correct.
* The outbound proxy address is correct.
* The selected SIP transport matches the PortSIP PBX configuration.
* The SIP port is correct.
* The extension number and authentication credentials are correct.
* The required SIP and RTP ports are permitted by the firewall.
* The HT812 V2 can reach PortSIP PBX or the PortSIP SBC over the network.
* The device time is correct, particularly when TLS certificate validation is enabled.
# 5 User Management
Tenant administrators can **add, edit, and deactivate users**, assign different **account types**, and configure **tenant-level user settings**. These capabilities are commonly used to:
* Temporarily manage users who are unexpectedly out of the office
* Troubleshoot and adjust user features and permissions
* Configure special settings for executives or other key users
User management helps ensure that user accounts remain accurate, secure, and properly configured as organizational needs change.
***
### Topics Covered in This Article
This article includes the following sections:
* [Users](/portsip-communications-solution/portsip-pbx-administration-guide/5-user-management/users)
* [How to Configure the Endpoints?](/portsip-communications-solution/portsip-pbx-administration-guide/5-user-management/how-to-configure-the-endpoints)
* [User Groups](/portsip-communications-solution/portsip-pbx-administration-guide/5-user-management/user-groups)
* [DND and Automatic Callback](/portsip-communications-solution/portsip-pbx-administration-guide/5-user-management/dnd-and-automatic-callback)
* [Speed Dial 8](/portsip-communications-solution/portsip-pbx-administration-guide/5-user-management/speed-dial-8)
* [Speed dial 100](/portsip-communications-solution/portsip-pbx-administration-guide/5-user-management/speed-dial-100)
# Users
This section explains how to create and configure extensions in **PortSIP PBX**. The system supports multiple methods for creating extensions to fit different deployment and provisioning scenarios.
When provisioning a new phone, you can choose to **create a new extension** specifically for that device.
### Methods to Create an Extension
Extensions can be created using any of the following methods:
* **Manually**, from the Web Portal:\
**Call Manager > Extensions**
* **Bulk import**, by uploading a `.csv` file
* **Programmatically**, by calling the **REST API**
* **By duplication**, copying from an existing extension
***
### Accessing Extension Configuration
To configure extensions, do one of the following:
* Sign in to the PortSIP PBX Web Portal using **System Admin** credentials.\
Click **Tenants**, select the target tenant, and then click **Manage**.
**OR**
* Sign in to the Web Portal using an account with the **Tenant Admin** role to manage that tenant directly.
***
### Adding or Editing an Extension
1. In the Web Portal, navigate to **Call Manager > Extensions**.
2. Click **Add** to create a new extension, **or**
3. Select an existing extension and click **Edit** to configure or manage that extension.
***
#### Username and Password
On the **User** tab, enter the **Username** and **Password** for the user.
> **Important**\
> These credentials are used **only** to access the **PBX Personal Web Portal**.\
> They are **not** used for SIP device registration.
For example, you may create a user with the username **`jamesbond`**.
***
#### Role Assignment
Assign permissions by selecting a role from the **Role** list:
* **User**\
Provides standard extension access.
* **Admin**\
Grants tenant-level administrative privileges.
A user assigned the **Admin** role is referred to as a **Tenant Admin**.
> **Notes**
>
> * A Tenant Admin can manage all settings for the tenant to which they belong.
> * PortSIP PBX allows **multiple Tenant Admins** within the same tenant.
***
#### Email Address
The **Email** field is **mandatory**.
The PBX uses this email address to send system notifications and user-related emails.
***
#### Display Name
The **Display Name** represents the user’s full name, for example:\
**James Bond**
***
#### Signing In to the PBX Web Portal
After the user is created, the user can sign in to the **PBX Web Portal** using:
* **Username**
* **Password**
* **Tenant SIP Domain**
On the initial login screen, the user must first enter the **tenant’s SIP domain** and click **Next**.
* If the SIP domain is correct, the system displays the login screen where the user can enter their **username and password**.
***
### Extension
On the **Extension** tab, the **Extension Number** and **Password** are **mandatory** and must be provided.
***
#### Welcome Email and QR Code Provisioning
If the tenant’s **SMTP server** is configured, the PBX automatically sends a **welcome email** to the user’s email address after the extension is created successfully.\
This email includes:
* Extension details
* PBX SIP domain
* PBX IP address
* A **QR code** for client provisioning
The **PortSIP UC App** can scan this QR code to register with the PBX automatically, eliminating the need for manual configuration.
***
#### QR Code Login
Each extension includes a dedicated **QR code**. Instead of entering account details manually, you can save the QR code and use the PortSIP App to scan it and sign in to the PBX.
***
#### Preferred Transport for QR Code
The **Preferred Transport for QR Code** option allows you to specify the transport protocol (for example, UDP, TCP, or TLS) associated with the QR code.
When the client registers by scanning the QR code, the PortSIP App will **prioritize the selected transport**.
***
#### Network Interface for QR Code Generation
The **Generate QR code with the below network interface** option specifies the **outbound proxy server address** that the client app will use when registering via QR code.
This setting is especially useful in multi-NIC or NAT environments to ensure clients connect using the correct public-facing interface.
***
#### Outbound Caller ID
In the **Outbound Caller ID** section, you can assign a DID from the trunk DID pool to the extension.
When the extension makes an outbound call through a trunk, the selected **Outbound Caller ID** is presented as the **user part of the `From` header** in the SIP `INVITE` message.
For example:
* Calls placed over **Trunk 1** present an Outbound Caller ID of **022000**
* Calls placed over **Trunk 2** present an Outbound Caller ID of **88010**
***
#### Call Recording Options
* **Record audio calls**\
When enabled, all audio calls for this extension are recorded and saved as audio files.
* **Record video calls**\
When enabled, all video calls for this extension are recorded and saved as video files (MP4 format).
***
#### Caller ID Privacy and Delivery
* **Always make outbound anonymous calls**\
When enabled, the user part of the `From` header in outbound SIP `INVITE` messages is set to **`anonymous`**.
* **Always deliver outbound caller ID**\
When enabled, the configured **Outbound Caller ID** is always used as the user part of the `From` header in outbound SIP `INVITE` messages sent to the trunk.
> **Note**\
> Enabling both options at the same time may result in conflicting behavior. Ensure your trunk provider’s caller ID and privacy requirements are clearly understood before enabling these settings.
***
### Forwarding Rules
Each extension can be configured with a set of **call forwarding rules** that define how **PortSIP PBX** handles incoming calls when the extension user is **unable to answer**.
Forwarding rules can be evaluated based on the following criteria:
* **User status**
* **Time conditions**
***
#### Status-Based Forwarding
A forwarding rule must be defined **for each user status**.
For example, if a user cannot answer calls while their status is **Available**, incoming calls can be forwarded to:
* Voicemail, or
* Another extension number, or
* A service number, such as a ring group, queue, IVR, or
* A mobile phone number or landline
> **Note**\
> Forwarding calls to an external (PSTN) number requires a **configured SIP trunk** and an appropriate **outbound routing rule**.
***
#### Forwarding Actions
Each forwarding rule supports the following optional actions:
#### Forward to Voicemail
Routes the call to the voicemail service, allowing the caller to leave a voice message.
* You may optionally specify an **extension number** for the voicemail box.
* If **Extension 108** is selected, the voicemail is stored in extension 108’s mailbox.
* If left **blank**, the voicemail is stored in the **current extension’s mailbox**.
***
#### Forward to Number
Forwards the call to a specified destination number. Supported destinations include:
* An extension number
* A system extension, such as:
* Ring Group
* Virtual Receptionist
* Meeting number
* Queue number
* A PSTN phone number
> **Important**\
> Forwarding calls to a PSTN number requires a configured SIP trunk and outbound rule.
***
#### Hang Up
Immediately terminates the call at the PBX.
***
#### Ring Anyway
Delivers the call to the extension, even if other forwarding conditions are met.
***
### Exception Rules
You can define **exception rules** to override the standard forwarding behavior for specific calls.
An exception rule is configured by specifying:
* **Caller ID**
* **Time range**, using the **Received During** field
* The desired action in the **Forward To** field
If an incoming call matches an exception rule:
* The call is processed according to the **exception rule**, and
* The extension’s **normal forwarding rules are bypassed**.
***
### Voicemail
The **Voicemail** page allows you to configure an extension’s voicemail preferences, including:
* Setting the **voicemail PIN** for authentication
* Enabling or disabling **PIN authentication**
* Enabling message **date and time announcements** during voicemail playback
These settings control how users access and interact with their voicemail messages.
***
#### Voicemail Greeting Configuration
In the **Choose Default Voicemail Greeting Message** section, you can manage the voicemail greetings used for this extension.
**Uploading a Greeting**
* Click the **“+”** button to upload a new greeting audio file.
* Click the **Switch** icon next to a greeting to set it as the **active voicemail greeting**.
**Recording a Greeting**
Users can also record their voicemail greeting directly from their phone by dialing the **Feature Access Code (FAC) `*57`**.
***
### Office Hours
The Office Hours feature allows an extension’s user status to change automatically based on either global office hours or extension-specific office hours.
* Choose whether the extension uses **Global Office Hours** or **Specific Office Hours**.
* Select **Use Specific Office Hours** to define different office hours for each day of the week.
#### Time Range Behavior
* **00:00 – 23:59**: The entire day is considered **open for business**.
* **00:00 – 00:00**: The entire day is considered **closed**.
For more information about configuring office hours and holidays, refer to the [Office Hours and Holiday Schedule](/portsip-communications-solution/portsip-pbx-administration-guide/30-office-hours-and-holiday-schedule) section.
***
### Phone Provisioning
The Phone Provisioning tab allows you to add or edit the settings of IP phones associated with this extension.
Detailed management of IP phone configuration is covered in [Phone Device Management](/portsip-communications-solution/portsip-pbx-administration-guide/4-phone-device-management).
***
### BLF (Busy Lamp Field)
The **BLF** tab allows you to configure BLF keys on supported IP phones.
You can associate a BLF button with an extension so the button displays the **real-time status** of that extension.\
The number of available BLF buttons depends on the phone model.
#### Supported BLF Functions
* **BLF**\
Displays the call/dialog status of another extension.
* **Visual Park**\
PortSIP PBX’s visual call parking feature.\
For details, see [Call Parking](/portsip-communications-solution/portsip-pbx-administration-guide/14-call-parking).
* **Speed Dial**\
Assigns a phone number for one-touch dialing.
* **Custom Speed Dial**\
Allows advanced or customized speed-dial behavior.
* **Change Status**\
Enables the user to change their presence status directly from the phone.
* **Night Mode**\
Allows quick activation or deactivation of Night Mode.\
For details, see [Night Mode](/portsip-communications-solution/portsip-pbx-administration-guide/32-night-mode).
***
### Balance
The **Balance** for an extension can be recharged by a **Tenant Administrator**.
When billing is enabled:
* Calls will **fail automatically** if the extension’s balance is insufficient.
***
### Extension Status
You can view the status of extensions by navigating to **Call Manager > Users**.\
Each extension’s **current status** is displayed in the **Status** column.
#### Status Indicators
* **Alarm icon**\
Indicates that the extension has successfully enabled **push notifications**.
* **Blocked icon**\
Indicates that **Do Not Disturb (DND)** is enabled for the extension.
***
#### Viewing Device Registration Details
You can click the **Search** icon next to an online extension to view its **device registration details**.
The device details show:
* Client or phone type
* IP address
* Port number
* Transport protocol (UDP/TCP/TLS)
As shown in the example:
* **Extension 102** is registered from:
* A **PortSIP ONE app**
* IP address: `192.168.0.22`
* Port: `5960`
* Transport: `UDP`
* A **Yealink T53 IP phone**
* IP address: `192.168.0.36`
* Port: `5060`
* Transport: `UDP`
This indicates that the extension is simultaneously registered on multiple devices.
***
### Registering Client Apps and IP Phones
This section explains how to register client applications and IP phones with the PortSIP PBX.
For detailed, step-by-step instructions, refer to the following article:
[How to Configure the Endpoints](/portsip-communications-solution/portsip-pbx-administration-guide/5-user-management/how-to-configure-the-endpoints)
# How to Configure the Endpoints?
After successfully [configuring the PortSIP PBX](/portsip-communications-solution/portsip-pbx-administration-guide/2-portsip-pbx-management) and [SBC](/portsip-communications-solution/portsip-pbx-administration-guide/9-configuring-portsip-sbc/configuring-sbc-for-webrtc), and creating the required [tenants ](/portsip-communications-solution/portsip-pbx-administration-guide/3-tenant-management)and [extensions](/portsip-communications-solution/portsip-pbx-administration-guide/5-user-management/users), you can register endpoints with the PBX.\
Once registered, endpoints can make and receive calls.
Supported endpoints include:
* WebRTC clients
* Mobile apps
* Windows Desktop apps
* IP phones
* Any standard SIP-based device
***
### Configuring the PortSIP ONE App
If you are using **PortSIP PBX v22.0 or later**, follow the appropriate guide below to configure the PortSIP ONE application:
* [PortSIP ONE for Desktop and WebRTC](/apps-guides/portsip-one-desktop-app)
* [PortSIP ONE for Mobile](/apps-guides/portsip-one-mobile-app)
***
### Configuring IP Phones
The following sections describe how to configure IP phones based on a sample deployment scenario.
***
#### Assumed Environment and Configuration
In this article, the following environment and configuration are assumed:
* **PBX and SBC deployment**
* Public IP address: `66.175.221.120`
* Private IP address: `192.168.1.72`
* **PBX Web Domain**
* Domain name: `uc.portsip.cc`
* Resolved to public IP: `66.175.221.120`
* **SBC Transport Configuration**
* UDP: Port `5060`
* TLS: Port `5061`
* TCP: Port `5063`
* WSS: Port `5065`
* **Tenant Configuration**
* Tenant SIP domain: `test.io`
***
### Essential Information
The following rules apply when configuring **client endpoints** for the deployment scenario described above.
***
#### Transport
**Transport** defines the network protocol used to send and receive SIP messages between the endpoint and the PBX (for example, UDP, TCP, TLS, or WSS).
For more information, refer to [Transport Management](/portsip-communications-solution/portsip-pbx-administration-guide/6-transport-management).
***
#### Outbound Proxy Server
In the client endpoint settings, the **Outbound Proxy Server** must be set to the **PBX server address**.
* When registering an endpoint **over the Internet**:
* Use the PBX **public IP address**, or
* Use the PBX domain name (for example, `uc.portsip.cc`), provided it resolves to the public IP address.
* When registering an endpoint **from the local LAN**:
* Use the PBX **private IP address**.
Selecting the correct outbound proxy is critical for proper SIP routing, especially in NAT or multi-interface environments.
***
#### Outbound Proxy Server Port
The **Outbound Proxy Server Port** must match the port of the transport configured on the **PBX or SBC**.
For example:
* If the endpoint registers using **TCP**, set the Outbound Proxy Server Port to **5063**.
* If the endpoint registers using **TLS**, set the port to **5061**.
* If the endpoint registers using **WSS**, set the port to **5065**.
***
#### Domain (SIP Domain / SIP Server)
The **Domain** (also referred to as **SIP Domain** or **SIP Server** in endpoint settings) must be set to the **tenant SIP domain** created in PortSIP PBX.
For example:
* Tenant SIP domain: `test.io`
* Domain / SIP Server value in the endpoint: `test.io`
> **Important**
>
> * Configure the **transport port only** in the **Outbound Proxy Server Port** field.
> * Do **not** configure a port for the Domain / SIP Server.
> * If the endpoint requires a port value for the Domain, enter **`0`**.
***
### Auto-Provisioning IP Phones
Many popular IP phone models can be **auto-provisioned** to register with the PortSIP PBX, eliminating the need for manual phone configuration.
Supported vendors include:
* Fanvil
* Yealink
* SNOM
* Grandstream
* DinStar
* ALE
* Htek
For detailed instructions, refer to [Phone Device Management](/portsip-communications-solution/portsip-pbx-administration-guide/4-phone-device-management).
***
### Manually Registering an IP Phone to the PBX
In addition to auto-provisioning, you can manually register an **IP phone** or other **SIP-based device or application** by entering the SIP extension credentials directly in the device’s web management interface.
This method is commonly used when:
* Auto-provisioning is not available or not preferred
* You are using a third-party SIP device
* You need to perform testing or troubleshooting
***
#### Example: Fanvil IP Phone
***
#### Example: Yealink IP Phone
***
#### Configuration Reminder
When manually configuring an IP phone or SIP device, ensure that:
* The **Outbound Proxy Server**, **Port**, **Transport**, and **Domain** values match the PBX configuration
* The **extension number** and **password** are entered exactly as configured in PortSIP PBX
* The selected transport (UDP/TCP/TLS) is supported by both the device and the PBX
For detailed parameter definitions and best practices, refer to [Essential Information](#essential-information) earlier in this guide.
# App Template
### 1. Introduction
The **App Template** feature enables System Administrators to centrally manage the configurations of the **PortSIP ONE** client when users log in by scanning a QR code.
This App Template feature allows centralized and standardized provisioning of the PortSIP ONE client through QR code login. This feature **simplifies onboarding, reduces configuration errors, and ensures consistent client behavior across the organization**.
* `app_local.xml` → Client-managed configuration
* `app_server.xml` → Server-enforced configuration (recommended)
* Templates can be assigned at the tenant level or to individual extensions
* Only System Administrators can manage templates
* QR codes must be regenerated after template changes
#### Supported Versions
* **PortSIP PBX**: version 22.4 or later
* **PortSIP ONE** app: version 10.8.6 or later
> ❗**Important**\
> Ensure both the PBX server and PortSIP ONE client are upgraded to the required versions. If either component is outdated, the App Template feature will not function.
#### Supported Configurable Parameters
With the template, you can configure the following parameters for the apps. You can view the supported default parameters in the `app_server.xml` template:
* **UI View**: For example, hide the SMS view.
* **Settings**: For example, hide the profile settings in the app.
* **Appearance**: Theme and language settings.
* **Office Hours**: Define business hours for the app.
* **Sound Effect Options**: Such as **FEC** (Forward Error Correction) and **AEC** (Acoustic Echo Cancellation).
* **Codecs**: Select and enforce preferred codecs.
* **Screen Pop**: Configure screen pop settings for incoming calls
#### Scope and Permissions
* Only System Administrators have the ability to create and modify App Templates.
* Tenant administrators and end users cannot modify template files, but can choose the template to apply.
***
### 2. Managing App Template Files
#### 2.1 Accessing the App Templates Page
To manage App Templates:
1. Log in to the **PBX Web Admin Portal** as a **System Administrator**.
2. Navigate to: **Advanced > App Templates**
After installation, the PBX includes two default built-in templates.
***
#### 2.2 Built-in Templates
**1) `app_local.xml`**
When this template is used:
* The generated extension QR code contains **only login settings**.
* All other settings are configured **independently** within the PortSIP ONE client.
* The PBX server does **not** push any other configurations to the client.
**Use Case**:\
Choose this template if you want users to manage their own client-side settings, such as codecs and media options.
***
**2) `app_server.xml`**
When this template is used:
* The generated QR code includes all predefined server-side configuration.
* The PBX enforces initial configuration settings, such as selected audio and video codecs.
* The client automatically applies these settings upon QR code login.
**Use Case**:\
Recommended for organizations that require standardized configuration, including:
* Enforced codec policies
* Consistent media behavior
* Centralized configuration control
> ❗**Best Practice**\
> For enterprise deployments, use the server-controlled template (`app_server.xml`) to ensure consistent configuration and reduce support overhead.
***
#### 2.3 Creating a Custom App Template
You can create your own template file.
**Option A – Add a New Template**
1. Sign in to the PortSIP PBX Web Admin Portal as a System Administrator.
2. Navigate to: **Advanced > App Templates**.
3. Click **Add**.
4. Define the template name and configurations.
5. Click **Save**.
**Option B – Copy an Existing Template (Recommended)**
1. Select `app_server.xml`.
2. Click **Copy**.
3. Rename the template.
4. Modify the configurations as needed.
5. Click **Save**.
> ❗**Recommendation**\
> It is strongly recommended to copy `app_server.xml` and modify it, rather than creating a template from scratch. This ensures that required baseline parameters remain intact.
***
#### 2.4 Security Considerations
* QR codes contain login settings and configuration information, which should be treated as **sensitive credentials**.
* Never share QR codes over unsecured channels (e.g., public messaging apps).
* If you suspect exposure, regenerate the QR code immediately.
> ❗**Warning**\
> Anyone with access to a valid QR code can potentially register the extension to the PBX.\
> Protect QR codes with the same level of security as passwords.
***
### 3. Using App Templates
App Templates can be applied at two levels:
* **Tenant (Company) level** – Default template for newly created extensions
* **Individual extension level** – Specific template assigned to a user
***
#### 3.1 Set Default Template for a Tenant (Company)
You can define a default template for all newly created extensions within a tenant.
**Steps**
1. Log in as a **Tenant Administrator**.
2. Navigate to: **Company > GENERAL**
3. Locate **Default App Template**.
4. Select the desired template.
5. Click **Save**.
**Expected Result**
* All newly created extensions within this tenant will automatically use the selected template.
* Existing extensions will not be affected.
> ❗**Note**\
> Changing the tenant default does not retroactively update existing users. To apply the template to existing users, it must be reassigned manually.
***
#### 3.2 Assign an App Template to a Specific Extension
You can override the default template for an individual user.
**Steps**
1. Log in as a **Tenant Administrator**.
2. Navigate to: **Call Manager > Users**
3. Select the desired user.
4. Click **Edit**.
5. Go to the **Extension** tab.
6. Locate **Default App Template**.
7. Select the desired template.
8. Click **OK** to save.
***
#### 3.3 Regenerate and Use the QR Code
After assigning a template:
1. Navigate to: **Call Manager > Users**
2. Select the desired user.
3. Click **Edit**.
4. Go to the **Extension** tab.
5. Click **Refresh** to regenerate the QR code.
> ❗**Important**\
> If you change the template, you must regenerate the QR code. Previously generated QR codes will not apply the updated template.
***
#### End-User Login Procedure
1. Install **PortSIP ONE 10.8.6 or later**.
2. Open the application.
3. Select **Scan QR Code**.
4. Scan the regenerated QR code.
**Expected Result**
* The client logs in successfully.
* The client applies the configuration settings defined in the assigned App Template.
* If using a server-controlled template, enforced parameters (e.g., codecs) will be applied automatically.
# User Groups
User Groups allow you to group multiple users together and assign a shared **Outbound Caller ID** to the group.
When an **Outbound Rule** is configured with a **Caller User Group** condition, the PBX applies the group’s outbound caller ID to calls placed by members of that group. Specifically, the PBX replaces the **user part of the `From` header** in the SIP `INVITE` message with the **User Group’s Outbound Caller ID**.
This feature is commonly used to present a **department-level caller ID** (for example, Sales or Support) instead of individual extension numbers.
***
### Create a User Group
To create a user group:
1. Navigate to **Call Manager > User Groups**.
2. Click **Add**.
3. Enter a **Group Name**.
4. Assign an **Outbound Caller ID** and select the trunk to be used.
In the example below, a user group named **Sales Dept** is created, with an outbound caller ID of **010000** assigned on the **CallCentric** trunk.
***
### Create an Outbound Rule Using Caller User Group Criteria
Next, create an outbound rule that uses the **Caller User Group** as a matching condition:
1. Go to **Call Manager > Outbound Rules**.
2. Create or edit an outbound rule.
3. Set the **Caller User Group** criterion.
4. Select the previously created **Sales Dept** user group.
***
### Call Behavior
When an extension that belongs to the **Sales Dept** group places a call that matches this outbound rule:
* The PBX uses the **group’s outbound caller ID**.
* The outbound caller ID is inserted as the **user part of the `From` header** in the SIP `INVITE` message.
* The call is routed according to the outbound rule and associated trunk.
This ensures consistent, department-level caller identification for outbound calls.
# DND and Automatic Callback
### Do Not Disturb (DND)
Do Not Disturb (DND) allows a user to silence incoming call notifications when they need to focus or avoid interruptions.\
When DND is enabled, incoming calls are **sent directly to voicemail**.
#### Enable or Disable DND
You can activate or deactivate DND using either of the following methods:
* **Feature Access Codes (FAC)**
* Dial **`*78`** from a client app or IP phone to **enable DND**
* Dial **`*79`** to **disable DND**
* **PBX Web Portal**
1. Go to **Call Manager > Users**
2. Select the user and click **Edit**
3. On the **Extension** page, toggle **Do Not Disturb** on or off
When DND is enabled, a **DND icon** appears next to the user in the user list to indicate the current status.
***
### Automatic Callback (ACB)
Automatic Callback (ACB) allows users to monitor a busy extension and automatically place a call when that extension becomes idle.
When a user calls another extension that is busy and a valid ACB condition is met, the caller hears a prompt asking whether they want to monitor the line and receive a callback when it becomes available.
#### Enable or Disable Automatic Callback
Users can activate or deactivate ACB using either of the following methods:
* **Feature Access Codes (FAC)**
* Dial **`*33`** from a client app or IP phone to **enable ACB**
* Dial **`*43`** to **disable ACB**
* **PBX Web Portal**
1. Go to **Call Manager > Users**
2. Select the user and click **Edit**
3. On the **Extension** page, toggle **Automatic Callback** on or off
When ACB is enabled, an **ACB icon** appears next to the user in the user list.
***
#### Automatic Callback Call Behavior
Automatic Callback is an **outgoing call feature** that works between users within the **same tenant**.
The call flow is as follows:
1. User A places a call to User B.
2. User B is busy.
3. User A activates Automatic Callback.
4. The PBX monitors User B’s line.
5. When User B becomes idle, the PBX automatically places a **new call** to User B.
> **Important**
>
> * The caller does **not** need to redial the number.
> * The callback attempt is treated as a **new originating call**.
> * For the callback to succeed, **both users must be available** at the time the callback is initiated.
***
#### Operating Parameters
Automatic Callback behavior is controlled by tenant-level parameters.
To configure these settings:
1. Go to **Advanced Services > Automatic Callback**
The following parameters are available:
* **ACB Service Extension Number**\
The default extension number used by the ACB service.\
**Recommendation:** Do not change this value.
* **Monitor Minutes**\
The maximum time (in minutes) the PBX will monitor a busy line while waiting for it to become idle.\
*Default: 30 minutes*
* **Retry Originator Minutes**\
The time (in minutes) the PBX waits before retrying a busy ACB originator (the user who requested the callback).\
*Default: 5 minutes*
* **Prompt Language**\
Specifies the language used for ACB audio prompts.
# Speed Dial 8
**Speed Dial 8** allows users to assign up to **eight frequently dialed numbers**—including long or hard-to-remember numbers—to **single-digit speed codes**. Users can then place calls by dialing the speed code instead of the full number.
* Speed codes use **single digits from 2 to 9**.
* Each speed code can be associated with:
* Internal or external phone numbers
* Emergency numbers (for example, **911**)
* Service numbers (for example, **611** for customer support)
***
### Ways to Program Speed Dial 8
Users can configure Speed Dial 8 using either of the following methods:
* **PBX Web Portal**
* **Feature Access Codes (FAC)**
This section focuses on configuration through the Web Portal.
***
### Configuring Speed Dial 8 in the Web Portal
#### For Tenant Administrators
1. Sign in to the **PBX Web Portal** as a **Tenant Administrator**.
2. Navigate to **Call Manager > Users**.
3. Select the target extension and click the **Speed Dial 8** tab.
4. Assign phone numbers to the desired speed codes (2–9).
***
#### For Extension Users
1. Sign in to the **PBX Web Portal** as an **extension user**.
2. Open the **Profile** menu.
3. Click the **Speed Dial 8** tab.
4. Configure your personal speed dialing settings.
***
### Configuring Speed Dial 8 Using Feature Access Codes (FAC)
You can also configure **Speed Dial 8** by dialing **Feature Access Codes (FAC)** directly from a phone or client app. This method allows quick setup without accessing the Web Portal.
***
#### Set Up a Speed Dial Code
To program **speed dial code 5** for the phone number **12345678**:
1. From your phone or app, dial: **`*74512345678`**
2. Follow the voice prompts provided by the PBX.
3. The system confirms whether the configuration was successful.
After setup, you can place the call by simply dialing **`5`**, and the PBX will automatically dial **12345678**.
***
#### Modify an Existing Speed Dial Code
To change the number assigned to **speed dial code 5** to **0033125**:
1. Dial: **`*7450033125`**
2. The PBX replaces the previously stored number for code 5 with the new number.
***
#### Delete a Speed Dial Code
To delete the number assigned to **speed dial code 5**:
1. Dial: **`*745*`**
2. The PBX clears the stored number for code 5.
# Speed Dial 100
**Speed Dial 100** allows users to assign frequently dialed numbers to **two-digit speed codes** ranging from **00 to 99**. Once configured, users can place calls by dialing the two-digit code instead of the full phone number.
Speed Dial 100 supports a larger set of speed codes than Speed Dial 8 and is ideal for users who need quick access to many contacts.
***
### Ways to Program Speed Dial 100
You can configure Speed Dial 100 using either of the following methods:
* **PBX Web Portal**
* **Feature Access Codes (FAC)** from an IP phone or softphone
The Web Portal is generally easier to use and allows you to review and confirm all configured speed codes, but both methods are supported.
***
### Configuring Speed Dial 100 in the Web Portal
#### For Tenant Administrators
1. Sign in to the **PBX Web Portal** as a **Tenant Administrator**.
2. Navigate to **Call Manager > Users**.
3. Select the target extension.
4. Click the **Speed Dial 100** tab.
5. Assign phone numbers to the desired two-digit speed codes (**00–99**).
***
#### For Extension Users
1. Sign in to the **PBX Web Portal** as an **extension user**.
2. Open the **Profile** menu.
3. Click the **Speed Dial 100** tab.
4. Configure your personal speed dialing entries.
***
### Configuring Speed Dial 100 Using Feature Access Codes (FAC)
You can configure **Speed Dial 100** by dialing **Feature Access Codes (FAC)** directly from an IP phone or client app. This method allows quick setup without using the Web Portal.
***
#### Set a Speed Dial Code
To program **speed dial code 06** for the phone number **0015620671**:
1. From your phone or app, dial: **`*75060015620671`**
2. Listen to the voice prompt from the PBX, which confirms whether the configuration was successful.
After configuration, you can place the call by dialing **`06`**, and the PBX will automatically dial **0015620671**.
***
#### Modify an Existing Speed Dial Code
To change the number assigned to **speed dial code 06** to **0033125**:
1. Dial: **`*75060033125`**
2. The PBX replaces the existing number for code 06 with the new number.
***
#### Delete a Speed Dial Code
To delete the number assigned to **speed dial code 06**:
1. Dial: **`*7506*`**
2. The PBX removes the speed dial configuration for code 06.
# Selective Call Rejection and Call Acceptance
PortSIP PBX allows extension users to control which callers can reach them during specific time periods by using **Selective Call Rejection** and **Selective Call Acceptance**.
These features apply only to calls routed directly to an extension. They do not block calls delivered through a **Call Queue**, **Team**, or **Ring Group**.
***
### Overview
Selective call filtering provides two types of rules:
| Feature | Description |
| ----------------------------- | ------------------------------------------------------------------------------------------------------------------------------------- |
| **Selective Call Rejection** | Blocks calls from selected caller numbers when the rule schedule is active. |
| **Selective Call Acceptance** | Allows calls only from selected caller numbers when the rule schedule is active. Other callers are rejected while the rule is active. |
Each rule can include:
* A caller number or caller number pattern
* A schedule condition, such as all hours, office hours, outside office hours, or specific office hours
* Optional holiday schedules
***
### Selective Call Rejection
Selective Call Rejection works as a deny list.
When this feature is enabled, PortSIP PBX checks whether the caller number matches a rejection rule whose schedule is currently active.
#### Behavior
| Schedule Active? | Caller Number Matches? | Result |
| ---------------- | ---------------------: | -------------------- |
| No | Not applicable | The call is accepted |
| Yes | Yes | The call is rejected |
| Yes | No | The call is accepted |
#### Example
Extension `1001` enables Selective Call Rejection and adds caller number `18005550100`.
The rule is configured to apply during office hours.
* If `18005550100` calls during office hours, the call is rejected.
* If `18005550100` calls outside office hours, the schedule is not active, so the call is not rejected by this feature.
* If another caller calls during office hours, the call is accepted because the caller number does not match the rejection rule.
***
### Selective Call Acceptance
Selective Call Acceptance works as an allow list.
When this feature is enabled, PortSIP PBX checks whether at least one acceptance rule schedule is currently active.
If no acceptance rule schedule is active, the feature does not affect the call, and the call is accepted.
If an acceptance rule schedule is active, only callers that match the configured acceptance numbers are allowed. Other callers are rejected.
#### Behavior
| Schedule Active? | Caller Number Matches? | Result |
| ---------------- | ---------------------: | -------------------- |
| No | Not applicable | The call is accepted |
| Yes | Yes | The call is accepted |
| Yes | No | The call is rejected |
#### Example
Extension `1001` enables Selective Call Acceptance and adds caller number `18005550100`.
The rule is configured to apply during office hours.
* If `18005550100` calls during office hours, the call is accepted.
* If another caller calls during office hours, the call is rejected.
* If any caller calls outside office hours, the acceptance rule is not active, so the call is not rejected by this feature.
***
### Rule Schedule Conditions
Each selective call rule can use one of the following schedule conditions.
| Condition | Description |
| --------------------------------- | ------------------------------------------------------------------------------------------------------------------------------------------------------- |
| **All Hours** | The rule is always active. Holiday schedules do not affect this condition. |
| **Specific Office Hours** | The rule is active only during the office hours configured for this rule. |
| **Personal Office Hours** | The rule is active during the extension’s personal office hours. If the extension uses global office hours, the tenant’s global office hours are used. |
| **Outside Personal Office Hours** | The rule is active outside the extension’s personal office hours. If the extension uses global office hours, the tenant’s global office hours are used. |
| **Global Office Hours** | The rule is active during the tenant’s global office hours. |
| **Outside Global Office Hours** | The rule is active outside the tenant’s global office hours. |
### Holiday Handling
Holiday schedules override office hours.
If a rule is configured to apply during office hours, the rule is not active during a holiday.
If a rule is configured to apply outside office hours, the rule is active during a holiday.
The **All Hours** condition ignores holidays and remains active at all times.
#### Example
Assume the following configuration:
* Office hours are Monday to Friday, 9:00 AM to 6:00 PM.
* The current time is Monday, 10:00 AM.
* Today is also configured as a holiday.
In this case:
* A rule using **Office Hours** is not active.
* A rule using **Outside Office Hours** is active.
* A rule using **All Hours** is active.
### Rule-Specific Holidays and Extension Holidays
A selective call rule may have its own holiday schedule.
If the rule has a holiday schedule, PortSIP PBX uses that holiday schedule when evaluating the rule.
If the rule does not have a holiday schedule, PortSIP PBX uses the extension’s configured holiday schedule.
***
### Evaluation Order
PortSIP PBX evaluates selective call filtering in the following order:
1. Exceptions
2. Selective Call Rejection
3. Selective Call Acceptance
4. Normal call routing
Selective Call Rejection has higher priority than Selective Call Acceptance.
This means that if a caller matches an active rejection rule, the call is rejected immediately, even if the same caller would also match an acceptance rule.
### Empty Rule Lists
If Selective Call Rejection is enabled but no rejection numbers are configured, the feature does not reject any calls.
If Selective Call Acceptance is enabled but no acceptance numbers are configured, the feature does not reject any calls.
This behavior prevents an extension from accidentally blocking all callers because of an empty allow list.
### Call Rejection Response
When a call is rejected by Selective Call Rejection or Selective Call Acceptance, PortSIP PBX rejects the call before ringing the extension.
The caller may receive a busy or rejected response, depending on PBX configuration, SIP endpoint behavior, and the upstream carrier.
***
### Recommended Use Cases
#### Block Unwanted Callers During Business Hours
Use Selective Call Rejection with an office-hours schedule to block specific callers only while the extension is working.
#### Allow Only Important Callers During Business Hours
Use Selective Call Acceptance with an office-hours schedule to allow calls only from selected callers during business hours.
#### Allow All Calls Outside the Active Schedule
If a selective call rule is not active because its schedule does not match the current time, PortSIP PBX allows the call to continue normally.
This ensures that schedule-based rules affect calls only during their configured time periods.
***
### Configuring Selective Call Rejection and Acceptance
Selective Call Rejection and Selective Call Acceptance can be configured by Tenant Administrators or by extension users.
#### For Tenant Administrators
1. Sign in to the PBX Web Portal as a Tenant Administrator.
2. Navigate to **Call Manager > Users**.
3. Select the target extension.
4. Click the **Call Handling** tab.
5. Enable **Selective Call Rejection** or **Selective Call Acceptance**.
6. Click **Add**.
7. Enter the caller number or caller number pattern.
8. Select the schedule condition.
9. Configure office hours or holiday schedules if required.
10. Save the rule.
#### For Extension Users
1. Sign in to the PBX Web Portal as an extension user.
2. Open the **Profile** menu.
3. Click the **Call Handling** tab.
4. Enable **Selective Call Rejection** or **Selective Call Acceptance**.
5. Click **Add**.
6. Enter the caller number or caller number pattern.
7. Select the schedule condition.
8. Configure office hours or holiday schedules if required.
9. Save the rule.
***
### Activating or Deactivating Selective Call Filtering Using Feature Access Codes
Users can also activate or deactivate Selective Call Rejection and Selective Call Acceptance by dialing **Feature Access Codes (FACs)** from a phone or client app.
This allows users to quickly turn the feature on or off without signing in to the Web Portal.
#### Selective Call Rejection FACs
| Action | Feature Access Code |
| ----------------------------------- | ------------------- |
| Activate Selective Call Rejection | `*25` |
| Deactivate Selective Call Rejection | `*26` |
To activate Selective Call Rejection:
1. From your phone or client app, dial `*25`.
2. Follow the PBX voice prompts.
3. After the feature is activated, the PBX plays a confirmation prompt.
To deactivate Selective Call Rejection:
1. From your phone or client app, dial `*26`.
2. Follow the PBX voice prompts.
3. After the feature is deactivated, the PBX plays a confirmation prompt.
#### Selective Call Acceptance FACs
| Action | Feature Access Code |
| ------------------------------------ | ------------------- |
| Activate Selective Call Acceptance | `*60` |
| Deactivate Selective Call Acceptance | `*61` |
To activate Selective Call Acceptance:
1. From your phone or client app, dial `*60`.
2. Follow the PBX voice prompts.
3. After the feature is activated, the PBX plays a confirmation prompt.
To deactivate Selective Call Acceptance:
1. From your phone or client app, dial `*61`.
2. Follow the PBX voice prompts.
3. After the feature is deactivated, the PBX plays a confirmation prompt.
***
### Important Notes
* These features apply only to calls routed directly to an extension. They do not block calls delivered through a **Call Queue**, **Team**, or **Ring Group**.
* Selective Call Rejection is evaluated before Selective Call Acceptance.
* Holidays override office hours.
* The **All Hours** condition ignores holidays.
* A rule schedule must be active before caller-number matching affects the call.
* For Selective Call Acceptance, unmatched callers are rejected only when at least one acceptance rule schedule is currently active.
* Outside the active schedule, Selective Call Acceptance does not block callers.
# 6 Transport Management
After completing the **Setup Wizard**, you can manage your **PortSIP PBX** through the **Web Portal**.
PortSIP PBX supports multiple SIP signaling transports, including **UDP**, **TCP**, and **TLS**. You must configure which transports and ports the PBX listens on to accept SIP registrations and calls.
> ❗ **Important**\
> Only **System Administrators** are allowed to create or delete SIP transports.\
> When deleting transports, **at least one transport must always remain configured**.
The Setup Wizard configures a **default transport** automatically. To modify or add transports, sign in to the PBX Web Portal as a **System Administrator** and navigate to: **Call Manager > Transports**
Click **Add** to create a new transport.
***
### Firewall Considerations
When you add a new SIP transport, you **must** update firewall rules to allow traffic on the selected port.
* IP phones and client applications connect to the PBX using the configured **transport protocol and port**
* If the PBX is deployed on a cloud platform such as **Amazon Web Services (AWS)**, you must:
* Open the port on the **OS-level firewall**
* Open the same port in the **cloud platform firewall** (for example, AWS Security Groups)
Failure to do so will result in **registration failures and call setup issues**.
***
### Adding UDP, TCP, or TLS Transports
To add a new SIP transport:
1. Navigate to **Call Manager > Transports**.
2. Click **Add**.
3. In the **Transport protocol** field, select **UDP**, **TCP**, or **TLS**.
4. Specify a listening port:
* Default ports:
* UDP: `5060`
* TLS: `5061`
* TCP: `5063`
* You may choose a different port if required, provided it is **not already in use**.
5. Click **OK** to add the transport.
***
### Adding a TLS Transport (Secure SIP)
Before adding a TLS transport, you must prepare **TLS certificate files**.
Refer to [Preparing TLS Certificates](/portsip-communications-solution/tutorials/certificates-for-tls-https-webrtc/preparing-tls-certificates) to obtain a certificate from a trusted third-party provider for your PBX Web Domain (for example: `uc.portsip.cc`).
To add the TLS transport:
1. Navigate to **Call Manager > Transports**.
2. Click **Add**.
3. Select **TLS** as the transport protocol.
4. Specify the listening port (default: `5061`).
5. Click **OK** to save the configuration.
> ❗ **Best Practice**\
> TLS is strongly recommended for deployments exposed to the public internet to protect SIP credentials and signaling traffic.
***
### Configuring Firewall Rules (Linux / firewalld)
If you create **custom transport ports** instead of using the default ones, you must explicitly open those ports on the firewall.
#### Example Scenario
You created the following transports:
* UDP on port `5066`
* TCP on port `5071`
* TLS on port `5072`
* WSS on port `5075`
Run the following commands on the PBX server:
```bash
firewall-cmd --permanent --service=portsip-pbx --add-port=5066/udp --set-description="PortSIP PBX"
firewall-cmd --permanent --service=portsip-pbx --add-port=5071/tcp --set-description="PortSIP PBX"
firewall-cmd --permanent --service=portsip-pbx --add-port=5072/tcp --set-description="PortSIP PBX"
firewall-cmd --permanent --service=portsip-pbx --add-port=5075/tcp --set-description="PortSIP PBX"
firewall-cmd --reload
```
> ❗ **Important**\
> Opening the OS firewall alone is **not sufficient** for cloud deployments.\
> You must also open the same ports in the **cloud platform firewall**, such as **AWS Security Groups**.
***
### Summary
* SIP transports define **how** and **where** the PBX listens for signaling traffic
* Only **System Administrators** can manage transports
* Always ensure:
* At least **one transport** remains configured
* Firewall rules are updated at both the **OS** and **cloud** levels
* Use **TLS** wherever possible for secure, internet-facing deployments
# 7 Trunk Management
Session Initiation Protocol (SIP) trunking is a digital method for making and receiving calls—and other real-time communications—over an IP network using SIP, an application-layer signaling protocol. In this context, **“trunking”** means aggregating multiple concurrent call paths (channels) into a single logical connection between your PBX and a carrier or service provider.
A SIP trunk typically provides **VoIP connectivity between an on-premises PBX and the Public Switched Telephone Network (PSTN)**. For example, an office may run an internal PBX for extension-to-extension calling. By connecting the PBX to a SIP trunk, users can place and receive external calls to/from the public telephone network.
SIP trunking is commonly used to **establish, manage, and terminate call sessions** (call setup, mid-call signaling, and teardown). It is widely adopted because it’s flexible, scalable, and standards-based—helping organizations connect their phone system to external calling services without traditional physical trunks.
PortSIP PBX supports a wide range of mainstream SIP trunk providers worldwide, including (but not limited to):Topics Covered
This article includes the following topics:
* [Vonage](https://www.vonage.com/)
* [QuestBlue](https://questblue.com/)
* [VoIP.ms](https://voip.ms/)
* [Voxtelesys](https://voxtelesys.com/)
* [Flowroute](https://flowroute.com/)
* [Skyetel](https://skyetel.com/)
* [Wavix](https://wavix.com/)
* [Bandwidth](https://www.google.com/aclk?sa=l\&ai=DChcSEwjP4Z7F04mGAxWv1MIEHcavBZsYABAAGgJwdg\&ase=2\&gclid=CjwKCAjw0YGyBhByEiwAQmBEWt0-86eUzdm8dvIhQPbhC0MFJ_iY0a-UAgyis1Kao874WgSy0MGNIhoCsocQAvD_BwE\&ei=ioRBZu2MC6yF0PEP0NKHiAI\&sig=AOD64_2iLhFzhgCJBcCnSRVqnrIcSWO_Vg\&q\&sqi=2\&nis=4\&adurl\&ved=2ahUKEwjt-ZXF04mGAxWsAjQIHVDpASEQ0Qx6BAgJEAE)
* [Twilio](https://www.twilio.com/en-us)
* [Telnyx](https://telnyx.com/)
* [Callcentric](https://www.callcentric.com)
* [Telstra](https://www.telstra.com.au/)
* [CM.com](https://www.cm.com)
* [Aire Network](https://airenetworks.es/)
* [Gamma](https://gammagroup.co/)
* [VoIP Innovation](https://carrierservices.sangoma.com/)
* [VoiceMeUp](https://www.voicemeup.com/)
* [SIPTRUNK](https://www.siptrunk.com)
### Topics Covered
This article includes the following topics:
* [Configuring SIP Trunk](/portsip-communications-solution/portsip-pbx-administration-guide/7-trunk-management/configuring-sip-trunk)
* [Handle Outbound Calls Through SIP Trunk](/portsip-communications-solution/portsip-pbx-administration-guide/7-trunk-management/handle-outbound-calls-through-sip-trunk)
# Configuring SIP Trunk
### Introduction
VoIP service providers deliver external calling by replacing traditional telecom lines with IP-based services. They can assign local phone numbers (DIDs) in many cities or countries, route inbound calls to your PBX, and often support number porting (moving an existing phone number to the new provider). VoIP providers may also offer more competitive calling rates by using international carrier networks and negotiated pricing.
PortSIP PBX supports several trunk types, described below.
***
### Trunk Types Supported by PortSIP PBX
#### Register-Based Trunk
A **Register-Based Trunk** requires PortSIP PBX to **register to the trunk provider** using credentials (an authentication ID and password).
* **System Admin:** Can create this trunk type and assign it to multiple tenants. Each tenant receives its own DID pool.
* **Tenant Admin:** Can also create a Register-Based Trunk, but it **cannot be shared** with other tenants.
* **Uniqueness requirement:** To avoid conflicts, the **hostname and authentication ID must be unique**.
#### Accept Register Trunk
An **Accept Register Trunk** works in the opposite direction: the **trunk provider registers to PortSIP PBX** using a predefined authentication ID and password.
* **System Admin:** Can create this trunk type and assign it to tenants. Each tenant receives its own DID pool.
* **Tenant Admin:** Can also create an Accept Register Trunk, but it **cannot be shared** across tenants.
* **Uniqueness requirement:** The **hostname and authentication ID must be unique**.
#### IP-Based Trunk
An **IP-Based Trunk** does not use SIP registration. Instead, the trunk provider routes calls based on your PBX’s **public IP address** (or a known SBC/published address).
* **System Admin only:** Only the System Admin can create an IP-Based Trunk.
* **One per provider:** This trunk can be added **only once per provider**.
* **Multi-tenant use:** If multiple tenants need the trunk, the System Admin assigns the trunk to those tenants and allocates a **unique DID pool per tenant**.
#### Microsoft Teams
PortSIP PBX supports **Microsoft Teams Direct Routing** as a trunk type.
* **Tenant Admin only:** This trunk type can only be configured by the Tenant Admin.
* **Not shareable:** A Teams trunk cannot be shared with other tenants.
#### WhatsApp
PortSIP PBX also supports **WhatsApp as a trunk** for messaging, enabling users to send and receive WhatsApp messages.
* **Tenant Admin only:** This trunk type can only be configured by the Tenant Admin.
* **Not shareable:** A WhatsApp trunk cannot be shared with other tenants.
***
### Tenant Admin Permissions
Tenant Admins can:
* View all trunks assigned by the System Admin.
* Create inbound and outbound rules that use those assigned trunks.
Tenant Admins **cannot**:
* Modify the settings of any trunk that was created by the System Admin or another tenant.
Tenant Admins **can** modify:
* Any trunk that they created themselves.
***
### Configuring a Trunk
Before you start, make sure you have an active account with a VoIP or SIP trunk provider. PortSIP PBX supports most SIP-based VoIP and SIP trunk services.
After you receive your trunk details from the provider (such as credentials, SIP server/domain, and assigned DIDs), you can configure the trunk in PortSIP PBX.
***
### DID Pool Concept
Because PortSIP PBX is a **multi-tenant** system, the PBX must be able to determine **which tenant owns an incoming DID** (and therefore which tenant’s inbound rules should apply).
If multiple tenants use the **same trunk provider** and configure the **same DID number** in their inbound rules, the PBX would not know which tenant should receive the inbound call. Similarly, if an extension in one tenant presents an **outbound caller ID (CLI)** that belongs to another tenant, it can create conflicts and incorrect call routing or identity presentation.
To prevent these issues, PortSIP PBX uses a **DID pool**: a dedicated set (or range) of DID numbers assigned to each tenant for a given trunk.
#### How DID Pools Work
* When the **System Admin** assigns a trunk to a tenant, they must also configure a **DID pool** for that tenant.
* DID pools for the same trunk provider **must not overlap** across tenants.
* When a tenant creates inbound rules using that trunk, they can only select DIDs from **their assigned DID pool**.
If a **Tenant Admin** adds a trunk independently, they must also define a DID pool for that trunk. When creating inbound rules for that trunk, the tenant can only use DID numbers from its pool. If DID pools overlap for the same provider, inbound routing conflicts will occur.
#### Example: Overlapping DID Pools (Not Allowed)
* Tenant A adds provider **XYZ** and sets the DID pool to **1000–2000**
* Tenant B adds the same provider **XYZ** and sets the DID pool to **2000–3000**
This configuration fails because **2000 overlaps**. If an inbound call arrives for DID **2000**, the PBX cannot determine which tenant should receive the call.
#### DID Pool Formats
A DID pool can be defined as:
* A single range:\
`1000-2000`\
`282556000-282556900`
* A mix of individual numbers and ranges (semicolon-separated):\
`101; 203; 300-450`
#### DID Pool Entry Rules
When configuring a DID pool, the DID number or range must **not** start with:
* `+`
* `0`
* `00`
If your DIDs are provided in E.164 format (for example, `+14155550100`) or include a trunk prefix (for example, `0014155550100`), remove the prefix before entering the DID pool.
> ❗**Note:** This entry rule applies only to how DIDs are stored/validated in the PBX DID pool. Your provider may still deliver inbound calls with `+` or in E.164 format depending on their signaling behavior.
***
### Add the Trunk (System Admin)
#### Prerequisites
Before you begin, make sure you have:
* An active SIP trunk account (or IP-based trunk details) from your provider
* The provider’s connection details, such as:
* Host domain/IP and port
* Outbound proxy (if required) and proxy port
* Transport protocol requirements (UDP/TCP/TLS)
* Credentials (for Register-Based trunks): authentication name/username, password, registration interval
If the provider requires **TCP or TLS**, ensure that transport is already configured in the PBX (see **Transport Management**).
***
#### Steps
1. **Open the Trunks page**\
Go to **Call Manager > Trunks**.
2. **Start adding a trunk**\
Click the **arrow** button and select the trunk type you want to add.
3. **Enter a trunk name**\
Enter a clear, recognizable **friendly name** (for example, `Twilio-US`, `Telnyx-NYC`, or `XYZ-Primary`).
4. **Select the trunk provider brand**\
From **Brand**, select the provider.
* If your provider is listed and preconfigured, follow the [Configuring SIP Trunks](/portsip-communications-solution/configuring-sip-trunks) guide for provider-specific settings.
* If the provider is not listed, select **Generic**.
5. **Enter trunk connection details**\
Fill in the fields using the information provided by your trunk service provider:
* **Host Domain or IP**
* **Port**
* **Outbound Proxy Server** (if required)
* **Outbound Proxy Server Port** (if required)
6. **Select the transport protocol**\
Under **Transport**, choose **UDP**, **TCP**, or **TLS** based on your provider requirements.
> ❗**Note:** The selected transport must already be configured in the PBX. If it isn’t available, add it first in [**Transport Management**](/portsip-communications-solution/portsip-pbx-administration-guide/6-transport-management).
7. **Add associated IPs (if required)**\
Some providers may send SIP INVITEs from **multiple source IP addresses**. If so:
* Under **Associated IPs of the Trunk**, click **Add**
* Enter each additional IP address provided by the carrier
8. **Enter registration credentials (Register-Based trunks only)**\
If you selected a **Register-Based** trunk:
* Click **Next**
* Enter:
* **Username/Authentication Name**
* **Password**
* **Register Time**
* Use the values provided by your trunk provider.
9. **Configure advanced options**\
Click **Next**, then review and configure the following settings as needed:
* **Use the private IP address to communicate with this trunk**\
Enable if the PBX should use a **private IP** for trunk connections. If disabled, the PBX uses its **public IP**.
* **Rewrite the host IP of the Via header using the PBX server’s public IP when sending requests to the trunk**\
If enabled (and the PBX has a public IP), the PBX replaces the Via host IP with its public IP when sending SIP messages to the trunk.\
**Recommendation:** Leave this at the default unless your provider explicitly requires it.
* **Verify the port when receiving SIP messages from the trunk**\
When enabled, the PBX matches inbound SIP messages from the trunk using **both IP and port**. When disabled, it matches by **IP only**.\
**Recommendation:** Leave this at the default unless instructed otherwise by your provider.
* **This trunk only accepts a single Via SIP header**\
When enabled, the PBX keeps only one Via header when sending SIP messages to the trunk.
* **Use the Tel URI scheme for the Request-Line**\
When enabled, the PBX sends INVITEs using `tel:` in the Request-Line. Example:\
`INVITE tel:+12345678 SIP/2.0`
* **Use the Tel URI scheme for the To header**\
When enabled, the PBX uses `tel:` in the To header. Example:\
`To: tel:+12345678`
* **STIR/SHAKEN signature required**\
When enabled, the PBX signs outbound calls using **STIR/SHAKEN**.\
For details, see the [STIR/SHAKEN](/portsip-communications-solution/portsip-pbx-administration-guide/27-stir-shaken) chapter.
* **Remove the “+” prefix from the called number on outbound calls**\
When enabled, the PBX removes the `+` prefix from the called number when sending the INVITE to the trunk.
* **Send OPTIONS message for keep-alive**\
When enabled, the PBX sends SIP **OPTIONS** periodically to monitor trunk reachability. If the PBX does not receive `200 OK`, it marks the trunk as **offline**.
* **Send OPTIONS message interval (seconds)**\
Sets how often the PBX sends OPTIONS keep-alives. Default: **360 seconds**.
10. **Assign the trunk to tenants (System Admin only)**\
Click **Next**, then select one or more tenants that should be allowed to use this trunk.
11. **Configure a DID pool for each assigned tenant**\
For every tenant you assign:
* Configure a **DID pool**
* Ensure DID pools are **unique and non-overlapping** for the same provider
***
#### Expected Outcome
After completing these steps:
* The trunk is created and available in the PBX.
* Selected tenants can see the trunk (as assigned by the System Admin).
* Each assigned tenant can create inbound rules **only using DIDs from their own DID pool**.
For more details, see [DID Pool Concept](#did-pool-concept).
***
### Add the Trunk (Tenant Admin)
When a Tenant Admin logs in to the Web Portal, they can create trunks for **their own tenant**. Tenant Admins can add only the following trunk types:
* **Register-Based** — The PBX registers to the trunk provider.
* **Accept Register** — The trunk provider registers to the PBX.
* **Microsoft Teams** — Microsoft Teams Direct Routing.
* **WhatsApp** — WhatsApp messaging service.
> ❗**Note:** **IP-Based** trunks can be added **only by the System Admin**.
***
#### Prerequisites
Before you begin, make sure you have:
* An active account with your SIP trunk provider (or Microsoft Teams / WhatsApp credentials, if applicable)
* Provider details such as:
* Host domain/IP and port
* Outbound proxy (if required) and proxy port
* Required transport protocol (UDP/TCP/TLS)
* Credentials (for Register-Based trunks): authentication name/username, password, re-register time
* Any additional source IPs the provider may use (for Associated IPs)
Also ensure the required transport protocol is already enabled in PortSIP PBX (see **Transport Management**).
***
#### Steps
1. **Open the Trunks page**\
Go to **Call Manager > Trunks**.
2. **Start adding a trunk**\
Click the **arrow** button and select the trunk type you want to add.
3. **Enter a trunk name**\
Enter a **friendly name** that helps you identify the trunk later (for example, `Telnyx-US`, `Twilio-Primary`, or `Teams-DirectRouting`).
4. **Select the trunk provider brand**\
From **Brand**, select your provider.
* If your provider is listed and preconfigured, follow the [Configuring SIP Trunks](/portsip-communications-solution/configuring-sip-trunks) guide for provider-specific settings.
* If your provider is not listed, select **Generic** and continue with the steps below.
5. **Configure the DID Pool**\
Enter a **DID pool** for this tenant.
* The DID pool defines which DIDs this tenant can use when creating inbound rules for this trunk.
* When creating inbound rules, the DID you select **must fall within this DID pool**.
For details and formatting rules, see [DID Pool Concept](#did-pool-concept).
6. **Enter trunk connection details**\
Fill in the following fields using the values from your trunk provider:
* **Host Domain or IP**
* **Port**
* **Outbound Proxy Server** (if required)
* **Outbound Proxy Server Port** (if required)
7. **Select the transport protocol**\
Under **Transport**, choose the protocol required by your provider: **UDP**, **TCP**, or **TLS**.
> ❗**Note:** The selected transport must already be configured in the PBX. If it’s not available, add it first in [**Transport Management**](/portsip-communications-solution/portsip-pbx-administration-guide/6-transport-management).
8. **Add associated IP addresses (if required)**\
Some providers send SIP INVITEs from **multiple source IPs**, not just the Host Domain/IP.
* Under **Associated IPs of the Trunk**, click **Add**
* Add each IP address provided by your trunk carrier
9. **Enter registration credentials (Register-Based trunks only)**\
If you selected **Register-Based**:
* Click **Next**
* Enter:
* **Username/Authentication Name**
* **Password**
* **Re-register Time**
* Use the values provided by your trunk provider.
10. **Configure advanced parameters**\
Click **Next**, then review and configure the following options as needed:
* **Use the private IP address to communicate with this trunk**\
Enable if the PBX should use a **private IP** for this trunk connection. If disabled, the PBX uses its **public IP**.
* **Rewrite the host IP of the Via header with the PBX server’s public IP when sending requests to the trunk**\
If enabled (and the PBX has a public IP), the PBX replaces the Via host IP with its public IP in outbound SIP messages.\
**Recommendation:** Leave this at the default unless your provider explicitly requires it.
* **Verify the port when receiving SIP messages from the trunk**\
When enabled, the PBX matches inbound SIP messages using **both IP and port**. When disabled, it matches by **IP only**.\
**Recommendation:** Leave this at the default unless instructed otherwise by your provider.
* **This trunk only accepts a single Via SIP header**\
Enable only if your trunk provider requires a single Via header in outbound SIP messages.
* **Use the Tel URI scheme for the Request-Line**\
When enabled, the PBX uses `tel:` in the Request-Line. Example:\
`INVITE tel:+12345678 SIP/2.0`
* **Use the Tel URI scheme for the To header**\
When enabled, the PBX uses `tel:` in the To header. Example:\
`To: tel:+12345678`
* **STIR/SHAKEN signature required**\
When enabled, the PBX signs outbound calls using **STIR/SHAKEN**.\
For details, see the [STIR/SHAKEN](/portsip-communications-solution/portsip-pbx-administration-guide/27-stir-shaken) chapter.
* **Remove the “+” prefix from the called number on outbound calls**\
When enabled, the PBX removes the `+` prefix from the called number when sending the INVITE to the trunk.
* **Send OPTIONS message for keep-alive**\
When enabled, the PBX sends SIP **OPTIONS** periodically to monitor trunk reachability (online/offline). If no `200 OK` is received, the PBX marks the trunk as **offline**.
* **Send OPTIONS message interval (seconds)**\
Sets how often OPTIONS keep-alives are sent. Default: **360 seconds**.
***
#### Expected Outcome
After completing these steps:
* The trunk is created and available for your tenant.
* Your tenant can create inbound rules using this trunk, but **only with DIDs in the trunk’s DID pool**.
* If keep-alive is enabled, the PBX monitors trunk status using SIP OPTIONS based on the configured interval.
***
#### 3-Way Authentication
Some register authenticated trunks require **3-way Authentication** for security purposes. This means that the **Account Username** and **Account Authentication** are different, and both must be used for authentication. PortSIP PBX supports this type of trunk configuration.
**Example Trunk Details:**
Assume the trunk provider has provided you with the following details:
* **Account Username:** 120390780001
* **Account Authentication:** 3jpAj1E1D8QkFO0
* **Account Password:** 5lbKCpbpHwDTbvQe
In this case, the **Account Authentication** field also refers to the **3-way authentication password**.
For reference, see the screenshot below for an example of how the settings should be configured in the PortSIP PBX web portal.
***
### Configure E1/T1 Gateway Registration to PortSIP PBX
#### Overview
In some deployments, PortSIP PBX is hosted in a public cloud (AWS, Azure, or Google Cloud), while an **E1/T1 gateway** remains on a customer’s local LAN. If the gateway **does not have a static public IP address**, an **IP-Based trunk** is not suitable because the PBX cannot reliably identify the gateway by a fixed source IP.
In this scenario, configure the E1/T1 gateway to **register outbound from the local LAN to the cloud-hosted PortSIP PBX**. This allows the gateway to function as a trunk for placing and receiving calls through PortSIP PBX.
> ❗**Terminology note:** In PortSIP PBX, this model is implemented using an **Accept Register** trunk (the gateway registers to the PBX).
***
#### Prerequisites
Before you begin, ensure you have:
* The cloud PBX **public static IP address** (or public SBC address) reachable from the gateway network
* The SIP **transport protocol and port** you will use on PortSIP PBX (UDP/TCP/TLS)
* A DID plan and a tenant DID pool strategy (see [DID Pool Concept](#did-pool-concept))
* Firewall/NAT rules that allow the gateway to reach the PBX SIP signaling port
> ❗**Security Note:** Use strong, unique credentials for trunk registration. Treat trunk credentials like admin passwords—anyone who can register may be able to send calls into your PBX or place outbound calls (depending on routing rules).
***
#### Step 1: Create an “Accept Register” Trunk in PortSIP PBX
1. **Open the Trunks page**\
Go to **Call Manager > Trunks**.
2. **Add a trunk**\
Click the **arrow** button and choose **Accept Register**.
3. **Enter a trunk name**\
Enter a **friendly name** (for example, `E1GW-SiteA`).
4. **Configure the DID Pool**\
Enter a **DID pool** for this trunk.\
When you create inbound rules for this trunk, the DID numbers you select **must fall within this DID pool**.\
For details, see [DID Pool Concept](#did-pool-concept).
5. **Set Host Domain or IP Address**\
Enter a **domain string** in **Host Domain or IP Address**. This value does **not** need to be a real domain, and it does not need to resolve in DNS.
Example: `portsiptrunk1.io`
> ❗**Important:** Ensure this value does **not** match any tenant’s SIP domain.
6. **Set trunk registration credentials**\
Click **Next**, then configure:
* **Authorization Name**: Enter an identifier (for example, `123456`).\
The E1/T1 gateway will use this value when registering to PortSIP PBX.
* **Password**: Enter a password.\
The E1/T1 gateway will use this password when registering to PortSIP PBX.
7. **Review remaining options**\
The remaining settings are the same as those used for IP-Based and Register-Based trunks (transport selection, Via header behavior, port verification, keep-alives, etc.).\
In most cases, you can keep the defaults unless your environment or gateway vendor requires specific behavior.
8. **Save the trunk**\
Complete the wizard to create the trunk.
**Expected Outcome**
* The Accept Register trunk is created and ready for the gateway to register.
***
#### Step 2: Configure the E1/T1 Gateway to Register to the Cloud PBX
On the E1/T1 gateway:
1. **Set the SIP server/domain**\
In the E1/T1 SIP settings, enter the trunk **Host Domain or IP Address** (for example, `portsiptrunk1.io`) in the **SIP Server/Domain** field.\
This must match the value you configured in PortSIP PBX.
2. **Set the outbound proxy**\
In **Outbound Proxy Server**, enter the **public static IP address** of the cloud-hosted PortSIP PBX.
3. **Set the outbound proxy port**\
In **Outbound Proxy Server Port**, enter the **PortSIP PBX transport port** used for this trunk (for example, the SIP listening port for UDP/TCP/TLS, depending on your transport).
4. **Enter registration credentials**\
Enter the values you configured in PortSIP PBX:
* **Username/Auth ID/Auth Name**: Authorization Name
* **Password**: Password
After saving the gateway configuration, the E1/T1 gateway should register successfully to the cloud-hosted PortSIP PBX.
**Expected Outcome**
* The E1/T1 gateway registers with the PortSIP PBX and becomes available as a trunk for inbound and outbound calling.
***
### Outbound Parameters and Inbound Parameters (Advanced)
After the trunk is working, you can further customize SIP header/value handling:
1. Go to **Call Manager > Trunks**
2. Select the trunk
3. Click **Edit**
4. Update **Inbound Parameters** and/or **Outbound Parameters**
#### Outbound Parameters
Use **Outbound Parameters** to apply rules that modify SIP headers in outbound INVITEs sent to the trunk. For example, you can set the user part of the **From** header to match the extension’s **Outbound Caller ID**.
To configure an extension’s Outbound Caller ID, go to the user’s settings **General** page. For details, see **Users**.
#### Inbound Parameters
Use **Inbound Parameters** to apply rules that normalize or rewrite field values in SIP messages received from the trunk (inbound calls).
For additional guidance, see [Handle Outbound Calls Through SIP Trunk](/portsip-communications-solution/portsip-pbx-administration-guide/7-trunk-management/handle-outbound-calls-through-sip-trunk).
> ❗**Recommendation:** Inbound and outbound parameter rules are advanced options. Use the default values unless you have a specific interoperability requirement.
***
### Deleting a Trunk
You cannot delete a trunk if it is referenced by any inbound or outbound rules.
To delete a trunk:
1. Identify all inbound and outbound rules that use the trunk.
2. Either:
* Change those rules to use a different trunk, **or**
* Delete the rules.
3. Delete the trunk.
**Expected Outcome**
* Once no rules are referencing the trunk, it can be deleted successfully.
# Handle Outbound Calls Through SIP Trunk
This topic explains how PortSIP PBX processes **outbound calls** through a SIP trunk—specifically, how the PBX builds the SIP **INVITE** request and populates key SIP header and URI fields.
***
### DID Pool
To understand the concept of Direct Inward Dialing (DID), see **What is Direct Inward Dialing (DID)?**
Because PortSIP PBX is a **multi-tenant** system, it must be able to reliably determine which tenant owns a DID and which caller IDs are allowed for that tenant:
* If multiple tenants use the **same trunk provider** and configure the **same DID** in inbound rules, the PBX cannot determine which tenant should receive inbound calls to that DID.
* If an extension in one tenant presents an **outbound caller ID** that belongs to another tenant, it can create conflicts and incorrect identity presentation.
To prevent these issues, PortSIP PBX uses a **DID pool**: a defined set (or range) of DID numbers assigned to each tenant for a given trunk/provider.
***
#### Trunks Added by System Admin
When the **System Admin** assigns a trunk to a tenant, they must configure a **unique DID pool** for that tenant.
* DID pools for the same provider **must not overlap** across tenants.
* After the trunk is assigned, the tenant can only select DID numbers **from its assigned DID pool** when creating inbound rules.
***
#### Trunks Added by Tenant Admin
If a **Tenant Admin** creates a trunk, they must also specify a **DID pool** for that trunk.
* All inbound rules created by that tenant for the trunk must use DID numbers **from that DID pool**.
* The DID pool must be **unique** and must not overlap with DID pools used by other tenants for the same trunk provider.
**Example: Overlapping DID Pools (Not Allowed)**
* Tenant A uses provider **XYZ** and sets the DID pool to **1000–2000**
* Tenant B uses the same provider **XYZ** and sets the DID pool to **2000–3000**
This creates a conflict. If an inbound call arrives for DID **2000**, the PBX cannot determine which tenant should receive the call.
***
### DID Pool Numbering
A DID pool can contain:
* A single range:\
`1000-2000`\
`282556000-282556900`
* A mix of individual numbers and ranges (semicolon-separated):\
`101; 203; 300-450`
#### DID Pool Entry Rules
When adding numbers to a DID pool, the DID number or range **must not begin with**:
* `+`
* `0`
* `00`
If your DID number or range begins with any of these prefixes, remove the prefix before entering the value.
> ❗**Note:** This rule applies to DID pool input formatting in PortSIP PBX. Your trunk provider may still deliver inbound called numbers in E.164 format (for example, `+14155550100`) depending on their SIP signaling and number normalization behavior.
***
## Structuring the INVITE Message
The values included in outgoing INVITE messages sent by PortSIP PBX can be configured within the SIP Structuring the INVITE Message
PortSIP PBX builds an outbound **SIP INVITE** when a user places a call through a SIP trunk. You can control how specific SIP header and URI values are populated by configuring the trunk’s **Outbound Parameters**.
To review or change these settings:
* Go to **Call Manager > Trunks**
* Select the trunk
* Click **Edit**
* Open **Outbound Parameters**
Outbound Parameters let you customize how PortSIP PBX assigns values to key SIP fields in outbound INVITEs. This is especially useful when a trunk provider requires specific formats for caller ID, number presentation, or header values. (These options are explained in detail later in this guide.)
Below is an example of a basic INVITE message generated by PortSIP PBX when placing an outbound call through a SIP trunk:
```log
INVITE sip:88888888@pstn.twillio.com:5060 SIP/2.0
Via: SIP/2.0/UDP 192.168.0.11:5060;branch=z9hG4bK-524287-1---39f4bc06b915b70f;rport
Max-Forwards: 19
Contact:
To: <88888888@pstn.twillio.com>
From: ;tag=35c2342b
Call-ID: DSSzmYKnCwhMeB1TWUwv2A..
CSeq: 1 INVITE
Session-Expires: 300
Min-SE: 90
Accept-Language: en
Allow: REGISTER, INVITE, ACK, CANCEL, OPTIONS, BYE, REFER, NOTIFY, SUBSCRIBE, UPDATE, INFO, MESSAGE, PUBLISH
Content-Type: application/sdp
Supported: replaces, norefersub, tdialog, join, timer
User-Agent: PortSIP UC - Call Manager 16.0.0.302
X-CID: QERh8-brREchTYRqTSTALQ..
X-Session-Id: 678271070897180672
X-Trunk-Name: CallCentric
Content-Length: 361
```
***
### Configurable SIP Fields
PortSIP PBX does not allow full customization of the entire INVITE message. The PBX always includes the required SIP structure and core headers needed for standards-compliant call setup. However, PortSIP PBX does allow you to configure how it populates the following **supported fields** (via **Call Manager > Trunks > Edit > Outbound Parameters**):
* **Request-Line URI**
* User Part
* Host Part
* **Contact**
* User Part
* Host Part
* **To**
* Display Name
* User Part
* Host Part
* **From**
* Display Name
* User Part
* Host Part
* **Remote-Party-ID (Called Party)**
* Display Name
* User Part
* Host Part
* **Remote-Party-ID (Calling Party)**
* Display Name
* User Part
* Host Part
* **P-Asserted-Identity**
* Display Name
* User Part
* Host Part
* **P-Preferred-Identity**
* Display Name
* User Part
* Host Part
* **P-Called-Party-ID**
* Display Name
* User Part
* Host Part
* **Privacy Types Supported**
* **Variables**
> ❗**Note:** These controls adjust specific header/URI values, not the overall SIP message layout. Use the default settings unless your trunk provider explicitly requires a different header format or number presentation.
***
### Variables
PortSIP PBX provides variables that you can assign to the configurable SIP fields above. These variables allow the PBX to dynamically populate SIP values based on trunk configuration and call context.
The following variable is available:
#### AuthID
**AuthID** resolves to the value configured as the trunk’s **Authentication Name (SIP User ID)**:
* **Path:** **Call Manager > Trunks > Edit (Register-Based Trunk) > Client Verification > Authentication Name (SIP User ID)**
**Applies to:**
* Register-Based Trunks
* Accept Register Trunks
#### CalledNum
**CalledNum** is the dialed (destination) number that the outbound INVITE is intended to call.
#### CallerNum
**CallerNum** is the caller number used for identity presentation in outbound signaling.
#### CallerDispName
When an extension registered to PortSIP PBX places an outbound call, and a value is provided for **From: Display Name**, PortSIP PBX attempts to preserve that value in the INVITE sent to the trunk.
* If the endpoint does not send a display name, PortSIP PBX uses the extension user’s name by default.
#### OriginatorCallerID
**OriginatorCallerID** attempts to preserve the original caller’s number—even if the call did not originate from PortSIP PBX (for example, a forwarded call).
* If the user places an outbound call using an anonymous dial code, this variable is populated as `anonymous`.
#### Anonymous
When PortSIP PBX sends an outbound call to the trunk in anonymous mode, this variable is populated as:
* `anonymous`
#### Custom Field
Use **Custom Field** when you want to manually enter a fixed value instead of using a dynamic variable.
#### TrunkHostPort
**TrunkHostPort** is the combined value of the trunk **Host Domain/IP** and **Port** fields:
* **Path:** **Trunks > Edit SIP Trunk > Server > Host Domain or IP** + **Port**
#### OutHostPort
**OutHostPort** is the combined value of the trunk **Outbound Proxy Server** and **Outbound Proxy Server Port** fields:
* **Path:** **Trunks > Edit SIP Trunk > Server > Outbound Proxy Server** + **Outbound Proxy Server Port**
#### ContactUri
**ContactUri** is the IP address and port at which the SIP trunk should contact PortSIP PBX. It is typically used to populate **Contact: Host Part**.
* The port is always the **PortSIP PBX transport port**.
***
### OutboundCallerId
During an outbound call, PortSIP PBX determines the **Outbound Caller ID** using a priority order (highest priority first). The highest priority source is the **Outbound Caller ID configured on the extension user**.
#### Configure the Extension Outbound Caller ID
1. Go to **Call Manager > Users**
2. Select the user and click **Edit**
3. Open the **Extension** tab
4. In **Outbound Caller ID**, set the outbound caller ID for the user
#### DID Pool Requirement
The outbound caller ID must fall within the trunk’s **DID pool** range.
> ❗**Important formatting note:** The original text states the outbound caller ID “can begin with `+`, `0`, `00`, or `+00`.” This is **inconsistent** with the DID pool input rule earlier (“DID pool cannot begin with `+`, `0`, or `00`”).\
> A safer and clearer way to express this is:
>
> * **DID pool entry**: entered without dialing prefixes (`+`, `0`, `00`)
> * **Outbound caller ID**: may be entered or presented with prefixes depending on PBX normalization and provider requirements
(Your existing text suggests PortSIP allows prefixes in outbound caller ID fields even if DID pools are stored without prefixes.)
#### User Groups as a Fallback (When Using “Calls from user groups”)
As described in the **User Groups** section:
* You can create a user group, add users as members, and assign DID numbers to the group.
* If an outbound rule uses **Calls from user groups**, and a group member does not have an outbound caller ID set, PortSIP PBX will use the **user group’s outbound caller ID** for that call.
#### Company-Level Fallback
If both of the following are empty:
* The user’s outbound caller ID, and
* The group’s outbound caller ID (or the outbound rule does not use user group criteria),
then PortSIP PBX uses the **company-wide outbound caller ID** settings.
To configure company-level outbound caller ID:
* Go to **Company > Outbound Caller ID**
***
### Outbound Caller ID Priority
When an extension places an outbound call through a SIP trunk, PortSIP PBX selects the **Outbound Caller ID** using the following priority order (highest to lowest). The selected value is then used to populate caller identity in the outbound INVITE—most notably by updating the **From** header (based on your trunk’s Outbound Parameters configuration).
#### Priority Order
1. **App-specified Outbound Caller ID (PortSIP ONE)**
* If the user places the call from the **PortSIP ONE app** and explicitly selects/specifies an Outbound Caller ID, the PBX uses that value.
2. **Caller Extension’s Outbound Caller ID**
* If the caller’s extension has an **Outbound Caller ID** configured, the PBX uses it and overwrites the **From** header accordingly.
3. **Outbound Rule’s Outbound Caller ID**
* If the extension does not have an Outbound Caller ID configured, the PBX uses the **Outbound Caller ID** set on the **Outbound Rule** and overwrites the **From** header.
4. **User Group’s Outbound Caller ID**
* If the outbound rule does not define an Outbound Caller ID, but the rule applies to a **User Group** that has an Outbound Caller ID assigned, the PBX uses the group’s Outbound Caller ID and overwrites the **From** header.
5. **Company Outbound Caller ID**
* If none of the above are set, the PBX uses the **Company-wide Outbound Caller ID** and overwrites the **From** header.
***
### Outbound Caller ID for PBX Services
You can configure an Outbound Caller ID for PBX services such as:
* **Virtual Receptionist (IVR)**
* **Call Queue**
* **Ring Group**
* **Meeting**
When PortSIP PBX places an outbound call to the trunk on behalf of one of these services—for example:
* a queue/ring group/virtual receptionist call **fails**, **times out**, or is **not answered** and is then routed to an external destination via the trunk, or
* a meeting **invites (dials out to)** an external number through the trunk,
The PBX uses the **Outbound Caller ID configured for that service**.
If the service does not have an Outbound Caller ID configured, PortSIP PBX falls back to the **Company Outbound Caller ID**.
***
### Adjust Trunk Parameters to Apply Outbound Caller ID
To ensure the selected Outbound Caller ID is actually reflected in outbound SIP signaling, configure the trunk’s **Outbound Parameters** so the appropriate variables are mapped into the SIP identity fields (such as **From** and/or identity headers).
Use the trunk settings to adjust outbound parameters:
* Go to **Call Manager > Trunks**
* Select the trunk and click **Edit**
* Open **Outbound Parameters**
* Configure the SIP fields (for example, **From: User Part**, **From: Display Name**, and other identity headers) to use the Outbound Caller ID variables required by your provider
> ❗**Note:** Outbound Parameters are advanced options. Use the default mappings unless your trunk provider requires specific caller ID formatting or specific identity headers.
***
### Bypassing the Outbound Caller ID Settings
PortSIP PBX can bypass the standard Outbound Caller ID selection logic by allowing a caller device (IP phone / softphone / application) to request a specific outbound caller ID using a custom SIP header in the INVITE it sends to the PBX.
When the endpoint includes the `X-Outbound-Cli` header, PortSIP PBX can rewrite selected identity fields in the outbound INVITE before forwarding the call to the SIP trunk.
> ❗**Security Note:** This is an advanced feature. Allowing endpoints to influence outbound caller ID can increase the risk of caller ID spoofing if not governed properly. Use it only when required, and ensure DID pool restrictions are enforced.
***
#### How It Works
The endpoint sends an INVITE to PortSIP PBX with one or more `X-Outbound-Cli` directives. The PBX then applies the requested rewrite(s) when sending the call to the trunk.
**Rewrite the From header user part**
```
X-Outbound-Cli: rewrite-from=123
```
PortSIP PBX rewrites the **username (user part)** in the `From` header to `123` before forwarding the INVITE to the trunk.
**Add/Rewrite P-Asserted-Identity (PAI)**
```
X-Outbound-Cli: rewrite-pai=456
```
PortSIP PBX adds (or updates) the `P-Asserted-Identity` header so its **username (user part)** is set to `456` before sending the INVITE to the trunk.
**Add/Rewrite Remote-Party-ID (RPI)**
```
X-Outbound-Cli: rewrite-rpi=789
```
PortSIP PBX adds (or updates) the `Remote-Party-ID` header so its **username (user part)** is set to `789` when sending the INVITE to the trunk.
***
#### Apply the Rewrite Only for a Specific Trunk
If you want the rewrite to apply only when the call is routed through a specific trunk, include the trunk identifier in the header.
**v22.x and later: use `trunk-id`**
```
X-Outbound-Cli: rewrite-from=123; trunk-id=235468356
```
PortSIP PBX rewrites the `From` header only when the call is routed through trunk ID `235468356`.
You can combine multiple rewrite directives:
```
X-Outbound-Cli: rewrite-from=123; rewrite-rpi=789; rewrite-pai=456; trunk-id=235468356
```
PortSIP PBX rewrites the `From`, `Remote-Party-ID`, and `P-Asserted-Identity` headers for the specified trunk.
**If `trunk-id` is omitted**
If no `trunk-id` is specified, PortSIP PBX applies the rewrite(s) to **any trunk** the call is routed through.
**v16.x: use `trunk-name`**
In **v16.x**, specify the trunk using `trunk-name` instead of `trunk-id`.
> ❗**Note:** Use the exact trunk name as configured in the PBX.
***
#### DID Pool Requirement
When using `X-Outbound-Cli` to bypass the PBX outbound caller ID settings, the caller ID you specify must still be within the tenant’s assigned **trunk DID pool** range.
***
### Remove SIP Headers on Outbound Messages
PortSIP PBX allows you to remove specific SIP identity headers from outbound SIP messages sent to a SIP trunk. This can be useful when a trunk provider does not support certain headers, or when you want to ensure only the required identity headers are sent.
You can remove the following headers:
* `P-Asserted-Identity`
* `P-Preferred-Identity`
* `P-Called-Party-ID`
#### Configure Header Removal
1. Go to **Call Manager > Trunks**
2. Select the trunk and click **Edit**
3. Open **Outbound Parameters**
4. Configure the header removal options as shown in the product UI (see the screenshot in the original guide)
5. Save your changes
***
### Privacy Types Supported
PortSIP PBX supports the following SIP **Privacy** types. These values influence how identity and informational headers are handled when sending SIP requests (for example, INVITEs) toward a trunk.
> ❗**Note:** Privacy handling is typically relevant when you need to withhold caller identity or reduce information disclosure. Some trunk providers have specific requirements for identity and privacy headers.
#### `user`
**User-level privacy** is applied. PortSIP PBX removes non-essential informational headers that are not required for call routing, including:
* `Subject`
* `Call-Info`
* `Organization`
* `User-Agent`
* `Reply-To`
* `In-Reply-To`
Depending on the call scenario and configuration, PortSIP PBX may also change the original `From` header value to `anonymous`.
#### `header`
**Header privacy** is applied. PortSIP PBX modifies headers that the caller typically cannot arbitrarily set, such as:
* `Contact`
* `Via`
The PBX also avoids adding unnecessary headers that could reveal personal information about the originator.
> ❗The modified values must remain routable, meaning the PBX can still receive and route in-dialog requests (such as re-INVITEs or BYEs) back to the originator as required.
#### `id`
**Identity privacy** is applied. Third-party asserted identity is kept private from SIP entities outside of the trusted domain where the user authenticated.
# PBX and SIP Trunk using PortSIP SBC
This topic describes how to configure **PortSIP SBC** to enable interoperability between a **generic SIP trunk** and **PortSIP PBX**.\
The SBC acts as a secure SIP signaling and media boundary, interconnecting the enterprise PBX deployed in a private network with a SIP trunk service hosted on a public network.
***
### 1. Interoperability Topology
The interoperability testing between PortSIP SBC, a generic SIP trunk, and PortSIP PBX was performed using the following deployment model.
#### Deployment Scenario
* The enterprise deploys **PortSIP PBX** within its private LAN to provide internal voice communications.
* The enterprise requires PSTN connectivity and enterprise calling services through a **SIP Trunk** provided over the public Internet.
* **PortSIP SBC** is deployed at the network edge to interconnect the enterprise LAN with the SIP trunk provider and to protect the PBX from direct exposure to the public network.
#### Key Concepts
* **Session**\
A real-time voice communication session established using the Session Initiation Protocol (SIP).
* **Border**\
The IP-to-IP network boundary between the enterprise LAN (where PortSIP PBX resides) and the public network hosting the SIP trunk.
#### Call Flow Overview
The high-level call flow for this topology is:
```
Extension <-> PortSIP PBX <-> PortSIP SBC <-> SIP Trunk
```
This architecture ensures secure signaling, controlled media traversal, and protocol normalization between the PBX and the SIP trunk provider.
***
### 2. Configuring PortSIP PBX
Before configuring the SBC and SIP trunk, ensure that the PortSIP PBX is installed and operational.
#### Prerequisites
Complete the following PBX setup steps:
1. [Install PortSIP PBX](/portsip-communications-solution/portsip-pbx-administration-guide/1-installation-of-the-portsip-pbx/installation-of-portsip-pbx-v22.x/install-portsip-pbx)
2. Perform basic [PBX configuration, including system and tenant setup](/portsip-communications-solution/portsip-pbx-administration-guide/2-portsip-pbx-management)
Refer to the corresponding PBX installation and configuration guides for detailed instructions.
***
### 3. Configuring PortSIP SBC
Install and [configure the PortSIP SBC](/portsip-communications-solution/portsip-pbx-administration-guide/9-configuring-portsip-sbc) according to your deployment requirements.
> ❗**Note**\
> If WebRTC endpoints are used, ensure the SBC is configured for WebRTC support as described in the [*Configuring SBC for WebRTC* guide](/portsip-communications-solution/portsip-pbx-administration-guide/9-configuring-portsip-sbc/configuring-sbc-for-webrtc).
***
### 4. Adding the SIP Trunk to PortSIP PBX
This section describes how to add the SIP trunk to PortSIP PBX when the SBC is used as an outbound proxy.
#### Assumed SIP Trunk Parameters
* SIP trunk is reachable over the public Internet
* SIP trunk IP address: `52.214.181.141`
* SIP signaling port: `5060`
* Transport protocol: `UDP`
* Authentication mode:
* IP-based authentication **or**
* Register-based authentication
***
#### Step-by-Step Configuration
1. **Sign in to the PortSIP PBX Web Portal**
* Use **System Administrator** credentials.
* Navigate to **Call Manager > Trunks**.
2. **Add a New Trunk**
* Click the arrow button and select:
* **IP-based Trunk** or
* **Register-based Trunk**, depending on the SIP trunk type.
3. **Configure Basic Trunk Settings**
* Enter a **friendly name** for the trunk.
* Set **Host Domain or IP** to the SIP trunk IP address:
```
52.214.181.141
```
* Set **Port** to `5060`, or to the actual port provided by the SIP trunk provider if different.
4. **Configure the Outbound Proxy (SBC)**
* Set **Outbound Proxy Server** to the **private IP address of the SBC**, for example:
```
192.168.1.73
```
* Set **Outbound Proxy Server Port** to:
```
5069
```
> By default, PortSIP SBC listens on TCP port 5069 for SIP traffic from the PBX.
5. **Select Transport Protocol**
* Select **TCP** as the transport.
* Click **Next**.
> **Note**\
> PortSIP PBX communicates with the SBC using TCP by default. Ensure the selected transport matches the SBC configuration.
6. **Configure Authentication (Register-Based Trunk Only)**
* Enter the **Authorization Name** and **Password** provided by the SIP trunk service provider.
* Click **Next**.
7. **Advanced Options**
* Enable **Use the private IP address to communicate with this trunk**.
* Disable **Rewrite the host IP of Via header by public IP when sending the request to trunk**.
* Click **Next**.
8. **Assign Trunk to Tenants**
* Since the trunk is created by the **System Administrator**, select one or more tenants that are allowed to use this trunk.
* For details, refer to the *Add the Trunk by System Admin* section in [Trunk Management](/portsip-communications-solution/portsip-pbx-administration-guide/7-trunk-management).
Now you are ready to [create the inbound & outbound rules for the call routing](/portsip-communications-solution/portsip-pbx-administration-guide/8-call-route-management).
# 8 Call Route Management
Outbound and inbound rules define how PortSIP PBX routes calls based on specific criteria. With these rules, you can control which trunk is used for a call—for example, to implement **Least Cost Routing (LCR)**, where the PBX selects the lowest-cost route that meets your requirements.
You can also assign **DIDs (Direct Inward Dialing numbers)** so external callers can reach a specific extension (or other destination) directly, without going through a receptionist or IVR.
This article includes the following topics:
* [Configuring Inbound Rule](/portsip-communications-solution/portsip-pbx-administration-guide/8-call-route-management/configuring-inbound-rule)
* [Configuring Outbound Rule](/portsip-communications-solution/portsip-pbx-administration-guide/8-call-route-management/configuring-outbound-rule)
# Configuring Inbound Rule
### Creating Inbound Rules
Many organizations assign **Direct Inward Dialing (DID)** numbers to users or departments so external callers can reach the right person or team directly, without going through a receptionist or IVR (auto attendant). In some regions, DID numbers are also called **DDI** (United Kingdom) or **MSN** (Germany).
DID numbers are provided by your SIP trunk provider (or phone company). They are virtual numbers that route inbound calls to your PBX, and providers typically assign them in a number range. If you need details about your DID range or format, contact your trunk provider.
***
#### Prerequisites
* Configure at least **one SIP trunk** before you create inbound rules.
#### Procedure: Add an inbound rule
1. Sign in to the PortSIP PBX Web Portal:
* **System Admin**: Go to **Tenants**, select a tenant, then click **Manage** to configure rules for that tenant.
* **Tenant Admin**: Sign in and manage inbound rules for your own tenant.
2. Go to **Call Manager > Inbound Rules**, then click **Add**.
3. Enter a **Name** (a friendly label to help you identify the rule later).
4. Configure the rule matching fields:
**Caller Number Mask (optional)**\
Use this field to match inbound calls by **caller ID (CID)**. You can configure caller number masking in inbound rules with support for:
* Number ranges (e.g., `1000-2000`)
* Single numbers (e.g., `60000`)
* Use `*` as a wildcard to match multiple callers. For example:
* `0044**********` matches caller numbers in that format (example: UK format).
* `004420********` matches caller numbers in that format (example: London area).
* Multiple conditions combined with semicolons (e.g., `0036***;1000-2000;6000`)
**Wildcard rule:** If you use `*`, the number of `*` characters must match the number of digits you want to match. For example, use `***` to match a 3-digit pattern.
> ❗**Note:** In most deployments, you can leave **Caller Number Mask** empty unless you need to restrict matching to specific caller IDs.
5. In **Trunk**, select the SIP trunk to associate with this inbound rule.
* Only **one** SIP trunk can be assigned to an inbound rule.
6. In **DID/DDI Number Mask**, enter the DID as it appears in the SIP **To** header for inbound calls. PortSIP PBX matches this value against the **To** header in the inbound SIP **INVITE** received from the trunk.
The DID/DDI Number Mask can be:
* A **single number**, for example: `442012345678`
* A **number range**, for example: `3325261000-3325262000` or `442012345600-442012345800`
The DID (or DID range) must be within the trunk’s **DID pool** range.
> ❗**Note:** The DID number and DID pool cannot start with **`+`, `0`, or `00`.** If your provider presents numbers with these prefixes, remove the prefix before entering the value.
7. Review how matching works:
* If you set **both** **Caller Number Mask** and **DID/DDI Number Mask**, the rule matches only when:
* The **caller ID** matches the Caller Number Mask, **and**
* The **called number** matches the DID/DDI Number Mask.
* If you set **only** **DID/DDI Number Mask**, the rule matches when the **called number** matches the DID/DDI Number Mask.
8. (Optional) Enable **Play recording notifications**.\
When enabled, inbound calls routed through this rule will play a voice prompt notifying the caller that the call may be recorded.
9\. Specify how inbound calls are forwarded
Choose how calls that match this inbound rule are routed:
* **Forward to number**\
Routes the call to a specific destination. The destination can be:
* An **extension**
* A **system extension**, such as a ring group, virtual receptionist (IVR), meeting number, or queue
* A **PSTN phone number**
* A **range of extensions**, for example `2000–3000`
**1:1 DID-to-extension range mapping**\
If **Forward to number** is configured as a range, both **DID Number Mask** and **Forward to number** must be **serial ranges of the same size**. Example:
* DID Number Mask: `442012345600–442012345800`
* Forward to number: `1100–1300`
With this configuration:
* A call to `442012345600` is routed to extension `1100`
* A call to `442012345698` is routed to extension `1198`
The PBX maintains a **1:1 offset mapping** between the DID numbers and the corresponding extensions.
* **Forward to voicemail**\
Routes the call directly to voicemail, allowing the caller to leave a message.\
Select the extension whose mailbox should receive the voicemail. For example, selecting extension `108` stores the voicemail in extension `108`’s mailbox.
* **Hang up**\
Terminates the inbound call when it matches this rule.
10\. Configure office hours and holiday routing
You can define different call-handling behavior for inbound calls received **outside of office hours** or **during holidays**. This allows you to apply alternate routing rules that align with your business schedule.
11\. Configure bulk DID-to-extension routing
You can configure an inbound rule to route **ranges of DID numbers** to corresponding **ranges of extensions** for large-scale deployments. This enables efficient **1:1 mapping** between DID ranges and extension ranges.\
Refer to the earlier **DID range mapping** example for details.
***
### Office Hours and Holidays
Inbound rules can apply **different call routing behavior based on time and date**, allowing you to control how calls are handled during business hours, after hours, and on holidays.
#### Office Hours
Use the **Office Hours** tab in the inbound rule to define how incoming calls are routed based on the **time of day**.
* **Use default Global Office Hours**\
When selected, the inbound rule follows the **global office hours** configured by the **Tenant Admin**.
* **Use specific Office Hours**\
When selected, you can define **custom office hours** that apply only to this inbound rule, overriding the global tenant schedule.
#### Holidays
In the **Holidays** section, select one or more holidays from the tenant’s configured holiday list.
* During the selected holidays, any inbound call that matches this rule will be routed to the **holiday destination** specified in the inbound rule.
* Holiday routing takes precedence over regular office hours for the selected dates.
> **Note:** Holidays must be defined in the tenant’s holiday schedule before they can be selected here.
For more information about configuring schedules, see [Office Hours and Holiday Schedule](/portsip-communications-solution/portsip-pbx-administration-guide/30-office-hours-and-holiday-schedule).
***
### Language Skill Routing
You can create **multiple inbound rules that use the same DID and trunk** to route calls based on the **caller’s number (Caller ID / CID)**. Each inbound rule must use a **unique Caller Number Mask** to distinguish which rule applies.
This approach allows you to route callers to different destinations—such as queues staffed by agents with specific language skills—based on the caller’s country or number pattern.
#### Example: Language-based queue routing
You have the DID `00326012345670` and want to route calls to different queues based on the caller’s language.
1. **Inbound Rule for English-speaking callers**
* **Caller Number Mask:** `0044**********` (UK callers)
* **DID Number Mask:** `326012345670`
* **Destination:** Queue `8000` (English-speaking agents)
2. **Inbound Rule for French-speaking callers**
* **Caller Number Mask:** `0033*********` (French callers)
* **DID Number Mask:** `326012345670`
* **Destination:** Queue `9000` (French-speaking agents)
#### Call flow behavior
When a caller dials `00326012345670`:
* Calls from **UK numbers** (caller ID starting with `0044`) are routed to **Queue 8000**, where English-speaking agents are assigned.
* Calls from **French numbers** (caller ID starting with `0033`) are routed to **Queue 9000**, where French-speaking agents are assigned.
This configuration enables **language skill–based routing** without requiring the caller to interact with an IVR or make a language selection.
***
### Route Bulk Numbers to Bulk Extensions
For large organizations with hundreds or thousands of employees, manually creating individual inbound rules for each DID can be time-consuming and error-prone. For example, assigning 1,000 DID numbers to 1,000 extensions would traditionally require creating 1,000 separate inbound rules.
PortSIP PBX simplifies this process by allowing you to route **ranges of DID numbers** to **ranges of extensions** using a **single inbound rule**.
***
#### Example: 1:1 DID-to-extension range mapping
Assume your organization has:
* A range of **1,000 serial DID numbers** provided by the trunk service provider:\
`0012012345001–0012012346000`
* A corresponding range of **employee extensions**:\
`1001–2000`
#### Configuration
To create the inbound rule:
1. Set **DID Number Mask** to:\
`12012345001–12012346000`
2. Set **Call Route Destination** to:\
`1001–2000`
> **Note:** The DID range and extension range must contain the **same number of entries** to maintain correct 1:1 mapping.
#### Call routing behavior
With this configuration, PortSIP PBX routes calls as follows:
* Calls to `0012012345001` are routed to extension `1001`
* Calls to `0012012345002` are routed to extension `1002`
* Calls to `0012012345005` are routed to extension `1005`
The PBX automatically maintains a **fixed offset mapping** between the DID range and the extension range.
***
#### Route a DID Range to a Single Extension
In some scenarios, you may want to route **all DID numbers in a range** to a **single destination**, such as a main receptionist or shared extension.
Using the same DID range (`0012012345001–0012012346000`), configure the inbound rule as follows:
* **DID Number Mask:** `12012345001–12012346000`
* **Call Route Destination:** `1001`
With this configuration:
* Any call to a DID within `0012012345001–0012012346000` is routed to extension `1001`.
***
#### Route Calls to Any Number
In some scenarios, you may want inbound calls to be routed **without modifying the called number**. This is useful when you want the PBX to pass the dialed number through unchanged—for example, when integrating with downstream systems or external routing logic.
To achieve this, configure an inbound rule with the **route destination number set to `0`**, as shown in the example screenshot. A destination value of `0` instructs the PBX **not to rewrite or replace the called number** during routing.
**Call routing behavior**
* If a caller dials a DID within the range `0012012345001–0012012346000`, the call is routed using **the same destination number that was dialed**.
* The PBX does **not** alter the destination number when forwarding the call.
**Configuration options**
* You can apply this behavior to:
* A **single DID number**, or
* A **range of DID numbers**
Both configurations ensure that inbound calls retain their original called number as they are routed by the PBX.
***
### Advanced Routing
In addition to **office hours** and **holiday schedules**, PortSIP PBX supports **advanced time-based routing** for inbound calls. This allows you to route calls based on more granular temporal criteria, including:
* Year
* Month
* Day
* Day of the week
* Time of day
Using these conditions, you can precisely control how inbound calls are handled under different time scenarios, ensuring that calls are always routed to the most appropriate destination.
For detailed configuration steps and examples, see [Advanced Routing for Inbound Rules](/portsip-communications-solution/portsip-pbx-administration-guide/30-office-hours-and-holiday-schedule/routing-calls-based-on-office-hours-and-holidays#advanced-routing-for-inbound-rule).
# Configuring Outbound Rule
### Creating Outbound Rules
An **outbound rule** determines which SIP trunk is used to place outbound calls. The PBX evaluates outbound rules based on criteria such as:
* The extension or user placing the call
* The dialed number or its prefix
* The length of the dialed number
* The extension group to which the caller belongs
Outbound rules allow you to control call routing for scenarios such as least-cost routing, carrier failover, and policy-based call control.
#### Procedure: Add an outbound rule
1. Sign in to the **PortSIP PBX Web Portal**.
2. Go to **Call Manager > Outbound Rules**, then click **Add**.
3. Enter a **Name** for the outbound rule.
4. Configure the rule priority:
* **Priority**\
Set the priority value for the rule.
* A **lower number** indicates a **higher priority**.
* If a call matches multiple outbound rules, the rule with the **highest priority** (lowest number) is applied.
* If multiple rules share the same priority, **any one of those rules may be selected**.
5. Select the **Routing Strategy**:
* **Prioritized**\
The PBX attempts to place the call using the trunks in the configured order.\
If the call fails on the first trunk, the PBX automatically tries the next trunk.
* **Randomly**\
The PBX selects a trunk at random from the configured list.\
If the call fails, the PBX randomly selects another trunk.
***
#### Specify outbound rule conditions
In the **Apply this rule to the following calls** section, define when this outbound rule applies. You can use one or more of the following conditions:
* **Calls to numbers starting with prefix**\
Apply the rule to calls that begin with specific prefixes.\
Example: `00;123;88`
* **Calls from extension(s)**\
Apply the rule to a specific extension or a range of extensions.\
Example: `100–120`
* **Calls to numbers with certain digits**\
Apply the rule based on the total number of digits in the dialed number.\
Example: `8;10;12` (matches 8-, 10-, or 12-digit numbers)
* **Calls from extension group(s)**\
Apply the rule to specific extension groups instead of individual extensions.
***
#### Route outbound calls
In the **Make outbound calls on** section, select **up to six trunks** that the PBX can use for this rule.
* **Prioritized strategy**\
Calls are sent to trunks in the configured order. If a call fails, the PBX tries the next trunk in the list.
* **Random strategy**\
Calls are sent to a randomly selected trunk. If the call fails, another trunk is selected at random.
***
#### Transform numbers (optional)
Before routing the call to the selected trunk, you can modify the dialed number:
* **Strip digits**\
Removes a specified number of digits from the beginning of the called number.\
Example: Strip `00` from `002345`, resulting in `2345`.
* **Prepend digits**\
Adds digits to the beginning of the called number.\
Example: Prepend `+44` to `002345`, resulting in `+442345`.
***
#### Outbound Caller ID
* **Outbound Caller ID**\
Specify the caller ID presented to the called party for outbound calls routed through this rule.
***
### Office Hours for Outbound Rules
PortSIP PBX allows the **Tenant Admin** to control when outbound rules are active by applying **office hours** and **holidays**. If an outbound call is placed **outside the configured office hours** or **during a holiday**, the PBX blocks the outbound rule and prevents the call from being routed.
#### Office Hours
Use the **Office Hours** tab within the outbound rule to define when outbound calls are permitted.
* The PBX evaluates the **current time** against the configured office hours to determine whether the outbound rule can be applied.
* If the current time falls **outside** the specified office hours, the outbound call will **fail**, even if all other rule conditions are met.
You can choose one of the following options:
* **Use default Global Office Hours**\
The outbound rule follows the **global office hours** configured by the Tenant Admin.
* **Use specific Office Hours**\
The outbound rule uses **custom office hours** defined specifically for this rule, overriding the global schedule.
#### Holidays
You can also apply **holiday restrictions** to outbound rules by selecting one or more holidays from the tenant’s **Global Holiday List**.
* During selected holidays, the outbound rule is **blocked**, and outbound calls are not routed.
* Holiday restrictions apply regardless of office-hour settings.
#### Allow outbound calls at all times
If you do **not** want to block outbound calls at any time:
* Do **not** select any holidays, and
* Configure office hours to cover **all days and all times**.
This ensures the outbound rule remains active continuously.
For more information about configuring schedules, see [Office Hours and Holiday Schedule.](/portsip-communications-solution/portsip-pbx-administration-guide/30-office-hours-and-holiday-schedule)
# Configuring Inter-Tenant Call Routing
This guide explains how to enable direct calling between tenants by using a second PortSIP PBX as an **inter-tenant routing gateway**.
This architecture allows users in different tenants on the same multi-tenant PortSIP PBX to call each other without routing calls through the PSTN.
### Scenario
Assume that you already have **PortSIP PBX A**(Assume the IP address is `192.168.1.34`) deployed and hosting multiple tenants.
You now want users in one tenant to call users in another tenant directly, without sending the calls through a PSTN provider.
To achieve this, deploy a second PortSIP PBX, referred to in this guide as **PortSIP PBX B**(Assume the IP address is `192.168.1.96`). PBX B acts solely as a routing gateway between the tenants hosted on PBX A.
### Example Tenant Numbering Plan
Assume the following DID ranges are assigned to tenants on **PBX A**:
| Tenant | DID Range |
| -------- | ------------- |
| Tenant 1 | `11000–11100` |
| Tenant 2 | `22000–22100` |
In this example, a user in Tenant 1 can call a user in Tenant 2 by dialing the destination user's DID number, such as `22001`.
The following diagram illustrates the overall deployment architecture and call-routing flow:
***
## 1. Configure PBX A
PBX A hosts the actual tenants, extensions, DID pools, and final inbound-routing rules.
### 1.1 Add PBX B as an IP Authentication Trunk
On **PBX A**, configure **PBX B** as an **IP Authentication trunk**.
This trunk is used to send inter-tenant calls from PBX A to PBX B for routing.
### 1.2 Allocate DID Numbers to the Tenants
On PBX A, assign the appropriate DID ranges to each tenant.
For example:
| Tenant | DID Range |
| -------- | ------------- |
| Tenant 1 | `11000–11100` |
| Tenant 2 | `22000–22100` |
The following screenshot shows an example configuration:
### 1.3 Create an Outbound Rule in Tenant 1
In **Tenant 1**, create an outbound rule that routes calls destined for Tenant 2 through the **PBX B trunk**.
Example configuration:
| Field | Value |
| -------------------- | ----------- |
| Called number prefix | `22` |
| Route | PBX B trunk |
With this rule, when a Tenant 1 user dials a number beginning with `22`, such as `22001`, PBX A sends the call to PBX B.
The following screenshot shows an example configuration:
### 1.4 Create an Inbound Rule in Tenant 2
In **Tenant 2**, create an inbound rule for calls received from the **PBX B trunk**.
Example configuration:
| Field | Value |
| ----------- | ---------------- |
| Trunk | PBX B trunk |
| DID number | `22001` |
| Destination | Extension `1001` |
With this rule, when PBX A receives a call from PBX B with the called number `22001`, the Tenant 2 inbound rule routes the call to extension `1001`.
The following screenshot shows the inbound rule configuration to route the DID `22001` to extension `1001` :
Set the route destination to extension `1001`, as shown below:
***
## 2. Configure PBX B
**PBX B** acts as the inter-tenant routing gateway. It receives calls from PBX A and routes them back to PBX A, where the destination tenant's inbound rules perform the final routing decision.
### 2.1 Create a Single Tenant on PBX B
On **PBX B**, create a single tenant.
Set the tenant's SIP domain to the **IP address of PBX B**, as shown below:
### 2.2 Add PBX A as an IP Authentication Trunk
On PBX B, configure **PBX A** as an **IP Authentication trunk**.
This trunk is used to:
* Receive calls from PBX A.
* Route those calls back to PBX A for final tenant-level routing.
### 2.3 Allocate DID Numbers to the PBX A Trunk
Allocate a DID range to the PBX A trunk that covers all tenant DID numbers that may participate in inter-tenant calling.
In this example, use:
```
11000-22100
```
This range covers the DID pools assigned to Tenant 1 and Tenant 2, as shown below:
### 2.4 Create an Inbound Rule on PBX B
In the tenant on PBX B, create an inbound rule for calls received through the **PBX A trunk**.
Example configuration:
| Field | Value |
| ----------- | ------------- |
| Trunk | PBX A trunk |
| DID number | `11000–22100` |
| Destination | `0` |
This rule allows PBX B to accept calls from PBX A for DID numbers within the configured range and pass them to the outbound-routing process.
Configure the DID/DDI number as `11000–22100` . Refer to the following screenshot for the detailed configuration:
Set the destination number as `0`, then the PBX will not modify the dialed number and just relay it. Refer to the following screenshot for the detailed configuration:
### 2.5 Create an Outbound Rule on PBX B
In the tenant on **PBX B**, create an outbound rule that sends calls back to **PBX A**.
Example configuration:
| Field | Value |
| -------------------- | --------------------- |
| Called number prefix | `0;1;2;3;4;5;6;7;8;9` |
| Route | PBX A trunk |
By matching all possible leading digits from `0` through `9`, this rule allows PBX B to route any called number back to PBX A through the PBX A trunk, as shown below:
***
## 3. Example Call Flow
The following example demonstrates how a user in Tenant 1 calls a user in Tenant 2.
### Example
A user in **Tenant 1** on PBX A dials:
```
22001
```
The call proceeds as follows:
1. The Tenant 1 outbound rule on PBX A matches the called-number prefix `22`.
2. PBX A sends the call to PBX B through the **PBX B trunk**.
3. PBX B receives the call from PBX A through the **PBX A trunk**.
4. PBX B matches the inbound rule for the DID range `11000–22100`.
5. PBX B applies its outbound rule and sends the call back to PBX A through the PBX A trunk.
6. PBX A receives the call from PBX B with the original called number `22001`.
7. Tenant 2 matches its inbound rule for DID `22001`.
8. PBX A routes the call to extension `1001` in Tenant 2.
9. Extension `1001` rings and answers the call.
The call is now established between the Tenant 1 user and extension `1001` in Tenant 2 without using the PSTN.
The complete signaling path is:
```
Tenant 1 user
↓
PBX A
↓
PBX B routing gateway
↓
PBX A
↓
Tenant 2 inbound rule
↓
Extension 1001
```
***
## 4. Notes
For calls in the opposite direction, for example, from Tenant 2 to Tenant 1, create the corresponding outbound rule in Tenant 2 and inbound rule in Tenant 1.
Ensure that DID ranges assigned to different tenants do not overlap unless you have implemented a clearly defined access-code or routing-prefix scheme.
PBX B should be used only as the inter-tenant routing gateway in this architecture. The final destination-routing decision remains on PBX A and is determined by the inbound rules configured for each tenant.
This design keeps inter-tenant calls entirely within the PortSIP PBX environment and avoids routing them through the PSTN.
# 9 Configuring PortSIP SBC
The PortSIP Session Border Controller (PortSIP SBC) delivers best-in-class communications security combined with the flexibility and convenience of software-based deployment on popular virtual machine and cloud platforms such as Microsoft Azure and AWS.
### Key Capabilities
PortSIP SBC provides a comprehensive set of enterprise- and carrier-grade features, including:
* **Full rebrandability** for service providers and enterprises
* **Advanced VoIP security**, including:
* SIP topology hiding
* Encryption (TLS / SRTP)
* Protection against Denial-of-Service (DoS) and other signaling attacks
* **Broad interoperability** with:
* Leading PBXs
* Cloud UC platforms
* Cloud contact center solutions
* SIP endpoints and SIP trunking providers
* **Microsoft Teams Direct Routing** support
* **WebRTC** support
* **Advanced call routing capabilities**
* **Powerful built-in media services**, including transcoding
* **Highly efficient architecture** that minimizes resource consumption and reduces deployment costs
***
### Simplified Deployment, Enterprise-Grade Security
PortSIP SBC dramatically simplifies the deployment of robust communications security for:
* SIP trunking services
* Microsoft Teams Direct Routing
* Cloud UC and cloud contact center platforms
The SBC can be deployed instantly on a wide range of environments, including:
* Microsoft Hyper-V
* VMware
* Linux KVM
* Microsoft Azure
* Amazon Web Services (AWS)
The SBC protects SIP trunks, SIP endpoints, cloud contact centers, and cloud UC services—including **Microsoft Teams Direct Routing**—while maintaining high performance and reliability.
Because PortSIP SBC is **pure software**, it can **scale up or down easily** based on the characteristics and capacity of your chosen cloud or virtualization platform.
***
### Proven at Scale
PortSIP SBC has been independently verified to deliver full security protection and high performance, even under severe and sustained security attacks.
This proven reliability is the result of real-world deployments across many of the world’s largest telecom provider networks. PortSIP’s engineering teams bring deep expertise in designing systems that prioritize **scalability, resiliency, and carrier-grade reliability**.
***
### Licensing Advantage
PortSIP SBC can be deployed **as an integrated component of the PortSIP PBX** and **does not require an additional license**, providing exceptional value and simplifying both procurement and deployment.
# Summary of Changes
### Upgrading PortSIP SBC
Please follow the [official upgrade guide](/portsip-communications-solution/portsip-pbx-administration-guide/9-configuring-portsip-sbc/upgrade-to-the-latest-sbc-release) to upgrade your PortSIP SBC to the latest version.
> **Important**\
> Always back up your system and schedule a maintenance window before performing an upgrade.
***
### Version 11.2.8
**Release Date:** August 12, 2026
**Changes**
* Fixed a security issue.
***
### Version 11.2.7
**Release Date:** July 9, 2026
**Changes**
* Updated the trusted root certificates required for Microsoft Teams Direct Routing to maintain compatibility and prevent potential call failures caused by Microsoft's certificate chain changes.
***
### Version 11.2.6
**Release Date:** July 1, 2026
**Changes**
* Updated **PortSIP ONE for WebRTC** to **v10.9.2**, including the latest enhancements.
* Fixed an issue where PortSIP SBC could crash in certain scenarios when processing invalid SDP.
***
### Version 11.2.3
**Release Date:** Feb 10, 2026
**Changes**
* WebRTC application updates with the latest enhancements
* Fixed an issue where Call Flip could incorrectly route calls back to the originating WebRTC client
* Fixed an issue related to updating the nginx.conf configuration during SBC updates
***
### Version 11.2.1
**Release Date:** December 19, 2025
**Changes**
* Updated the WebRTC application
***
### Version 11.2.0
**Release Date:** November 20, 2025
**Changes**
* Fixed an issue where the WebRTC app failed to connect to the IM server when the IM service was deployed on a separate server
***
### Version 11.1.10
**Release Date:** November 6, 2025
**Changes**
* Released a new version of the WebRTC application
***
### Version 11.1.9
**Release Date:** July 28, 2025
**Changes**
* Fixed an issue with incorrect version information display
***
### Version 11.1.8
**Release Date:** July 22, 2025
**Changes**
* Added support for configuring codecs used for transcoding
***
### Version 11.1.1
**Release Date:** January 13, 2025
**Changes**
* Added new features to the WebRTC application
* Fixed multiple WebRTC application bugs
***
### Version 11.0.0
**Release Date:** December 12, 2024
**Changes**
* Introduced the all-new **PortSIP ONE WebRTC application**
***
### Version 10.1.2
**Release Date:** June 12, 2024
**Changes**
* Added support for IPv6 clients
***
### Version 10.1.0
**Release Date:** May 23, 2024
**Changes**
* Added transcoding support for audio calls
***
### Version 10.0.10
**Release Date:** March 11, 2024
**Changes**
* Updated the WebRTC client to support **UK English**
* Added support for controlling queue agent status
* Fixed minor bugs
***
### Version 10.0.9
**Release Date:** January 17, 2024
**Changes**
* Updated the WebRTC client to synchronize extension status with other apps and IP phones
* Performance improvements
* Fixed minor bugs
***
### Version 10.0.6
**Release Date:** November 2, 2023
**Changes**
* Added theme support
* Performance improvements
***
### Version 10.0.4
**Release Date:** August 3, 2023
**Changes**
* Fixed a security vulnerability
* Fixed an issue where sending DTMF from a WebRTC client caused incorrect RTP event timestamps, which could result in repeated DTMF detection by some SIP servers or trunks
***
### Version 10.0.3
**Release Date:** July 7, 2023
**Changes**
* Significant performance improvements:
* Up to **2,000 concurrent WebRTC audio calls**
* Up to **500 concurrent WebRTC video calls**
* Improved WebRTC screen-sharing performance with reduced latency
***
### Version 10.0.1
**Release Date:** March 30, 2023
**Changes**
* Changed the WebRTC client URL port to **10443**
> Ensure TCP port **10443** is allowed in the firewall
* Fixed a crash issue when stopping or restarting the SBC while calls were active
***
### Version 10.0.0
**Release Date:** January 16, 2023
**Changes**
* Full rebrandability
* Microsoft Teams Direct Routing support
* WebRTC support
* Interoperability with leading UC, PBX, contact center platforms, and SIP trunk providers
* Advanced security features for protection against malicious attacks and fraud
# Topology
The PortSIP Session Border Controller (PortSIP SBC) can operate as an integrated component of the PortSIP PBX, delivering WebRTC services and enabling Microsoft Teams Direct Routing.
Designed for flexibility and scalability, PortSIP SBC allows service providers and enterprises to support a large number of WebRTC users and Internet-based clients while maintaining carrier-grade security and performance.
Before proceeding, we strongly recommend reviewing the section "[What's an SBC?](/portsip-communications-solution/faq/what-is-the-sbc)" for a detailed conceptual overview.\
The SBC role and traffic flow are typically illustrated as shown in the diagram below.
### Enterprise IP PBX with SIP Trunk and Internet Users
This deployment scenario demonstrates how to configure the PortSIP SBC to interwork between:
* An enterprise IP PBX
* A SIP trunk provider
* Nomadic Internet users, such as:
* Client apps
* WebRTC browsers
* Remote IP phones
* Microsoft Teams, integrated via Direct Routing
#### Deployment with One Physical Network Interface
The example deployment includes the following components:
* **Enterprise LAN:** PortSIP PBX running at IP address: `192.168.1.72`
* **SIP Trunk:** Connected to the public Internet
* **Nomadic Internet Users:** Remote users accessing the system over the Internet via apps, WebRTC clients, or IP phones
* **Microsoft Teams:** Integrated with the PBX through the PortSIP SBC using Direct Routing
In this architecture, the PortSIP SBC serves as the **secure demarcation point** between internal PBX services and external networks, providing:
* SIP signaling and media security
* NAT traversal and topology hiding
* Media services for interoperability
* Controlled access for Internet and Teams users
***
**Logical Network Interfaces**
The PortSIP SBC is configured with the following **logical network interfaces**:
* **LAN Interface (Management + Signaling)**
* IP address: `192.168.1.73`
* Connected to the internal enterprise LAN
* Also used for SBC management access
* **DMZ / WAN Interface**
* IP address: `66.175.221.120`
* Exposed to the Internet for SIP, media, WebRTC, and Microsoft Teams connectivity
***
**Physical Network Interface Layout**
* **Physical LAN Port Connections:** A single Ethernet port is connected to the LAN
In this topology, the PortSIP SBC uses **one physical network interface** that hosts **two logical interfaces**:
* The **LAN interface** uses the private IP address (`192.168.1.73`)
* The **DMZ/WAN interface** is implemented as a **virtual IP mapping** to the public IP address (`66.175.221.120`)
This design is common in virtualized and cloud environments where public IP addresses are mapped to internal interfaces via NAT or platform-level networking.
***
#### Deployment with Two Physical Network Interfaces
The PortSIP SBC can be deployed using two physical network interfaces (NICs) to provide clear separation between internal (LAN) and external (DMZ/WAN) traffic. This deployment model is recommended for high-security enterprise and carrier-grade environments.
**Logical Network Interface Configuration**
The SBC is configured with the following **logical network interfaces**:
* **LAN Interface (Management + Internal Signaling)**
* IP address: `192.168.1.73`
* Connected to the internal enterprise LAN
* Used for SBC management and internal SIP signaling
* **DMZ / WAN Interface**
* IP address: `66.175.221.120`
* Connected to the external network
* Used for SIP trunks, WebRTC, and Microsoft Teams Direct Routing
***
**Physical Network Interface Connections**
The logical interfaces are mapped to **two separate physical Ethernet ports**:
* **LAN NIC:** Connected to the enterprise LAN
* **DMZ/WAN NIC:** Connected to the DMZ or Internet-facing network
This architecture provides **strong network isolation**, improved security posture, and clearer traffic control compared to a single-NIC deployment.
***
### Hosted Cloud PBX Deployment
This example illustrates how to configure the PortSIP SBC to interwork between LAN-based IP phones, client apps, WebRTC clients, and a hosted cloud IP PBX.
In this scenario, the SBC acts as the **secure service edge**, providing SIP, media, WebRTC, and Microsoft Teams connectivity between internal users and external networks.
#### SBC Logical Network Interface Configuration
This deployment uses **two logical network interfaces** on the SBC:
* **LAN Interface (PBX-Facing)**
* IP address: `172.31.3.190`
* Used for communication with the hosted IP PBX
* The PBX is located on the same LAN at IP address: `172.31.3.192`
* **WAN / Public Interface**
* IP address: `185.53.179.172`
* Provides services:
* SIP services
* WebRTC services
* Microsoft Teams Direct Routing
***
#### Traffic Flow Description
* Within the **LAN**, IP phones, desktop and mobile apps, and WebRTC clients communicate with the **PortSIP SBC** using:
* SIP signaling
* RTP / SRTP media streams
* The SBC securely brokers and protects traffic between:
* Internal endpoints and the hosted PBX
* External services such as SIP trunks and Microsoft Teams
This architecture ensures:
* Secure exposure of cloud PBX services
* Centralized media and signaling control
* NAT traversal and topology hiding
* Scalable support for large numbers of WebRTC and remote users
# Installation PortSIP SBC v11.x
> ❗ **Important**\
> If your PortSIP PBX is running version 22.x, you must install PortSIP SBC version 11.x in order to use the latest WebRTC application.
### Supported Operating Systems
PortSIP SBC supports the following operating systems:
* **Debian:** 112.x
* **Ubuntu:** 22.04, 24.04
***
### Preparing the Server for Installation
The following tasks **must be completed** before installing PortSIP SBC.
#### System Preparation
* Ensure the system date and time are correctly synchronized.
* Linux: Perform installation using a user with `sudo` privileges.
* Windows: Installation must be performed using the Administrator account.
* Assign static IP addresses:
* If the server is located on a LAN, assign a static private IP address.
* If the server is on a public network, assign both a static public IP and a static private IP.
* Install all available OS updates and service packs before installation.
* Do not install PostgreSQL on the PortSIP SBC server.
* Disable all power-saving options for the system and network adapters (set the system to High Performance mode).
* Do not install TeamViewer, VPN software, or similar tools on the host machine.
* The PortSIP SBC must not be installed on a server acting as a DNS or DHCP server.
***
### Firewall and Network Requirements
The following ports **must be permitted by the firewall** and **must not be used by other applications**:
* **UDP:** 5066, 25000–34999
* **TCP:** 5065, 5067, 8883, 10443
Additional requirements:
* All commands must be executed in the directory:
```shellscript
/opt/portsip
```
* If deploying on a cloud platform (such as AWS or Azure), you must also open these ports in the cloud provider’s firewall / security group.
***
### Prerequisites
This guide assumes that you have already installed the PortSIP PBX by following the guide:
[Installation of the PortSIP PBX](/portsip-communications-solution/portsip-pbx-administration-guide/1-installation-of-the-portsip-pbx)
***
### Installing PortSIP SBC and PBX on the Same Server
The PortSIP SBC can be deployed on the same server as the PortSIP PBX.
In this configuration:
* The PBX handles SIP calling directly
* The SBC provides WebRTC services and enables Microsoft Teams Direct Routing
#### Example Server Configuration
* **Private IP:** `192.168.1.72`
* **Public IP:** `66.175.221.120`
* **Domain:** `uc.portsip.cc`, Resolved to: `66.175.221.120`
* A **trusted SSL certificate** (not self-signed) is installed for `uc.portsip.cc`, refer to the guide: [Certificates for TLS / HTTPS / WebRTC](/portsip-communications-solution/tutorials/certificates-for-tls-https-webrtc)
***
Execute the commands below on the PBX server to install the SBC:
```bash
cd /opt/portsip
sudo /bin/sh sbc_ctl.sh run -p /var/lib/portsip -i portsip/sbc:11
```
***
#### Configure the SBC
After installation, follow the guide: [Configure PortSIP SBC on the Same Server as PortSIP PBX](/portsip-communications-solution/portsip-pbx-administration-guide/9-configuring-portsip-sbc/configuring-sbc-for-webrtc#configure-portsip-sbc-on-the-same-server-as-portsip-pbx)
***
### Installing PortSIP SBC on a Separate Server
In most deployments, the **PortSIP SBC** is installed on a **separate server** from the PBX.
In this architecture:
* The SBC acts as the front-end edge component
* The PBX remains transparent to end users
***
### Example Server Configuration
* **PBX Server (Private IP):** `192.168.1.72`
* **SBC Server (Private IP):** `192.168.1.73`
* **SBC Server (Public IP):** `66.175.221.120`
#### Domain Configuration
* **Domain:** `sbc.portsip.cc`, resolved to: `66.175.221.120`
* A **trusted wildcard SSL certificate** (not self-signed) is installed for `portsip.cc`, refer to: [Certificates for TLS / HTTPS / WebRTC](/portsip-communications-solution/tutorials/certificates-for-tls-https-webrtc)
***
### Install PortSIP SBC on Linux (Separate Server)
#### Step 1: Initialize the Environment
On the dedicated server used to install the PortSIP SBC, execute the following commands:
```bash
sudo mkdir -p /opt/portsip
sudo curl \
https://raw.githubusercontent.com/portsip/portsip-pbx-sh/master/v22.x/init.sh \
-o init.sh
sudo /bin/sh init.sh
```
***
#### Step 2: Install the Docker-Compose Environment
```bash
cd /opt/portsip
sudo /bin/sh install_docker.sh
```
If prompted with:
```
cloud.cfg (Y/I/N/O/D/Z) [default=N] ?
```
Enter **Y** and press **Enter**.
***
#### Step 3: Create and Run the SBC Docker Instance
```bash
sudo /bin/sh sbc_ctl.sh run -p /var/lib/portsip -i portsip/sbc:11
```
***
#### Configure the SBC
After installation, follow the guide: [Configure PortSIP SBC on a Separate Server](/portsip-communications-solution/portsip-pbx-administration-guide/9-configuring-portsip-sbc/configuring-sbc-for-webrtc#configure-portsip-sbc-on-a-separate-server)
***
### Managing the PortSIP SBC Docker Instance
After successfully installing the SBC, you can manage the Docker instance using the following commands.
```bash
cd /opt/portsip
```
#### Show SBC Status
```bash
sudo /bin/sh sbc_ctl.sh status
```
#### Start the SBC
```bash
sudo /bin/sh sbc_ctl.sh start
```
#### Stop the SBC
```bash
sudo /bin/sh sbc_ctl.sh stop
```
#### Restart the SBC
```bash
sudo /bin/sh sbc_ctl.sh restart
```
#### Remove the SBC Container
> This command **does not delete SBC data**.
```bash
sudo /bin/sh sbc_ctl.sh rm
```
# Configuring PortSIP SBC for WebRTC
After successfully installing the **PortSIP SBC**, you can now configure it to enable the **WebRTC** feature.
Choose the appropriate configuration method based on your deployment model.
***
### Configure PortSIP SBC on the Same Server as PortSIP PBX
#### Step 1: Prepare the SSL Certificate
Prepare the SSL certificate as described in the guide [Certificates for TLS / HTTPS / WebRTC](/portsip-communications-solution/tutorials/certificates-for-tls-https-webrtc).
You should have the following files available:
* `portsip.pem`
* `portsip.key`
***
#### Step 2: Sign In to the SBC Web Portal
1. Open the following URL in your browser:
2. Log in using the default credentials:
* **Username:** `admin`
* **Password:** `admin`
3. Ignore the browser SSL warning and continue.
***
#### Step 3: Upload the TLS Certificate
1. Navigate to **Settings > TLS Certificates**.
2. Click **Add**.
3. Fill in the fields:
* **Description:** `SBC Host Name` (example)
* **TLS Domain:** `uc.portsip.cc`
4. Open `portsip.pem` in a text editor and paste its contents into **Certificate Context**.
5. Open `portsip.key` and paste its contents into **Private Key** Context.
6. Enable **This is SBC Web Domain Certificate**.
7. Click **OK** to save.
***
#### Step 4: Configure Network Settings
1. Navigate to **Settings > Network**.
2. Configure the following values:
* **Web Domain:** `uc.portsip.cc`
* **Private IPv4:** `192.168.1.72`
* **Public IPv4:** `66.175.221.120`
3. Keep **Create default transports automatically** enabled.
The SBC will automatically create the following transports:
* **TCP 5069** – Communication with PBX
* **TLS 5067** – Microsoft Teams Direct Routing
* **WSS 5065** – WebRTC services
* **UDP 5066** – Standard SIP services
> Disabling automatic transport creation is not recommended unless you are performing a custom configuration.
4. Click **OK**.\
The SBC will restart automatically and log you out.
***
#### Step 5: Restart the PBX
Execute the command below to restart the SBC:
```bash
cd /opt/portsip
sudo /bin/sh sbc_ctl.sh restart
```
***
#### Step 6: Generate the SBC Access Token in PBX
1. Sign in to the PBX Web Portal:
2. Navigate to **Servers** > **SBC**.
3. Click **Generate** to create an access token.
4. Click **Copy** to copy the token.
***
#### Step 7: Configure PBX Connection in SBC
1. Sign in to the SBC Web Portal:
2. Navigate to **Settings > PBX**.
3. Configure the following:
* **PBX Access Token:** Paste the copied token
* **PBX IPv4 Address:** `192.168.1.72`
* *(If PBX runs in HA mode, enter the PBX Virtual IP)*
* **Prefer Transport:** `TCP`
* **PBX Port:** `5063`
4. Click **OK** to save.
***
#### Step 8: Access the WebRTC Client
Open the following URL in your browser: , the WebRTC client will launch.\
Scan the user’s QR code to register with the PBX and place or receive calls.
***
### Configure PortSIP SBC on a Separate Server
Follow these steps if the PortSIP SBC is installed on a separate server from the PortSIP PBX.
#### Step 1: Prepare the SSL Certificate
Prepare the SSL certificate as described in the guide [Certificates for TLS / HTTPS / WebRTC](/portsip-communications-solution/tutorials/certificates-for-tls-https-webrtc).
You should have the following files ready:
* `portsip.pem`
* `portsip.key`
A **trusted wildcard SSL certificate** (not self-signed) must be installed for the domain: `portsip.cc`
***
#### Step 2: Sign In to the SBC Web Portal
1. Open the following URL in your browser:
2. Log in using the default credentials:
* **Username:** `admin`
* **Password:** `admin`
3. Ignore the browser SSL certificate warning and continue.
***
#### Step 3: Upload the TLS Certificate
1. Navigate to **Settings > TLS Certificates**.
2. Click **Add**.
3. Enter the following values:
* **Description:** `SBC Host Name` (example)
* **TLS Domain:** `sbc.portsip.cc`
4. Open the `portsip.pem` file in a text editor and copy its contents into the **Certificate Context** field.
5. Open the `portsip.key` file and copy its contents into the **Private Key Context** field.
6. Enable **This is SBC Web Domain Certificate**.
7. Click **OK** to save the certificate.
***
#### Step 4: Configure Network Settings
1. Navigate to **Settings > Network**.
2. Configure the following fields:
* **Web Domain:** `sbc.portsip.cc`
* **Private IPv4:** `192.168.1.73`
* **Public IPv4:** `66.175.221.120`
3. Ensure **Create default transports automatically** is enabled.
When this option is enabled, the SBC automatically creates the following transports:
* **TCP 5069** – Communication with the PBX
* **TLS 5067** – Microsoft Teams Direct Routing
* **WSS 5065** – WebRTC services
* **UDP 5066** – Standard SIP services
> Turning off automatic transport creation is **not recommended** unless you are performing an advanced custom configuration.
4. Click **OK**.
The SBC will **restart automatically** and log you out.
***
#### Step 5: Restart the PBX
After the SBC restarts, restart the PBX to ensure proper connectivity.
```bash
cd /opt/portsip
sudo /bin/sh sbc_ctl.sh restart
```
***
#### Step 6: Generate the SBC Access Token in the PBX
1. Sign in to the PBX Web Portal:
2. Navigate to **Servers > SBC**.
3. Click **Generate** to create an SBC access token.
4. Click **Copy** to copy the generated token.
***
#### Step 7: Configure PBX Connection in the SBC
1. Sign in to the SBC Web Portal:
2. Navigate to **Settings > PBX**.
3. Configure the following fields:
* **PBX Access Token:** Paste the copied token
* **PBX IPv4 Address:** `192.168.1.72`
* *(If the PBX is deployed in HA mode, enter the PBX **Virtual IP** instead)*
* **Prefer Transport:** `TCP`
* **PBX Port:** `5063`
4. Click **OK** to save the configuration.
***
#### Step 8: Access the WebRTC Client
Open the following URL in your browser: , the WebRTC client will launch.\
Scan the user’s QR code to register with the PBX and make or receive calls.
***
#### Step 9: Add the SBC IP Address to the PBX Whitelist
To prevent the PBX from rate-limiting requests from the SBC, you must whitelist the SBC IP address.
1. Sign in to the **PBX Web Portal** as a **System Administrator**.
2. Navigate to **IP Blacklist**.
3. Click **Add**.
4. Enter the **SBC IP address** (`192.168.1.73` or the public IP if applicable).
5. Set a **long expiration date**.
6. Save the configuration.
***
### Check Open Firewall Ports
The following commands can be used to verify which firewall ports are currently open on the server hosting the PortSIP SBC.
```sh
sudo firewall-cmd --info-service=portsip-sbc
```
# Upgrade to the Latest v11.x Release
This guide explains how to upgrade your existing **PortSIP SBC** installation to the **latest v11.x release**.\
Please follow the steps below carefully to complete the upgrade.
### Back Up Before Upgrading
Before upgrading, we strongly recommend backing up your SBC data.
#### Linux
* Default data directory:
```shellscript
/var/lib/portsip
```
* You may also back up the **entire virtual machine** or take a **VM snapshot**.
For detailed backup instructions, refer to: [Backup and Restore: An Essential Guide](/portsip-communications-solution/tutorials/backup-and-restore)
> ❗**Important**\
> All commands must be executed in the following directory:
>
> ```
> /opt/portsip
> ```
***
### Upgrading PortSIP SBC on Linux
#### Step 1: Update the Management Scripts
Run the following commands to download and apply the latest PortSIP management scripts:
```bash
sudo curl \
https://raw.githubusercontent.com/portsip/portsip-pbx-sh/master/v22.x/init.sh \
-o init.sh
sudo /bin/sh init.sh
```
***
#### Step 2: Upgrade the SBC
If PortSIP SBC is currently running and you want to upgrade it to the latest v11.x version, execute:
```bash
cd /opt/portsip && sudo /bin/sh sbc_ctl.sh upgrade -i portsip/sbc:11
```
The upgrade process may take some time.\
**Do not interrupt the process, close the terminal, or reboot the server during the upgrade.**
# 10 Configuring SBC for MS Teams
Businesses that want to optimize their investment in Office 365 and Microsoft Teams can utilize PortSIP's robust communications solution. PortSIP PBX for Microsoft Teams is a native Direct Routing integration that provides calling functionality and enables Teams users to get more done with an industry-leading cloud or on-premise PBX while keeping Teams at the center of the collaboration experience.
## Features and Benefits
Enterprise-grade telephony for your Microsoft Teams users with a native user experience. Rich in PBX features:
* Basic call controls
* IVR and call handling
* Automatic call recording
* Call reports and analytics
* Call queues
* Full PSTN calls
* Out-of-the-box native integrations to boost user productivity.
* Provides enhanced PBX and telephony tools for your teams to deliver a true productivity boost for your projects.
* Streamline the number of tools your users need to use, reducing cost, administration, and training.
* Take advantage of the latest enhanced communications to save costs and increase the level of service your users enjoy.
This article includes the following topics:
* [Architecture](/portsip-communications-solution/portsip-pbx-administration-guide/10-configuring-sbc-for-ms-teams/architecture)
* [Configuring Microsoft Teams](/portsip-communications-solution/portsip-pbx-administration-guide/10-configuring-sbc-for-ms-teams/configuring-microsoft-teams)
* [Configuring SBC and PBX](/portsip-communications-solution/portsip-pbx-administration-guide/10-configuring-sbc-for-ms-teams/configuring-sbc-and-pbx)
* [Configure an SBC for Multiple Tenants](/portsip-communications-solution/portsip-pbx-administration-guide/10-configuring-sbc-for-ms-teams/configure-an-sbc-for-multiple-tenants)
# Architecture
### Prerequisites
Before configuring Microsoft Teams Direct Routing with PortSIP PBX and PortSIP SBC, make sure the following requirements are met:
1. **Microsoft Teams and Microsoft 365 domain**
You must have a Microsoft Teams account and a Microsoft 365 tenant with a fully qualified domain name (FQDN) that you own.
2. **Required Microsoft licenses**
Users must have the required Microsoft licensing for Teams. This may include one Microsoft 365 or Office 365 suite license, such as E1, E3, or E5, and one Teams standalone license, such as Microsoft Teams Enterprise or Microsoft Teams EEA, depending on your region and Microsoft licensing requirements.
For the latest Microsoft licensing details, refer to the official Microsoft documentation:\
3. **Calling policy configuration**
In the Microsoft Teams admin center, ensure that **Prevent toll bypass and send calls through the PSTN** is set to **Off** for the calling policy assigned to the Teams users.
To verify this setting:
1. Sign in to the **Microsoft Teams admin center**.
2. Go to **Voice > Calling policies**.
3. Select the calling policy assigned to the Teams users.
4. Set **Prevent toll bypass and send calls through the PSTN** to **Off**.
5. Save the policy.
This setting allows calls to use Direct Routing through the configured SBC. This is especially important if your deployment also uses Microsoft Phone System.
4. **Trusted TLS certificate**
A trusted TLS certificate is required for the SBC FQDN. The certificate should be issued by a public certificate authority, such as DigiCert, Thawte, GeoTrust, or a similar trusted CA.
A wildcard certificate may also be used if it covers the SBC FQDN.
**Example:**\
If the SBC FQDN is `sbc.portsip.cc`, the certificate must cover either:
* `sbc.portsip.cc`, or
* `*.portsip.cc`
5. **Network access**
The configuration is simpler when PortSIP PBX or PortSIP SBC is deployed with a public IP address.
PortSIP PBX can also be deployed on a private LAN IP address. In this case, the firewall and NAT rules must be configured correctly so that Microsoft Teams and the PortSIP SBC can reach the required SIP and media services.
**Note:**\
If PortSIP PBX is deployed behind a firewall or NAT device, make sure the required signaling and media ports are properly forwarded and accessible according to your PortSIP deployment design.
***
### Call Flows
The following call flows are typically used when integrating Microsoft Teams with PortSIP PBX through PortSIP SBC.
#### 1. Teams Users to External Numbers Through PBX and SIP Trunk
**Flow:**\
Microsoft Teams Users → PortSIP SBC → PortSIP PBX → SIP Trunk → External Number
**Description:**\
Microsoft Teams users place outbound calls to external numbers. The calls are sent from Microsoft Teams to the PortSIP SBC, then routed to PortSIP PBX. PortSIP PBX applies the configured outbound routing rules and sends the calls to the SIP trunk.
#### 2. PSTN Users to Teams Users Through SIP Trunk and PBX
**Flow:**\
PSTN Users → SIP Trunk → PortSIP PBX → PortSIP SBC → Microsoft Teams Users
**Description:**\
Inbound PSTN calls arrive at PortSIP PBX through the SIP trunk. PortSIP PBX applies the configured inbound routing rules and forwards the calls to Microsoft Teams users through the PortSIP SBC.
#### 3. Teams Users to PBX Extension Users
**Flow:**\
Microsoft Teams Users → PortSIP SBC → PortSIP PBX → PBX Extension Users
**Description:**\
Microsoft Teams users call PBX extension users through PortSIP SBC. The calls are sent from Microsoft Teams to PortSIP SBC, then routed to PortSIP PBX. PortSIP PBX applies the configured inbound routing rules and delivers the calls to the target PBX extensions.
#### 4. PBX Extension Users to Teams Users
**Flow:**\
PBX Extension Users → PortSIP PBX → PortSIP SBC → Microsoft Teams Users
**Description:**\
PBX extension users call Microsoft Teams users through PortSIP PBX and PortSIP SBC. PortSIP PBX routes the calls to PortSIP SBC, and PortSIP SBC forwards the calls to Microsoft Teams.
***
### Topology of the Interoperability Environment
This guide uses the following topology to demonstrate interoperability between Microsoft Teams, PortSIP SBC, and PortSIP PBX.
#### Deployment Scenario
In this example, the enterprise deploys PortSIP PBX in its private network to provide unified communications services for internal users. The enterprise also wants to enable Microsoft Teams users to make and receive calls through PortSIP PBX.
#### Network Topology
The example environment uses the following network configuration:
| Component | Address / Domain | Description |
| ---------------------- | ---------------------------------- | ------------------------------------------------------------------------------------------------------------- |
| PortSIP PBX | `192.168.1.72` | Private static IP address. The PBX is deployed in the internal network and does not have a public IP address. |
| PortSIP SBC | `192.168.1.73` | Private static IP address. The SBC is deployed at the edge of the enterprise network. |
| Public IP address | `66.175.221.120` | Static public IP address used for the SBC. |
| SBC FQDN | `sbc.portsip.cc` | Public DNS record that resolves to the SBC public IP address `66.175.221.120`. |
| TLS certificate | `sbc.portsip.cc` or `*.portsip.cc` | Trusted TLS certificate used by the SBC for secure SIP signaling. |
| PortSIP PBX SIP domain | `sip.portsip.cc` | SIP domain used by the PortSIP PBX tenant. |
#### Topology Description
In this topology:
1. PortSIP PBX is deployed inside the enterprise private network.
2. PortSIP PBX uses the private static IP address `192.168.1.72`.
3. PortSIP SBC is deployed at the network edge and uses the private static IP address `192.168.1.73`.
4. The SBC is reachable from the public Internet through the static public IP address `66.175.221.120`.
5. The DNS name `sbc.portsip.cc` resolves to the SBC public IP address `66.175.221.120`.
6. A trusted TLS certificate is installed for `sbc.portsip.cc`, or a wildcard certificate is installed for `*.portsip.cc`.
7. The PortSIP PBX tenant uses `sip.portsip.cc` as its SIP domain.
#### Call Routing Behavior
The example environment supports the following routing behavior:
1. **PBX user to Teams user**
When a PortSIP PBX user dials a Teams user’s phone number, PortSIP PBX routes the call to PortSIP SBC. PortSIP SBC then forwards the call to Microsoft Teams.
2. **Teams user to PBX extension**
When a Microsoft Teams user dials a number, the call is routed to PortSIP SBC first. PortSIP SBC then sends the call to PortSIP PBX. PortSIP PBX applies the configured inbound rule and routes the call to the target extension.
3. **Teams user to external PSTN number**
When a Microsoft Teams user dials an external PSTN number, the call is routed from Microsoft Teams to PortSIP SBC, then to PortSIP PBX. PortSIP PBX applies the outbound rule and sends the call to the SIP trunk.
4. **External PSTN caller to Teams user**
When an external PSTN caller dials a number assigned to a Teams user, the call arrives at PortSIP PBX through the SIP trunk. PortSIP PBX routes the call to PortSIP SBC, and PortSIP SBC forwards the call to Microsoft Teams.
# Configuring Microsoft Teams
### 1 Install the Teams module
* Launch **PowerShell as Administrator**, then run the following command to verify that the Microsoft Teams PowerShell module has been installed successfully: `Get-Module -ListAvailable -Name MicrosoftTeams`. If it is installed successfully, you will see the results below:
* If you cannot see the result, it means that the PowerShell module wasn’t installed correctly, please visit to install it manually.
* If there have new Teams module available, you can use the below command to upgrade it.
```
Install-Module -Name MicrosoftTeams -Force
```
### 2 Create your domain in your Office 365 tenant
* Log in to your Office 365 admin account and create your domain. In the[ Microsoft 365 admin center](https://www.microsoft.com/en-us/microsoft-365/business/microsoft-365-administration), go to `Setup.` Then press the `View` button for the `Get your custom domain set up`, then the `Manage` button. Add a domain there.
* Choose a domain name (e.g. `portsip.cc`) that you own.
{% hint style="warning" %}
Since it will be verified by Microsoft for example by having you paste a value in the TXT value field of your DNS or signing in to the account where you got the domain etc. It is important that you own the domain and can perform the verification process. Once that is done, the domain will be created and you can add users to it.
{% endhint %}
### 3 Create users in that domain
Now you can create users under the domain you just created in step 1 above.
Again, in `Microsoft 365 admin center`, go `Active users` under `Users` and `Add a user`. Give the first and last name of the user (say "Thomas Oliveri") and under the username give a unique name that will be his/her email.
{% hint style="warning" %}
Make sure to choose the domain you created above for the domain part of the username (portsip.cc in this example) and not any other `*.onmicrosoft.com`.
{% endhint %}
That way the user will reside in the domain you just created in step 1 above (in this example say: ).
### 4 Use PowerShell to Connect to your Office 365 account
* Open a Windows PowerShell command prompt window and run the following commands:
```shell
Import-Module MicrosoftTeams
$userCredential = Get-Credential
Connect-MicrosoftTeams -Credential $userCredential
```
* In the **Windows PowerShell Credential Request dialog box**, type your administrator account name and password, and then press **OK**. Just the portion `Connect using a Skype for Business Online administrator account name and password` should be enough unless you want to do more.
* If you get the error `cannot be loaded because running scripts is disabled on this system` then run the following command to adjust the permission:
```shell
Set-ExecutionPolicy RemoteSigned
```
### 5 Create a PSTN gateway that will connect to the SBC
* Make sure it is the right one and connected to the right account as you did in the steps above. To confirm the steps were done correctly use the command:
```shell
Get-Command *onlinePSTNGateway*
```
Your command will return the four functions shown here that will let you manage the SBC.
* Using PowerShell, create a PSTN gateway that will connect to the PortSIP SBC using the FQDN of the domain, for example: `sbc.ortsip.cc`. Note, you must have a valid certificate for the domain `sbc.portsip.cc`. or a wildcard certificate for `portsip.cc`.
* The domain portion of this FQDN must match the domain registered in your tenant as in the step `Create users in that domain` above (e.g. it can be: sbc.portsip.cc, since the domain you created was portsip.cc).
* It is also important that there is an Office 365 user in that domain (as you did in steps above, a user in portsip.cc) and an assigned E3 or E5 license. If not, you will receive an error: Can not use the `sbc.portsip.cc` domain as it is not configured for this tenant.
* This FQDN (say sbc.portsip.cc) must resolve to a reachable IP of the PortSIP SBC, the Teams Direct Routing will route the calls to PortSIP SBC by this FQDN:
* This FQDN (sbc.portsip.cc in this example) must be a SIP domain in PortSIP PBX.
* You must make sure that a DNS A record is made for that domain (e.g. sbc.portsip.cc) that will reach the PortSIP SBC.
* A valid certificate must be added to the PortSIP SBC for this domain.
**PowerShell command example to create the PSTN gateway:**
{% code overflow="wrap" %}
```shell
New-CsOnlinePSTNGateway -Identity sbc.portsip.cc -Enabled $true -SipSignalingPort 5067 -MaxConcurrentSessions 1000
```
{% endcode %}
{% hint style="danger" %}
That port 5067 in the above commands refers to the PortSIP PBX(SBC) TLS port; by default, the PortSIP PBX(SBC) creates TLS transport on port 5067 for Teams; if you changed the TLS default port for Teams in the PortSIP PBX(SBC), please replace the 5067 by the new TLS port in the above commands.
{% endhint %}
You can check the gateway parameters at any time with:
```shell
Get-CsOnlinePSTNGateway -Identity sbc.portsip.cc
```
### 6 Enable the user for direct routing service
* Direct Routing requires the user to be homed on Skype for Business Online. You can check this by looking at the RegistrarPool parameter. It needs to have a value in the infra.lync.com domain.
**PowerShell command**
```shell
Get-CsOnlineUser -Identity "email" | fl RegistrarPool
```
For our example:
```shell
Get-CsOnlineUser -Identity "thomas@portsip.cc" | fl RegistrarPool
```
* Using PowerShell, enable the user for direct routing service by configuring the phone number and enabling enterprise voice and voicemail for the user.
* Using PowerShell, enable the user for direct routing service by configuring the phone number and enabling enterprise voice and voicemail for the user. Notice, that is a 4-digit number for our example, but it could be a full E.164 number. For this example, we want to use the users as extensions (and here 1001 is the extension for this user) which can connect and can be connected as an extension between TEAMS and PortSIP PBX.
* PSTN or SIP trunk inbound and outbound calls can be handled by the PortSIP PBX trunk just like any PBX and users on TEAMS can act as extensions of the PBX. But you can easily use other setups and scenarios and assign the full E.164 numbers (with country code) to the users.
```shell
Set-CsPhoneNumberAssignment -Identity thomas@portsip.cc -PhoneNumber +1001 -PhoneNumberType DirectRouting
Set-CsPhoneNumberAssignment -Identity thomas@portsip.cc -EnterpriseVoiceEnabled $true
```
**Note:** It can take some time between creating a user in Teams and being able to change its setting here with `Set-CsUser` or `Set-CsPhoneNumberAssignment`, so you may have to wait an hour or two if it gives errors like the user does not exist and you have made sure that the user email (or name) is correct.
The user should be able to receive calls from the PortSIP PBX now, either from extensions on PortSIP PBX itself or from PSTN and SIP trunks (set up within the PortSIP PBX), as the case may be.
### 7 Configure voice routing for outgoing calls to the PortSIP PBX
Now you can configure the rules as to when to use the PSTN gateway setup to route the call to PortSIP PBX.
As explained in the Microsoft document, Microsoft Teams has a routing mechanism that allows a call to be sent to a specific SBC based on:
* Called number pattern
* Called number pattern + Specific User who makes the call
Call routing involves:
* Online PSTN Gateway: It connects to the SBC or PBX (in this case, PortSIP SBC). It also stores the configuration that is applied when a call is placed via the SBC, such as forward P-Asserted-Identity (PAI) or Preferred Codecs. It is used by Voice Routes.
* Voice Route: It uses Online PSTN Gateways to use for calls where the calling number matches the pattern.
* PSTN Usage: It uses Voice Routes and other PSTN Usages. Different Voice Routing Policies can use it.
* Voice Routing Policy: It uses PSTN Usages. It can be assigned to a user or to multiple users.
In summary:
**User > Voice routing policy > PSTN usage > Voice route > PSTN gateway.**
In our example, since we use the user as an extension of PortSIP PBX, we want the call to first go there and use the dial plans in PortSIP PBX for routing calls. There can be other scenarios easily implemented as well. For this simple one, let’s create:
**Thomas Oliveri (User) > MyPolicy (Voice policy) > MyUsage (PSTN usage) > sbc.portsip.cc** (PSTN gateway).
* Let’s create the usage first as it is going to be used in the route:
```shell
Set-CsOnlinePstnUsage -Identity Global -Usage @{Add="MyUsage"}
```
* Let’s create the route using the PortSIP PSTN gateway and the above usage:
```shell
New-CsOnlineVoiceRoute -Identity "MyRoute" -NumberPattern "^\+(\d{4})|^(\d{4})" -OnlinePstnGatewayList sbc.portsip.cc -Priority 1 -OnlinePstnUsages "MyUsage"
```
As you can see, the command creates a route `MyRoute` where TEAMS will pass the call to the PSTN gateway `sbc.portsip.cc` (a domain in PortSIP PBX) if the dialed number has at least 4 numbers (that is of course based on our example here where we want to give each user a 4-digit extension, but it is up to your setup), with or without a "+" sign. That way, you could dial a 4-digit extension or an E.164 number with a country code and a "+" sign.
Of course, multiple routes can be created with different priorities.
* To find out different routes, use:
```shell
Get-CsOnlineVoiceRoute
```
Let’s create a voice policy using the same usage to which our PSTN gateway is linked above:
```shell
New-CsOnlineVoiceRoutingPolicy "MyPolicy" -OnlinePstnUsages "MyUsage"
```
The result for the example:
```shell
Identity : Tag:MyPolicy
OnlinePstnUsages : {MyUsage}
Description :
RouteType : BYOT
```
You can, of course, create a policy with several PSTN Usages, but we will keep it simple and to the point regarding our example.
Let’s grant our user `thomas@portsip.cc` our voice policy:
```shell
Grant-CsOnlineVoiceRoutingPolicy -Identity "thomas@portsip.cc" -PolicyName "MyPolicy"
```
You can check the policy assignment with this command:
```shell
Get-CsOnlineUser "thomas@portsip.cc" | select OnlineVoiceRoutingPolicy
```
Now the outbound dialing policy and routing are complete and `thomas@portsip.cc` can call out. In this example, that outbound call will end up in your PortSIP PBX SIP domain `sbc.portsip.cc`.
In our example, we could set up your domain in PortSIP PBX (explained in the PortSIP PBX section) so that:
* If that extension (4 digits in this case) exists in your PortSIP PBX domain and is registered, it will be called from your Office 365 user whether it's a SIP desktop phone registered to your PortSIP SIP domain, PortSIP desktop app, PortSIP web app or PortSIP mobile app.
* If that extension does not exist (say an E.164 10-digit number etc.), then PortSIP PBX will route the call to a SIP trunk so that call can go out.
# Configuring SBC and PBX
Please confirm the following items have been completed before configuring the SBC and PBX for Microsoft Teams Direct Routing.
* The PBX has been [installed ](/portsip-communications-solution/portsip-pbx-administration-guide/1-installation-of-the-portsip-pbx)and [configured](/portsip-communications-solution/portsip-pbx-administration-guide/2-portsip-pbx-management).
* The SBC has been [installed and configured](/portsip-communications-solution/portsip-pbx-administration-guide/9-configuring-portsip-sbc).
* The Microsoft Teams Direct Routing has been [configured](/portsip-communications-solution/portsip-pbx-administration-guide/10-configuring-sbc-for-ms-teams/configuring-microsoft-teams).
### 1. Add Teams Base Domain
1. Sign in to the SBC web portal
2. Select the menu **Settings > Teams Base Domains**, and click the **Add** button to add the SBC domain that SBC will send the OPTIONS message to MS Teams to keep alive, in case it's "**sbc.portsip.cc**".
After adding the Team's base domain, the SBC will periodically send OPTIONS to Teams; if it receives 200 OK for the OPTIONS message, the **Status** of this domain will display as **Active**.
If it is displayed as **Inactive**, something is wrong, please double-check every step.
### 2. Add SBC as a Teams trunk in PBX
1. Ensure the TCP transport on port 5063 has been added to the PBX.
2. Sign in to the PBX web portal as **System Administrator**, navigate to the **Tenants** menu, select a tenant to be managed, and click the **Manage** button; or sign in the user who is the "**admin**" role of the tenant into the PBX web portal.
3. Ensure the **SIP domain** for this tenant is already set as `sbc.portsip.cc`.
4. Select **Call Manager > Trunks** menu, and click the arrow button to choose the trunk type **Microsoft Teams**.
* `DID/DDI Pool` : The phone number that will be dialed from the teams to PBX, it's can be a single number or a number range, for example, 331001-331100; the 33 is the country code of the Teams user you specified when you create the tenant user(33 is for France); 1001-1100 is the phone number range for Teams users.
* The host domain or IP can't be modified, the port must be 5060.
* Enter the SBC server private IP `192.168.1.73` into the **Outbound Proxy Server** field. If the SBC is installed on the same server as the PBX, then this is the PBX server's private IP.
* The **Outbound Proxy Server Port** is the `5069` default, the port is the SBC transport port that communicates with PBX.
* The **Transport** is TCP.
4. Click the **Next** button
5. Turn off the **Rewrite the host IP of Via header by the public IP when sending the request to the trunk**, and click **OK** to complete the Teams Trunk configuration.
### 3. Creating Inbound Rules
The inbound rule must be created in order to route the Microsoft Teams call to the extension or system service, such as IVR, Call Queue, and Ring Group.
1. Sign in to the PortSIP PBX Web Portal by **System Admin** credentials, click the menu **Tenants**, select a tenant, then click the **Manage** button to manage this tenant to configure the inbound rule. or sign a user who has the `Tenant Admin` permission into the Web Portal to manage that tenant.
2. From the Web Portal, select **Call Manager > Inbound Rules**, and click the **Add** button.
3. Enter a friendly name for the rule, for example, **From Teams**, as shown screenshot below, when dialing the number `331001` from Teams, the call will be routed to the PBX extension `101`. When the Teams user dials 1001, and once the call arrives at PBX, the dialed number will be `+331001`, we should remove the `+` and enter the number only.
### 4. Creating Outbound Rules
We can create an outbound rule that routes the calls from PBX to Microsoft Teams.
1. Sign in to the PortSIP PBX Web Portal by **System Admin** credentials, click the menu **Tenants**, select a tenant, then click the **Manage** button to manage this tenant to configure the outbound rules. or sign a user who has `Tenant Admin` permission into the Web Portal to manage that tenant.
2. From the Web Portal, select **Call Manager > Outbound Rules**, and click the **Add** button.
3. We want to route all calls made by extension 102 to Microsoft Teams, then configure the outbound rule as the screenshot below.
When extension 102 dials a number that does not exist in the PBX internal directory, the call is routed to Microsoft Teams.
For example, when extension 102 dials 1001, the PBX routes the call to Microsoft Teams, and since the callee number is 1001, the Teams user who has the phone number 1001 will be ringing.
### 5. Forward Teams calls to Trunk for any number
Consider this scenario: A Teams caller calls phone numbers and routes to SBC/PBX. These calls should be sent to the trunk in order to ring the mobile phone/landline. Since it is impossible to create multiple inbound rules for all phone numbers, we can implement it easily as follows:
1. When creating the Teams trunk, specify the DID pool as **1** or a number range that includes **1**, for example, **1-1000000**.
2. Create the inbound rule and specify the DID number as **1**. Specify the destination number as **0**. The **1** means to match all called numbers that come from Teams, and the **0** means don’t modify the called number.
3. Create the outbound rule to route Teams calls to the trunk as you prefer.
# Configure an SBC for Multiple Tenants
PortSIP SBC supports configuring one Session Border Controller (SBC) to serve multiple tenants for Teams Direct Routing.
### 1. Configuring the Tenant Domains in Microsoft Teams
Microsoft provided a detailed guide for configuring Microsoft Teams Direct Routing for multiple tenants; please follow [Configure a Session Border Controller for multiple tenants](https://learn.microsoft.com/en-us/MicrosoftTeams/direct-routing-sbc-multiple-tenants) to set up the tenant domains in the Microsoft 365 admin center.
According to that guide, the following items summarize the configuration of the base domain and subdomains:
* The Teams Direct Routing Base domain is **customers.adatum.biz**.
* The tenant domains are **sbc1.customers.adatum.biz**, **sbc2.customers.adatum.biz**, and **sbc3.customers.adatum.biz**.
* a wildcard SSL certificate for the domain **\*.customers.adatum.biz.**
* Resolve the domain **customers.adatum.biz** to the SBC IP address.
### **2. Configuring the PortSIP PBX**
Please follow the guides below to install and configure the PortSIP PBX:
* [Installation of the PortSIP PBX](/portsip-communications-solution/portsip-pbx-administration-guide/1-installation-of-the-portsip-pbx)
* [Configuring the PortSIP PBX](#id-2-configuring-the-portsip-pbx)
Now, create three tenants and set their respective SIP domains to **sbc1.customers.adatum.biz**, **sbc2.customers.adatum.biz**, and **sbc3.customers.adatum.biz**.
### 3. Configuring the PortSIP SBC
Please install the PortSIP SBC by following the guide[ Configuring PortSIP SBC](/portsip-communications-solution/portsip-pbx-administration-guide/9-configuring-portsip-sbc).
To configure the PortSIP SBC for multiple tenants, please follow the [guide ](/portsip-communications-solution/portsip-pbx-administration-guide/10-configuring-sbc-for-ms-teams/configuring-sbc-and-pbx)and pay attention to the following points:
* When adding the TLS certificate in the menu **Settings > TLS Certificates**, enter **customers.adatum.biz** as the TLS domain and select the option **This is an SBC Web Domain Certificate.** Then, copy and paste the wildcard certificate of the domain **\*.customers.adatum.biz** to add the TLS certificate.
* When [adding the Teams Base Domain](/portsip-communications-solution/portsip-pbx-administration-guide/10-configuring-sbc-for-ms-teams/configuring-sbc-and-pbx#1-add-teams-base-domain), enter **customers.adatum.biz** as the Teams Base Domain.
* From the menu, select **Settings > Network** and enter **customers.adatum.biz** in the **Web Domain** field.
### **4. Configure Call Routing in the PortSIP PBX**
Please follow the guide [Configuring SBC and PBX](/portsip-communications-solution/portsip-pbx-administration-guide/10-configuring-sbc-for-ms-teams/configuring-sbc-and-pbx#2-add-sbc-as-teams-trunk-in-pbx) to create the Teams trunk and inbound and outbound rules for routing calls. Please skip the section **1 Add Teams Base Domain** since we have already completed that step in the previous steps.
# 11 Deploy the SBC Cluster
If your deployment handles a high volume of **WebRTC** or **Microsoft Teams** calls, or if you use a Session Border Controller (SBC) to isolate the PBX from external networks, all signaling and media traffic will be routed through the SBC layer.
In these scenarios, it is strongly recommended to deploy the SBC in a **clustered configuration**. This approach improves scalability, enhances reliability, and ensures efficient load distribution across SBC nodes.
***
### Deployment Architecture
In a typical architecture, the **PortSIP PBX** is deployed within a protected environment, such as a private VLAN or cloud network. One or more SBC servers are positioned in front of the PBX to:
* Prevent direct user access to the PBX
* Secure SIP, WebRTC, and Teams traffic
* Handle NAT traversal, TLS termination, and media anchoring
* Provide horizontal scalability and high availability
All external client traffic (WebRTC browsers, Microsoft Teams, SIP endpoints) is terminated on the SBC cluster before being forwarded to the PBX.
***
### DNS Configuration
You must create DNS records for each SBC node. The following DNS record types are supported:
* **A records**
* **DNS SRV records**
#### Example SBC IP Addresses
* SBC 1: `72.247.113.11`
* SBC 2: `72.247.113.12`
* SBC 3: `72.247.113.13`
#### Individual A Records
Create individual DNS records for each SBC:
* `sbc1.sbc.com` → `72.247.113.11`
* `sbc2.sbc.com` → `72.247.113.12`
* `sbc3.sbc.com` → `72.247.113.13`
#### Shared DNS Record (Load Distribution)
You may also configure a shared DNS name that resolves to all SBC IP addresses:
* `sbc.com` → `72.247.113.11`
* `sbc.com` → `72.247.113.12`
* `sbc.com` → `72.247.113.13`
This allows clients to distribute connections across multiple SBC servers using DNS-based load balancing.
***
### TLS Certificates
Purchase and install a **wildcard TLS certificate** for the domain:
```
*.sbc.com
```
Refer to the [Certificates for TLS/HTTPS/WebRTC](/portsip-communications-solution/tutorials/certificates-for-tls-https-webrtc) guide for detailed instructions on certificate requirements and installation.
Using a wildcard certificate ensures:
* Seamless HTTPS and WebRTC access
* Consistent TLS configuration across all SBC nodes
* Simplified certificate management in clustered environments
***
### Configuring the SBC
Follow the instructions in [Configuring PortSIP SBC for WebRTC](/portsip-communications-solution/portsip-pbx-administration-guide/9-configuring-portsip-sbc/configuring-sbc-for-webrtc) to configure each SBC server. In addition, ensure the following settings are applied consistently across all nodes:
#### Certificate Settings
* Set **TLS Domain** to: `sbc.com`
* Enable **This is SBC Web Domain Certificate**
#### Web Domain Configuration
* Set **Web Domain** to: `sbc.com`
***
### Accessing the SBC
After completing the SBC configuration, you can access each SBC’s web management portal using its dedicated hostname:
* **SBC 1:** `https://sbc1.sbc.com:8883`
* **SBC 2:** `https://sbc2.sbc.com:8883`
* **SBC 3:** `https://sbc3.sbc.com:8883`
#### Accessing the WebRTC Client
End users can access the WebRTC client using the shared SBC domain:
This URL automatically leverages DNS-based distribution to route users to available SBC nodes.
***
### Best Practice Summary
* Always deploy SBCs in a clustered configuration for high-volume WebRTC or Microsoft Teams traffic
* Use DNS-based load distribution with a shared SBC domain
* Protect the PBX by placing SBCs in front of it
* Use a wildcard TLS certificate for consistent WebRTC and HTTPS access
* Keep all SBC nodes configured identically to ensure predictable behavior
# 12 Configuring Virtual Receptionist
The virtual receptionist feature allows PortSIP PBX to answer phone calls automatically. When a call comes into the PortSIP, the caller is presented with a list of options. The caller can choose the appropriate option by using the numbers on their phone keypad. You can implement a menu by using this feature. A virtual receptionist is also known as an **Auto Attendant**.
For example, "**Thanks for contacting us; for sales, press 1; for support, press 2 or wait in line to be transferred to the operator."**
You can configure various virtual receptionists, each of which owns a unique extension number. Depending on your preferences, you may configure to answer calls on the base of which line the call comes in and from, as well as whether the call is received inside or outside office hours. For example, you can have a different prompt for outside office hours that do not include the option to be transferred to groups/queues since there are no agents available to take the calls.
This article includes the following topics:
* [Managing Virtual Receptionist](/portsip-communications-solution/portsip-pbx-administration-guide/12-configuring-virtual-receptionist/managing-virtual-receptionist)
* [Visual IVR Editor Guide](/portsip-communications-solution/portsip-pbx-administration-guide/12-configuring-virtual-receptionist/visual-ivr-editor-guide)
* [Direct Inward System Access (DISA)](/portsip-communications-solution/portsip-pbx-administration-guide/12-configuring-virtual-receptionist/direct-inward-system-access-disa)
# Managing Virtual Receptionist
### **Recording a Menu Prompt**
Before creating a virtual receptionist, decide which **menu options** you want to offer callers and record the corresponding **announcement prompt**.
**Example prompt:**
> “Welcome to XYZ. For Sales, press 1. For Support, press 2, or stay on the line for an operator.”
#### Best Practice for Prompt Design
It is recommended to state the **menu option first**, followed by the **DTMF digit**, for example:
> “For Sales, press 1”
rather than:
> “Press 1 for Sales”
This approach allows callers to listen for their desired option first and then register the digit to press, resulting in a better caller experience.
{% hint style="warning" %}
For the prompt file format, please refer to [What's the file format required for the PortSIP PBX prompt files?](/portsip-communications-solution/faq/what-file-format-is-required-for-portsip-pbx-prompt)
{% endhint %}
***
### Creating a Virtual Receptionist
You can create multiple virtual receptionists and assign them to specific extensions or inbound numbers.
#### To create a virtual receptionist:
1. Navigate to **Advanced Services > Virtual Receptionist** in the Web Portal.
2. Click **Add**.
3. On the **General** section, enter the **Name** and **Extension Number** for the virtual receptionist.
***
### General Settings
#### Prompt File
By default, the PBX uses a **system-predefined audio prompt**.\
To use a custom prompt, click **Browse** and select a previously recorded audio file.
#### Prompt When Call Is Transferring
The audio file played when a call is being transferred after the caller presses a DTMF key.
#### Virtual Receptionist Language
Specifies the language used for the prompt files.
#### Gap Time Between DTMF Digits (Seconds)
Defines how long the virtual receptionist waits before attempting to match the entered digits to an extension or account.\
If no matching account is found, the system plays an announcement indicating that the extension does not exist.
#### DISA PIN
Configures the [**Direct Inward System Access (DISA)**](/portsip-communications-solution/portsip-pbx-administration-guide/12-configuring-virtual-receptionist/direct-inward-system-access-disa) PIN if DISA is enabled for this virtual receptionist.\
For more information, refer to **Direct Inward System Access**.
#### Verify PIN for DISA
Specifies whether the virtual receptionist should verify the DISA PIN before allowing access.
***
### Call Handling Options
#### Night Mode
When [**Night Mode** ](/portsip-communications-solution/portsip-pbx-administration-guide/32-night-mode)is enabled, all calls reaching this virtual receptionist are handled according to the **Destination for Night Mode** settings. For more details, please refer to [Night Mode](/portsip-communications-solution/portsip-pbx-administration-guide/32-night-mode).
#### Block Direct Extension Dialing
Prevents callers from dialing extensions directly.
* You can block individual extensions or define extension ranges.
* Multiple entries must be separated by semicolons.
**Example:** `1001-2001;3000;7000-8000`
#### Destination for Night Mode
Defines how incoming calls are handled when **Night Mode** is active for the tenant.\
For detailed configuration instructions, refer to the **Night Mode** section of this guide.
***
### Timeout and Failure Handling
#### Timeout (Seconds)
Specifies how long the virtual receptionist waits for a **DTMF input** from the caller.\
If no input is received within the specified time, the system automatically performs the **default action**.
This option is intended for callers who do not understand the menu or who are using phones that do not support DTMF input.
#### Call Failure
A **Call Failure** occurs when a caller enters a DTMF digit that triggers a call transfer, but the transfer attempt fails.
In the **Call Failure** section, you can define how the call should be handled in this situation.
***
### Menu Options
In the **Menu Options** tab, you configure the actions associated with each **DTMF digit** entered by the caller.
For each numeric key, you can define an action such as:
* Forwarding the call to an extension
* Ring group
* Call queue
* Another virtual receptionist
* System extension
If the action targets a specific destination, select the desired extension or system extension number.
***
### User Input and Time-Based Routing
The **User Input** option controls when the virtual receptionist starts searching for a destination that matches the caller’s input.
#### Example Behavior (DTMF = 2)
* **During office hours:**\
The call is forwarded to extension 2001.
* **Outside office hours:**\
The call is disconnected.
* **During holidays:**\
The call is forwarded to the voicemail of extension 102.
This allows flexible, time-based call routing using a single virtual receptionist.
> If the caller enters a DTMF digit that does not match any configured DTMF option, the Call Failure rule is not triggered.
***
#### **Office Hours**
You can define the **office hours** for this DTMF input by clicking the **Office Hours** button. Two options are available:
* **Use Global Office Hours**\
Applies the default office hours defined at the **tenant level**.
* **Use Specific Office Hours**\
Allows you to define **custom office hours** for this DTMF input.
By default, each DTMF input follows the global office hours configured for the tenant.
#### **Holidays**
Set the holidays for this DTMF input by clicking the **Holidays** button. You can select a holiday list from the tenant scope by clicking the **Select Holidays** button.
### **Direct Destinations**
The Direct Destinations feature is somewhat like a built-in version of the IVR system.
To direct inbound calls to specified extensions, you can use the pre-configured destination fields and link them to pre-recorded announcements and user input options.
Using the sample shown below, the virtual receptionist’s welcome message will be as follows: "**For Sales, press 1. For Support, press 2. For all other inquiries, press 0**." (The user input options are linked to extensions 8003, 8000, and 8001.)
***
#### Direct Destination vs. IVR Node
For simple virtual receptionist configurations, using a direct destination is often the most straightforward and effective option.\
For virtual receptionists that require advanced IVR logic, complex call flows, or integrations, it is recommended to use an IVR node.
***
#### Direct Destination Behavior
Once direct destination mappings are configured, the system automatically dials the associated destination when the caller enters the corresponding DTMF input.
**Example:**\
As shown in the screenshot above, when a caller presses 2, the call is routed to extension 8001.
***
#### Using the Pound Sign (#) Delay
By appending a **pound sign (#)** to a direct destination (for example, `2#`), the system waits **3 seconds** before dialing the destination.
This delay is especially useful when extension numbers consist of **multiple digits**, such as extensions in the **100 range** (101, 102, etc.).\
The 3-second pause ensures the system collects the **entire user input** (for example, `101`) instead of immediately acting on the first digit (`1`).
***
#### User Input Considerations
The User Input value can consist of one or multiple digits. By default, the system dials a direct destination immediately after the caller finishes entering the keypad input.
This behavior can cause conflicts when:
* A direct destination uses a digit that overlaps with the beginning of an extension number
* For example, a direct destination of **1** conflicts with extensions such as **101**, **102**, etc.
In this scenario, the system cannot distinguish whether the caller intends to reach the direct destination or continue dialing an extension.
***
#### Best Practices to Avoid Conflicts
To prevent overlap issues:
* Use extension ranges that **do not conflict** with direct destinations, mailbox prefixes, or outbound dialing prefixes
* Extension ranges such as **4xx to 7xx** are commonly recommended
If changing extension assignments is not practical (for example, extension numbers are already printed on business cards), you can use the **timeout mechanism** instead.
By appending a **pound sign (#)** to the direct destination (for example, `1#`), the system waits **3 seconds** before dialing, allowing callers enough time to complete multi-digit extension input.
***
#### Destination Extension
The **Destination Extension** can be any valid internal destination, including:
* An extension
* A conference room
* Other internal system numbers
***
### Allow Callers to Dial a Known Extension Directly
While the virtual receptionist prompt is playing, callers can enter a known **extension number** to be connected immediately. This allows callers who already know their party’s extension to bypass the receptionist menu and reach the intended extension more quickly.
This option is **enabled by default**. To make effective use of this feature, include clear instructions in the voice prompt.
**Example prompt:**
> “Welcome to Company XYZ. If you know your party’s extension number, please enter it now. For Sales, press 1. For Support, press 2.”
from platforms like Cisco, Avaya, and RingCentral.
***
### Sending HTTP Requests to a WebHook
When creating a Virtual Receptionist, the configuration interface includes three tabs:
* **Virtual Receptionist**
* **Action URL**
* **Outbound Caller ID**
In the Virtual Receptionist tab, you configure the basic IVR behavior.\
In the Action URL tab, you define WebHook-based actions and how calls are handled when specific conditions are met.
***
#### Action URL Overview
An Action URL allows the Virtual Receptionist to send an HTTP request to a third-party server and route the call dynamically based on the response.
**Typical Scenario**
When a caller enters a preconfigured **DTMF input** (or when the caller number matches a defined rule), the Virtual Receptionist:
1. Sends an HTTP request to the specified WebHook URL
2. Receives a response from the third-party server
3. Parses the response
4. Routes the call to the destination defined in the response
This mechanism enables **advanced IVR logic**, such as database lookups, external validation, or dynamic call routing.
***
#### Action URL Configuration
**Name**
Enter a **user-friendly name** for the Action URL.\
This field is **mandatory** and is used to identify the action.
***
**Type**
Specifies how the Action URL is triggered. PortSIP PBX supports the following trigger types:
* **DTMF** – Triggered by user-entered DTMF digits
* **Caller Number** – Triggered by matching the caller’s number
> When **DTMF** is selected and the entered DTMF matches a rule defined in the **Action URL**, the PBX **overrides** the DTMF handling configured in the Virtual Receptionist tab and processes the call according to the Action URL settings.
***
#### Configuring DTMF and Caller Number Match Rules
Depending on the selected **Type**, configure one of the following match lists:
**DTMF Match List**\
**Caller Number Match List**
You can specify match values in any of the following formats:
**Semicolon-separated values**\
Example: `101;102;103`
**Number range**\
Example: `860000–880000`
**Wildcard pattern using asterisks (`*`)**\
Example: `*****` matches any 5-digit DTMF input.
Each entry must be unique. Duplicate entries are not allowed.
**Matching All DTMF Input**
For the **DTMF Match List**, you can use `ALL` to match any DTMF input.
When `ALL` is specified, the IVR DTMF menu is bypassed. Any DTMF input entered by the caller triggers this webhook directly.
> **Important**\
> Use `ALL` carefully. When enabled, all caller DTMF input is sent to the webhook instead of being handled by the IVR menu.
**Common Use Cases**
* Matching bank card numbers or account IDs entered by callers
* Triggering external validation or lookup services
* Handling variable-length DTMF input dynamically
***
#### HTTP Request Behavior
Once an Action URL rule is triggered, the Virtual Receptionist sends an HTTP request to the configured WebHook server.
**Authentication**
You may optionally configure:
* **Username**
* **Password**
These credentials are used for **HTTP Basic Authentication**.
***
#### HTTP Method
Choose how the request is sent:
* **GET**
* **POST**
***
#### Timeout Settings
* **Connection Timeout**\
Defines how long the system waits to establish a connection with the WebHook server.
* **Response Timeout**\
Defines how long the system waits for a response after sending the request.
These settings control communication reliability between the Virtual Receptionist and the WebHook server.
***
#### Request URL
Specifies the **WebHook endpoint URL**.
When the action is triggered, the Virtual Receptionist sends an HTTP request to this URL and processes the call based on the **HTTP response message** returned by the server.
***
#### Additional Headers
Allows you to include **custom HTTP headers** in the request.
To add multiple headers, use the following format:
```
key1:value1&key2:value2
```
**Example:**
```http
Authorization:Bearer token123&X-App-ID:portsip
```
***
### Summary
The Action URL feature enables the Virtual Receptionist to integrate with **external systems** and perform **dynamic, logic-driven call routing**, making it ideal for:
* CRM and database integrations
* Banking or account verification
* Advanced IVR workflows
* Custom business logic
***
### HTTP Request Message
PortSIP defines the following parameters for constructing the **HTTP request message** sent to a WebHook.\
The request payload is formatted in **JSON** (for POST requests) or as URL query parameters (for GET requests).
#### Parameters
* **from:** The caller’s number (the extension or number calling the Virtual Receptionist).
* **to:** The callee’s number (the extension number assigned to the Virtual Receptionist).
* **input:** The DTMF digits entered by the caller.
* **from\_name:** The display name of the caller. This field is empty if no display name is available.
* **account\_name:** The name of the Virtual Receptionist.
* **session\_id**: The unique ID of that call.
***
#### Example Scenario
Assume a Virtual Receptionist is configured with the following settings:
* **Number:** 888
* **Name:** Sales
* **Action Name:** Action1
* **Action Type:** DTMF
* **DTMF Match List:** `22;33`
* **HTTP Method:** GET
* **Request URL:**\
`http://www.appserver.com/dest.php`
***
#### GET Request Example
When **extension 101** (display name **Jason**) calls **888**, the Virtual Receptionist automatically answers the call and plays the configured prompt.
If the caller enters **DTMF 22**, the Virtual Receptionist sends the following **HTTP GET request** to the WebHook endpoint:
```
http://www.appserver.com/dest.php?session_id=12345678&from=101&to=888&input=22&from_name=Jason&account_name=Sales
```
***
#### POST Request Example
If **POST** is selected as the HTTP method, the Virtual Receptionist sends the request in **JSON format** in the HTTP request body:
```json
{
"from": "101",
"to": "888",
"input": "22",
"from_name": "Jason",
"account_name": "Sales",
"session_id": "12345678"
}
```
### HTTP Response Message
PortSIP PBX defines the following **HTTP response format** for WebHook requests sent by the **Virtual Receptionist**.\
The response is expected in **JSON format** and determines how the Virtual Receptionist should handle the call.
#### Response Parameters
* **status\_code**\
The HTTP status code returned by the WebHook endpoint.\
A value of **200** indicates that the request was processed successfully. Any other value is treated as a failure.
* **action**\
Specifies the action the Virtual Receptionist should take. Supported values are:
* **call** – Forward the call to the number specified in `destination`
* **hangup** – Immediately terminate the call
* **repeat** – Replay the prompt message
* **destination**\
The target callee number. This parameter is **only valid when `action` is set to `call`**.\
It is ignored for all other actions.
***
#### Example Response
```json
{
"status_code": 200,
"action": "call",
"destination": "222"
}
```
***
#### Call Handling Behavior
When the Virtual Receptionist receives the response above, it forwards the call to **extension 222**, as specified in the `destination` field of the JSON response.
# Visual IVR Editor Guide
This article provides information for Tenant Administrators on how to use Visual IVR Editor.
The Visual IVR Editor lets Tenant Administrators configure the Multi-level IVR using an easy-to-use graphical interface. This feature helps Tenant Administrators to add IVR menus and assign them to extensions with just a few clicks. It allows Tenant Administrators to edit and update an existing IVR menu. Once the configuration has been saved, PortSIP PBX will automatically verify the settings and display any missing information.
Tenant Administrators can log in the tenant to web portal and access the Visual IVR Editor by going to **Advanced Services > Virtual Receptionsit > IVR Editor** tab. Below is the Visual IVR Editor.
## Create a new IVR menu
Below New Tree, click the plus icon. This will automatically generate a menu that can be customized.
## Open and edit an existing IVR menu
Click the IVR menu to edit. The IVR menus will be displayed on the right panel.
## Add sub-items to the IVR menu
1. Hover your mouse over the menu, then click the Plus icon.
This will expand to show a list of sub-items that you can add. The following sub-items can be added to an IVR Menu:
* New Virtual Receptionist - Lets you create a new IVR menu as an option to your IVR tree.
* Forward to Number - Lets you add a specific extension to your IVR tree. This can be a ring group, queue, shared voicemail, or a user.
* Forward to Voicemail - Gives an option to your callers to leave a voicemail of a specified extension.
* Repeat Prompt - Repeat the currently prompt voice.
* Hangup: Hang up the caller.
# Direct Inward System Access (DISA)
### Overview
**DISA (Direct Inward System Access)** allows users to access PortSIP PBX resources from an external phone, such as a mobile phone, landline, or even a payphone—and place calls **as if they were an internal extension**.
With DISA, a user can:
* Call into the PortSIP PBX from an external number
* Authenticate using a PIN (optional)
* Make internal calls to extensions
* Make external calls via SIP trunks or PSTN trunks
* Check his voicemail
DISA is especially useful when users need to place business calls but do not have access to their own extension or device.
> **Security Note**\
> DISA should always be protected with a strong PIN and properly restricted outbound rules to prevent unauthorized usage or toll fraud.
***
### How DISA Works
After DISA is configured:
1. A user calls into the PortSIP PBX and reaches a **Virtual Receptionist**.
2. The user presses a configured DTMF key to access DISA.
3. If PIN verification is enabled, the PBX prompts the user to enter the DISA PIN.
4. After successful authentication, the user enters the destination number followed by **#**.
5. The PBX places the call on behalf of the user.
***
### Creating and Configuring DISA
To configure DISA on the PortSIP PBX, follow these steps:
1. Sign in to the **PortSIP PBX Web Portal** as a **Tenant Administrator**.
2. Navigate to **Advanced Services > Virtual Receptionist**.
3. Create a new Virtual Receptionist or edit an existing one.
4. In the Virtual Receptionist settings:
* Enable **Verify the PIN for DISA**
* Enter the **DISA PIN** (digits only)\
This PIN will be required before the caller can dial out.
* (Optional) Disable this option if authentication is not required (not recommended).
5. In **Menu Options**:
* Add a **User Input** for the desired DTMF key
* Set the action to **DISA**
6. Save the configuration.
***
### Example: DISA Call Flow
In this example:
* DISA PIN verification is enabled
* DTMF key **0** is assigned to DISA
Call flow:
1. A caller dials the company number.
2. The Virtual Receptionist answers and plays the greeting.
3. The caller presses **0**.
4. The PBX prompts the caller to enter the **DISA PIN**.
5. If the PIN is correct, the caller enters the destination number.
6. The caller presses **#** to indicate the end of number entry.
7. The PBX places the call to the entered destination.
***
### Example: Using DISA to Check an Extension's Voicemail
In this example:
* DISA PIN verification is enabled
* DTMF key **0** is assigned to DISA
Call flow:
1. A caller dials the company number.
2. The Virtual Receptionist answers and plays the greeting.
3. The caller presses **0.**
4. The PBX prompts the caller to enter the **DISA PIN**.
5. After the PIN is verified, the caller enters the voicemail FAC followed by the extension number.
6. The caller presses `#` to indicate the end of the number entry. For example, if the extension number is `101` and the default voicemail FAC is `*57`, enter: `*57101#`
7. The PBX then routes the call to the voicemail service. Follow the voice prompts to access the voicemail box.
***
### Outbound Call Considerations
* If the entered destination is an **external phone number**, a corresponding **Outbound Rule** must exist.
* The outbound rule must:
* Match the dialed number
* Allow the call
* Route the call to the appropriate SIP trunk or PSTN trunk
Without a valid outbound rule, the external call will not be completed.
***
### Best Practices
* Always enable **DISA PIN authentication**.
* Use a **strong, non-trivial PIN**.
* Restrict outbound rules to limit destinations and reduce fraud risk.
* Monitor call logs and CDRs for unusual activity related to DISA usage.
# 13 Configuring Ring Group
**Ring Groups** allow you to ring a predefined group of users according to a configured ringing pattern.\
When a call is routed to a Ring Group, the PBX follows the group’s ring strategy to determine how and in what order members are alerted.
PortSIP PBX allows you to configure a Ring Group with:
* Ring group profile information
* User (extension) assignments
* Call distribution, call forwarding, and business continuity settings
***
### Creating a Ring Group
To create a Ring Group:
1. Sign in to the **PortSIP PBX Web Portal**.
2. Navigate to **Call Manager > Advanced Services > Ring Groups**.
3. Click **Add**.
#### Configure Ring Group Settings
* **Ring Group Number**\
A unique number that identifies the ring group.\
This must be a new number and **must not conflict with any existing extension**.
* **Ring Group Name**\
A friendly name to identify the ring group.
* **Ring Time**\
The amount of time (in seconds) that each extension will ring.
* **Ring Strategy**\
Select how calls are distributed to group members:
* **Ring Simultaneously**\
All group members ring at the same time.
* **Prioritized Hunt**\
Ring available members one by one in a fixed, configured order.
* **Cyclic Hunt**\
Ring available members in rotation.\
The member who has not been rung for the longest time is given priority.
* **Least Worked Hunt**\
Ring available members based on call activity.\
The member who has answered the fewest calls from this group is given priority.
* **Skill-Based Routing – Prioritized Hunt**\
Ring agents serially based on skill level and configured order.\
Calls are offered to the highest skill group first, then to lower skill groups if unanswered.
* **Skill-Based Routing – Cyclic Hunt**\
Ring agents serially, prioritizing the agent who has not been rung for the longest time, starting with the highest skill group.
* **Skill-Based Routing – Least Worked Hunt**\
Ring agents serially, prioritizing the agent who has answered the fewest calls, starting with the highest skill group.
* **Paging / Intercom**\
Create a paging or intercom group (see the sections below).
* **Skip member(s) who’s calling**\
If enabled, the calling group member will not be rung.
* **Night Mode:** Set the group with Night Mode activated or deactivated. For more details, please refer to [Night Mode](/portsip-communications-solution/portsip-pbx-administration-guide/32-night-mode).
***
#### Call Handling Options
* **Destination if no answer**\
Defines how calls are handled if no group member answers (for example, forward to voicemail, another number, or another service).
* **Destination for Night Mode**\
Defines call behavior when Night Mode is active for the tenant.\
For details, refer to the **Night Mode** option above of this guide.
***
#### Group Members
On the **Group Members** page, select the extensions that should belong to this Ring Group.
***
#### Outbound Caller ID
When an **Outbound Caller ID** is configured for the Ring Group:
* If no members answer and the call is forwarded to an external number via a SIP trunk,
* The Ring Group’s outbound caller ID can be used to replace specific SIP fields.
For more details, refer to [Outbound parameters and Inbound parameters](/portsip-communications-solution/portsip-pbx-administration-guide/7-trunk-management/configuring-sip-trunk#outbound-parameters-and-inbound-parameters).
***
### Paging
When the **Paging / Intercom** ring strategy is selected, the Ring Group functions as a **paging group**.
* Calls are automatically answered on the called extensions
* Audio is played through the phone speaker
* Called users do **not** need to pick up the handset
* The caller does **not** hear audio back from the paged users
Paging is commonly used for announcements.
***
### Intercom
Intercom uses the same **Paging / Intercom** ring strategy but allows two-way communication when initiated.
* Called extensions auto-answer and hear the caller
* By default, the caller does not hear audio back
* A called user can:
* Press **\*** to start talking
* Press **#** to stop talking
***
#### Ways to Use Paging and Intercom
**Method 1: Ring Group Paging / Intercom**
Assume:
* A Ring Group with number **9000**
* Ring Strategy set to **Paging / Intercom**
Behavior:
* Dialing **9000** causes all group members to auto-answer
* Members hear the caller, but the caller does not hear them
* Any member can press **\*** to speak and **#** to stop speaking
***
**Method 2: Direct Extension Intercom**
Assume:
* Extension **100** wants to intercom with extension **101**
* The Feature Access Code (FAC) for Intercom is **\*46**
Behavior:
* Extension **100** dials **\*46101**
* Extension **101** auto-answers and two-way audio is established
The Intercom FAC can be viewed or changed under\
**Advanced > Feature Access Codes**.
# 14 Call Parking
Call parking is a feature that allows callers to be put on hold in a communal parking spot so that any extensions can retrieve the call on a different phone or extension. Today, every PBX offers this feature to its users.
Typically, most PBXs implement the Call Parking feature by creating a dozen park spots, which are actually PBX extensions, and these spots are registered to the PBX. Users will need to subscribe to the park spots for the Dialog Event package and maintain the subscription by sending SUBSCRIBE messages periodically.
Once someone parks a call at a spot, subscribers who have subscribed to this spot will receive a NOTIFY message for the Dialog Event, and the BLF key will flash. Then the user can press the BLF key to retrieve the call.
This article includes the following topics:
* [PortSIP Call Parking Feature](/portsip-communications-solution/portsip-pbx-administration-guide/14-call-parking/portsip-call-parking-feature)
* [Using the Call Parking Feature](/portsip-communications-solution/portsip-pbx-administration-guide/14-call-parking/using-call-parking-feature)
* [Using Enhanced Call Park on Fanvil IP Phones](/portsip-communications-solution/portsip-pbx-administration-guide/14-call-parking/using-enhanced-call-park-on-fanvil-ip-phones)
* [Using Enhanced Call Park on Yealink IP Phones](/portsip-communications-solution/portsip-pbx-administration-guide/14-call-parking/using-enhanced-call-park-on-yealink-ip-phones)
* [Using Enhanced Call Park on GrandStream IP Phones](/portsip-communications-solution/portsip-pbx-administration-guide/14-call-parking/using-enhanced-call-park-on-grandstream-ip-phones)
* [Using Enhanced Call Park on Snom IP Phones](/portsip-communications-solution/portsip-pbx-administration-guide/14-call-parking/using-enhanced-call-park-on-snom-ip-phones)
* [Using Enhanced Call Park on Dinstar IP Phones](/portsip-communications-solution/portsip-pbx-administration-guide/14-call-parking/using-enhanced-call-park-on-dinstar-ip-phones)
* [Using Enhanced Call Park on Htek IP Phones](/portsip-communications-solution/portsip-pbx-administration-guide/14-call-parking/using-enhanced-call-park-on-htek-ip-phones)
# PortSIP Call Parking Feature
### What Is the Problem with Traditional Call Parking?
As described earlier, **traditional call parking** works well in **single-tenant PBX** deployments. In these environments, call parking is typically implemented by creating dedicated **parking extensions (park spots)**, which users can monitor and retrieve calls from.
However, this model does **not scale** in modern **cloud PBX** deployments.
#### Challenges in a Cloud, Multi-Tenant Environment
Today’s PBX deployments are predominantly **cloud-based and multi-tenant**, where:
* A service provider hosts a **single PBX instance**
* The PBX serves **hundreds or thousands of tenants**
* Each tenant operates a **logically isolated virtual PBX**, while sharing the same infrastructure
A single cloud PBX instance may support **1,000 to 10,000 tenants**.
In a traditional call parking model:
* Each tenant must create its own set of parking spots
* Parking spots are implemented as **PBX extensions**
* Each parking extension must:
* Register to the PBX
* Periodically send SIP `REGISTER` messages
* Be monitored via **Dialog Event subscriptions**
**Scalability impact**
For example:
* If each tenant creates **10 parking spots**
* A PBX with **1,000 tenants** requires **10,000 parking extensions**
This results in:
* Tens of thousands of SIP registrations
* Thousands of Dialog Event subscriptions
* Significant consumption of **CPU**, **memory**, and **network bandwidth**
As tenants grow and require more parking spots, the impact multiplies further.\
This approach **severely degrades PBX performance** and is **unacceptable for service providers** operating at scale.
***
### PortSIP Solution
PortSIP PBX is designed specifically for **cloud PBX and service provider environments**. It is a **true multi-tenant PBX**, where:
* A single PBX instance can host **thousands of tenants**
* Each tenant is fully isolated
* System resources are used efficiently and predictably
To address the scalability issues of traditional call parking, **PortSIP implements call parking in a fundamentally different way**.
#### Key Design Principles
PortSIP’s call parking implementation:
* Does **not** require creating parking spot extensions
* Does **not** require SIP registration for parking spots
* Does **not** require Dialog Event subscriptions
This design eliminates the core scalability bottlenecks found in traditional implementations.
***
### How PortSIP Call Parking Works
#### Parking a Call
* There is **no need to create parking spots**.
* The **target extension number itself** acts as the parking reference.
* To park a call to extension `103`, the user simply transfers the call to:
```
*68103
```
Where:
* `*68` is the **Feature Access Code (FAC)** for call parking
* `103` is the extension number associated with the parked call
***
#### Call Park Notification
Once the call is parked:
* The target extension device (IP phone or softphone) receives an **out-of-dialog SIP NOTIFY**
* The NOTIFY uses the **`park-info` event**
* The message includes:
* Who parked the call
* Where the call is parked
* How the call can be retrieved
The device can parse this information and **alert the user** that a call is parked.
***
#### Retrieving the Call
* The user retrieves the parked call by pressing the corresponding **button or soft key**
* No polling, subscription, or manual dialing is required
***
### Advantages of the PortSIP Call Parking Design
PortSIP’s approach provides the following benefits:
* **No parking spot extensions required**\
Eliminates the need to create, register, and maintain thousands of virtual extensions.
* **No Dialog Event subscriptions**\
Removes subscription overhead and long-lived SIP dialogs.
* **Rich NOTIFY information**\
Devices receive detailed parking information and can present one-click retrieval to users.
* **Cloud-scale performance**\
Call parking does not consume excessive CPU, memory, or bandwidth—even in very large deployments.
* **Service-provider friendly**\
Suitable for large tenants and massive multi-tenant cloud PBX environments without performance degradation.
***
### Summary
Traditional call parking models were designed for on-premise, single-tenant PBXs.\
PortSIP’s call parking is **cloud-native by design**, enabling service providers to deliver call parking at scale—without compromising system performance.
# Using Call Parking Feature
### Park and Retrieve Calls with PortSIP
PortSIP PBX allows you to **park an active call** and retrieve it later from the same device or a different device, using simple **Feature Access Codes (FACs)**. This is useful when you need to move between devices, involve another colleague, or temporarily place a call on hold for retrieval.
#### Feature Access Codes (FACs)
* **Park a call**\
While on an active call, transfer the call to:
```
*68
```
This places the call into a parking state.
* **Retrieve a parked call**\
To retrieve the parked call, dial:
```
*88
```
* **Park a call at a specific extension**\
To associate the parked call with a specific extension, transfer the call to:
```
*68
```
Example: `*68102`
* **Retrieve a call parked at a specific extension**\
To retrieve a call parked at a specific extension, dial:
```
*88
```
Example: `*88102`
***
### Scenario 1: Park a Call for Another User
Bob’s extension number is **101**, and he answers a client call on his desktop IP phone. He needs assistance from his colleague Alice, whose extension number is **102**.
1. Bob transfers the active call to:
```
*68102
```
2. Bob hangs up.
3. Alice’s IP phone lights up and displays a parked call alert.
4. Alice retrieves the call by:
* Pressing the corresponding **soft key**, or
* Dialing `*88`, or
* Dialing `*88102`
Alice is now connected to the client.
> **Note:**\
> If Alice is not available, **any other colleague** can retrieve the parked call by dialing `*88102`.
***
### Scenario 2: Move a Call Between Devices (Same Extension)
Bob’s extension number is **101**, and he answers a client call on his desktop IP phone. He needs to walk to another office.
1. Bob transfers the call to:
```
*68
```
2. Bob hangs up on the desktop IP phone.
3. The caller hears music while the call is parked.
4. Bob opens the **PortSIP mobile app**, which is registered to the PBX using the **same extension (101)**.
5. Bob retrieves the call by dialing:
```
*88
```
Bob continues the conversation while walking to the other office.
***
### Scenario 3: Retrieve a Parked Call from Another IP Phone
Bob’s extension number is **101**, and he answers a client call on his desktop IP phone. He then needs to continue the call from a different office.
1. Bob transfers the call to:
```
*68
```
2. Bob hangs up on the original IP phone.
3. The caller hears music while the call is parked.
4. After arriving at the other office, Bob uses another IP phone.
5. Bob retrieves the call by dialing:
```
*88101
```
Bob is reconnected to the client and continues the call from the new location.
***
### Retrieve Parked Calls Using the PortSIP App, Fanvil, and Yealink IP Phones
The **PortSIP App**, **Fanvil**, and **Yealink** IP phones all support **one-touch retrieval** of parked calls. When a call is parked, supported devices automatically notify the user and allow the call to be retrieved with a **single button or key press**, without dialing any Feature Access Codes.
#### Scenario: One-touch call retrieval
Bob’s extension number is **101**, and he answers a client call (caller number `003386002678`) on his desktop IP phone. The call now needs to be handled by his colleague Alice, whose extension number is **102**.
1. Bob transfers the active call to:
```
*68102
```
2. Bob hangs up.
3. Once the call is successfully parked:
* Alice’s **PortSIP App** (Mobile App, Windows Desktop App, or WebRTC App), and
* Alice’s **IP phone** (Fanvil, Yealink, or Dinstar)
receive a **parked call notification**.
4. Alice’s device:
* Lights up (IP phone),
* Displays an on-screen message indicating that a call is parked on **extension 102**.
5. Alice retrieves the call by:
* Pressing the **on-screen button** in the PortSIP App, or
* Pressing the **dedicated key or soft key** on the IP phone.
No manual dialing (such as `*88` or `*88102`) is required.
***
### Group Call Park
**Group Call Park** allows a user to park a call to a **Call Park Group**, making the call available for retrieval by any other member of that group. This is ideal for team-based call handling, where calls need to be shared and answered by the first available colleague.
***
### Feature Notes
Before configuring Group Call Park, be aware of the following:
* Group Call Park is a **tenant-level feature** included with the PortSIP PBX license. **No additional license or cost** is required.
* A user can belong to **only one** Call Park group.
* A Call Park group can include **only users from the same tenant**.
* A tenant can create **multiple Call Park groups**.
* **Call Park group names must be unique** within the tenant.
***
### Modifying Call Park Settings
1. Sign in to the **PortSIP PBX Web Portal**.
2. Go to **Advanced Services > Call Park**.
***
### Add or Delete a Call Park Group
#### Create a Call Park Group
1. Click **Add** to create a new Call Park group. The **Settings** screen appears.
2. In **Group Name**, enter a unique and descriptive name.
> This field is required and is used to identify the group throughout the system.
3. Configure the **Recall destination**, which defines where the call is routed if it is not retrieved within the recall time.
#### Recall destination options
Choose one of the following **Recall To** behaviors:
* **Alert parking user only**
* If the parked call is not retrieved before the **Recall Timer** expires, the call is returned to the user who parked it.
* If the parking user does not answer and the Recall Timer expires again, the system retries the parking user after **10 seconds**.
* **Alert parking user first, then Ring Group**
* The call is first returned to the parking user when the Recall Timer expires.
* If the parking user does not answer within the configured **Alert Ring Group Wait Time**, the call is forwarded to the selected **Ring Group**.
* Once forwarded to the Ring Group, the call follows normal Ring Group routing and is **not reverted again**.
* *Available only when a Ring Group is configured.*
* **Alert Ring Group only**
* If the parked call is not retrieved before the Recall Timer expires, it is forwarded directly to the selected **Ring Group**.
* The call follows Ring Group routing and is **not reverted**.
* *Available only when a Ring Group is configured.*
4. **Ring Group**
* Select a Ring Group as the recall destination.
* This field is applicable only when **Alert parking user first, then Ring Group** or **Alert Ring Group only** is selected.
***
#### Assign users to the Call Park Group
1. Open the **GROUP MEMBERS** tab.
2. Click **Add**.
3. Select users from the **Available** list.
4. Click **OK** to save the group.
***
### Feature Operation
#### Parking a call to a group
* To park an active call to a Call Park group, the user transfers the call to the Feature Access Code:
```
*58
```
* The Group Call Park service automatically searches for the **first available member** of the Call Park group.
* The system always starts with the **first assigned group member**.
* Once an available member is found, the call is parked against that member.
* **All members of the Call Park group** receive parked-call notifications.
#### Retrieving a parked call
* While the call is parked, the caller hears **music on hold**.
* Any group member can retrieve the parked call by:
* Pressing the **parked call button / soft key** on supported devices, or
* Dialing:
```
*88
```
from other IP phones or third-party softphones.
#### Recall behavior
* If the parked call is **not retrieved** within the configured **Recall Timer**:
* The call is recalled to the configured **parking user** or **Ring Group**, based on the Call Park group settings.
* Recall behavior is fully configurable per Call Park group.
***
### Example
Users **101**, **102**, and **103** are members of a Call Park group.
1. User **101** parks an active call by transferring it to:
```
*58
```
2. The caller hears music on hold.
3. Users **102** and **103** receive parked-call notifications on:
* PortSIP Apps
* Fanvil, Yealink, and Dinstar IP phones
4. Either user **102** or **103** retrieves the call by:
* Pressing the parked-call button on their device, or
* Dialing `*88` from another phone or app.
***
### Enhanced Call Park
On Fanvil, Yealink, Snom, Grandstream, and Dinstar IP phones, the Enhanced Call Park feature is supported, providing an improved user experience with visual notifications and one-touch call retrieval.
For detailed instructions on how to use Enhanced Call Park on supported devices, refer to the following articles:
* [Using Enhanced Call Park on Fanvil IP Phones](/portsip-communications-solution/portsip-pbx-administration-guide/14-call-parking/using-enhanced-call-park-on-fanvil-ip-phones)
* [Using Enhanced Call Park on Yealink IP Phones](/portsip-communications-solution/portsip-pbx-administration-guide/14-call-parking/using-enhanced-call-park-on-yealink-ip-phones)
* [Using Enhanced Call Park on Snom IP Phones](/portsip-communications-solution/portsip-pbx-administration-guide/14-call-parking/using-enhanced-call-park-on-snom-ip-phones)
* [Using Enhanced Call Park on Grandstream IP Phones](/portsip-communications-solution/portsip-pbx-administration-guide/14-call-parking/using-enhanced-call-park-on-grandstream-ip-phones)
* [Using Enhanced Call Park on Dinstar IP Phones](/portsip-communications-solution/portsip-pbx-administration-guide/14-call-parking/using-enhanced-call-park-on-dinstar-ip-phones)
# Using Enhanced Call Park on Fanvil IP Phones
This article explains how to use PortSIP PBX’s enhanced call park feature with Fanvil IP phones, providing a more intuitive and efficient call parking experience.
***
### Supported Fanvil IP Phone Models
#### V1 Series
* **Models:** X4U, X5U, X6U, X7, X7C, X210, X210i
* **Minimum ROM version:** 2.4.13
#### V2 Series
* **Models:** X4U-V2, X5U-V2, X6U-V2, X7-V2, X7C-V2, X210-V2, V62, V64, V65
* **Minimum ROM version:** 2.12.16.17
***
### Application Scenarios
#### Enhanced Call Park
**Enhanced Call Park** improves the traditional call park experience on Fanvil IP phones by replacing manual Feature Access Code (FAC) dialing with **dedicated park and retrieve keys**.
When used with PortSIP PBX, Enhanced Call Park provides:
* One-touch call parking and retrieval
* Visual call park notifications
* Seamless integration with PortSIP’s advanced call park features
***
#### Call Park
The **Call Park** service allows a user to temporarily place a call on hold and retrieve it later from the same extension or another extension.
**Typical use case:**\
You are on an active call and need to move to a different location. You park the call on your extension and retrieve it once you reach the desired location.
***
#### Group Call Park
**Group Call Park** introduces a hunting mechanism for parked calls. When a call is parked, the system searches for an **available user within a configured Call Park group** instead of parking the call only on the original user’s extension.
**Typical use case:**\
If you and your colleagues belong to the same Call Park group, a parked call can be placed on a colleague’s line. That colleague can retrieve the call and either continue the conversation or notify and transfer the call to you.
***
#### Call Park Notification
**Call Park Notification** provides a **visual alert** on Fanvil IP phones when a call is parked for a user.
* The phone displays an on-screen notification
* Line keys or indicators light up
* The user can retrieve the parked call by pressing the corresponding key
This eliminates the need to manually dial retrieval codes.
***
#### Retrieve Park
A parked call can be retrieved by dialing the **Call Park Retrieve Feature Access Code**, along with the extension number where the call is parked.
**Typical use cases:**
* Retrieve a call you parked on your own extension
* Retrieve a call parked on a colleague’s extension, then transfer it or notify verify the caller
*(With Enhanced Call Park enabled, retrieval is typically done using a dedicated key instead of dialing.)*
***
#### Recall
The **Recall** feature ensures parked calls are not left unanswered indefinitely.
* You can configure:
* **Recall destination** (parking user or a specified number)
* **Recall timer**
* If a parked call is not retrieved within the configured time, the PBX automatically recalls the call to the defined destination.
**Example:**\
If the recall timer is set to **30 seconds**, and no one retrieves the parked call within that time, the PBX recalls the call to the original parking user (or the configured recall number).
***
### Configuring a Key for Visual Park
When provisioning an IP phone, you can configure a **soft key** for **Visual Call Park** to enable one-touch call parking and retrieval.
#### How it works
* During the IP phone provisioning process, assign a soft key to the **Visual Park** function.
* After the phone is successfully provisioned, the soft key displays the label **“Visual Park”** on the device.
* The user can then use this key to park and retrieve calls visually, without dialing Feature Access Codes.
#### Example
In the example shown:
* User **James** has extension **103**
* A soft key has been configured with the **Visual Park** function
* The IP phone displays the **Visual Park** label, allowing James to manage parked calls directly from the phone interface
***
### Parking a Call
If **James** wants to park a call for his colleague whose extension number is **105**, he can do so using the **Visual Park** key without dialing any Feature Access Codes (FACs).
#### Park a call to a specific extension
1. While on an active call, James presses the configured **Visual Park** soft key.
2. When prompted, he enters the destination extension number (for example, `105`).
3. James presses the **Visual Park** soft key again.
The IP phone parks the call on **extension 105**.
> ❗**Result:**\
> James does not need to remember or dial the call park FAC. The entire operation is completed using the Visual Park key.
***
### Group Call Park
Group Call Park allows a user to park a call to a **Call Park group**, making the call available to any member of that group.
#### Configure a Call Park group
1. Sign in to the PortSIP PBX Web Portal as the **Tenant Admin**.
2. Go to **Advanced Services > Call Park**.
3. Follow the configuration guide to [configure a park group](/portsip-communications-solution/portsip-pbx-administration-guide/14-call-parking#adding-and-deleting-a-call-park-group).
**Example configuration:**\
Extensions **101**, **102**, **103**, **104**, and **105** are members of the same Call Park group.
***
#### Park a call to a Call Park group
If **James** (extension **103**) wants to park a call to the Call Park group:
1. While on an active call, James presses the **Visual Park** soft key **twice**.
2. The IP phone automatically parks the call to the Call Park group.
#### Call behavior
* The call is parked against the group using the group hunting logic.
* **All members of the Call Park group** receive a parked-call alert notification.
* Any group member can retrieve the call using their device’s parked-call button or retrieval method.
> ❗**Result:**\
> James does not need to remember or dial the FAC for Group Call Park. The Visual Park key provides a simple, one-touch experience.
***
### Retrieve a Parked Call
In this example, **Alice** is on a call with **Bob**. Bob parks the call to **James’s extension (103)** using **Visual Park**.
#### Call flow
1. Bob presses the **Visual Park** key.
2. Bob enters **103** and presses the **Visual Park** key again.
3. The call is parked on **James’s extension (103)**.
#### Visual notification on James’s phone
* On James’s IP phone, the **Visual Park** key flashes **red**, indicating that a call is parked on his extension.
* James presses the flashing **Visual Park** key to view the parked call details.
#### On-screen information
* The phone displays the parked call information.
* The caller name is shown as **“Parked”** (in this case, **Alice**).
#### Retrieve the call
* James presses the **Retrieve** button (located at the bottom-left of the screen).
* The call is immediately connected to James.
> ❗**Result:**\
> James retrieves the parked call with a single key press and does **not** need to remember or dial any Feature Access Codes (FACs).
# Using Enhanced Call Park on Yealink IP Phones
This article explains how to use PortSIP PBX’s enhanced call park feature with Yealink IP phones, providing a streamlined call parking experience with visual notifications and one-touch actions.
***
### Supported Yealink IP Phone Models
* T3x series, download the firmware:
* [124.87.0.15 or later](https://support.yealink.com/document-detail/a4c32c2e33024d3ababfa0f67587f8f7)(recommended)
* T4x series, download the firmware:
* [108.87.0.20 or later](https://support.yealink.com/document-detail/736c56d161414e459adcad6bce73b787)(recommended)
* [T46U(T43U,T46U,T41U,T48U,T42U,T44U,T44W)-108.86.0.118.rom](https://dmfile.yealinkops.com/firmware/18facaab3c9c479e86e1707970ebe6fb/1670571333242/T46U\(T43U,T46U,T41U,T48U,T42U\)-108.86.0.118.rom)
* T5x series, download the firmware:
* [96.87.0.20 or later](https://support.yealink.com/document-detail/8e3fac67467d487ba8bac7cbf47cd511)(recommended)
* [T54W(T57W,T53W,T53,T53C,T54,T57)-96.86.0.118.rom](https://dmfile.yealinkops.com/firmware/821074fc924f43a8ad2fe494a0a5cae9/1670571488097/T54W\(T57W,T53W,T53,T53C,T54,T57\)-96.86.0.118.rom)
* T7x and T8x series, download the firmware from the Yealink website.
***
### Application Scenarios
#### Enhanced Call Park
**Enhanced Call Park** improves the traditional call park experience by replacing manual Feature Access Code (FAC) dialing with **dedicated Park and Retrieve soft keys** on Yealink IP phones.
When integrated with PortSIP PBX, Enhanced Call Park provides:
* One-touch call parking and retrieval
* Visual call park notifications
* Seamless interaction with PortSIP’s advanced call park features
***
#### Call Park
The **Call Park** service allows users to temporarily place a call on hold and retrieve it later from the same or another extension.
**Typical use case:**\
You are on an active call and need to move to another location. You park the call and retrieve it once you reach your destination.
***
#### Group Call Park
**Group Call Park** uses a hunting mechanism to park calls against an **available member of a configured Call Park group**, rather than only the original parking user.
**Typical use case:**\
If you and your colleagues are in the same Call Park group, a parked call may be placed on a colleague’s line. That colleague can retrieve the call and either handle it directly or transfer it back to you.
***
#### Call Park Notification
**Call Park Notification** provides a **visual alert** on Yealink IP phones when a call is parked for a user.
* The phone displays an on-screen notification
* Line keys or indicators light up
* The user can retrieve the call by pressing the corresponding soft key
This removes the need to dial retrieval codes.
***
#### Retrieve Park
A parked call can be retrieved by dialing the **Call Park Retrieve Feature Access Code**, followed by the extension number where the call is parked.
**Typical use cases:**
* Retrieve a call parked on your own extension
* Retrieve a call parked on a colleague’s extension, then transfer the call or notify them
> **Note:** When Enhanced Call Park is enabled, retrieval is typically performed using a **dedicated soft key** instead of dialing a FAC.
***
#### Recall
The **Recall** feature ensures parked calls are not left unanswered.
* You can configure:
* The **recall destination** (parking user or a specified number)
* The **recall timer**
* If the parked call is not retrieved within the configured time, the PBX automatically recalls the call to the defined destination.
**Example:**\
If the recall timer is set to **30 seconds**, and no one retrieves the call within that time, the PBX recalls the call to the original parking user (or the configured recall destination).
***
### Configuring Soft Keys for Visual Park
When provisioning an IP phone, configure **BLF keys** for **Visual Call Park** and **Visual Group Park** to enable one-touch call parking and retrieval.
#### How it works
* During the IP phone provisioning process, assign BLF keys to:
* **Visual Park**
* **Visual Group Park**
* After the phone is successfully provisioned:
* The BLF keys display the labels **“Visual Park”** and **“Visual Group Park”**
* These keys allow users to park and retrieve calls visually, without dialing Feature Access Codes (FACs)
#### Example
In the example shown:
* User **James** has extension **101**
* BLF keys have been configured for **Visual Park** and **Visual Group Park**
* The phone displays the corresponding labels, allowing James to manage parked calls directly from the phone interface
***
### Parking a Call
If **James** wants to park a call for his colleague whose extension number is **103**, he can do so using the **Visual Park** key—without dialing any Feature Access Codes (FACs).
#### Steps
1. While on an active call, James presses the configured **Visual Park** key.
2. When prompted, he enters the destination extension number (`103`).
3. James presses **OK**.
The IP phone parks the call on **extension 103**.
***
#### Result
* The call is successfully parked on extension **103**.
* James does **not** need to remember or dial the call park FAC.
* The operation is completed quickly using on-screen prompts.
***
### Group Call Park
Group Call Park allows a user to park a call to a **Call Park group**, making the call available for retrieval by any member of that group.
#### Configure a Call Park Group
1. Sign in to the PortSIP PBX Web Portal as the **Tenant Admin**.
2. Navigate to **Advanced Services > Call Park**.
3. Follow the [configuration guide](/portsip-communications-solution/portsip-pbx-administration-guide/14-call-parking) to create a Call Park group.
**Example configuration:**\
Extensions **101**, **102**, **103**, **104**, and **105** are members of the same Call Park group.
***
#### Park a Call to the Group
In this example:
* **James** has extension **101**
* James is on an active call with **extension 102**
To park the call to the Call Park group:
1. While on the active call, James presses the **Group Park** key on his IP phone.
2. The IP phone parks the call to the Call Park group automatically.
#### Call behavior
* As shown on the IP phone screen in the screenshot above, pressing the **Group Park** key parks the call to the group.
* **All members of the Call Park group** receive a parked-call alert notification.
* Any group member can retrieve the parked call using their device’s parked-call button or retrieval method.
> **Result:**\
> James does not need to remember or dial any Feature Access Codes (FACs). Group call parking is completed with a single key press, providing a faster and more user-friendly experience.
***
### Retrieve a Parked Call
In this example, **Alice** is on a call with **Bob**. Bob parks the call on **James’s extension (101)**.
#### Visual notification
* On James’s IP phone, a **Retrieve** label is displayed on the screen (as shown in the screenshot below), indicating that a call has been parked on his extension.
#### Retrieve the call
1. James presses the **Retrieve** soft key on his IP phone.
2. The call is immediately connected to James.
> **Result:**\
> James retrieves the parked call with a single key press and does **not** need to remember or dial any Feature Access Codes (FACs).
# Using Enhanced Call Park on Snom IP Phones
This article explains how to use **PortSIP PBX’s enhanced call park feature** with **SNOM IP phones**, delivering a modern call parking experience with visual notifications and simplified call handling.
***
### Supported SNOM IP Phone Models
#### Models
* **D1xx series**
* **D7xx series**
* **D8xx series**
#### Firmware Requirements
* **Firmware version 10.1.204.0 or later**
***
### Application Scenarios
#### Enhanced Call Park
**Enhanced Call Park** improves the traditional call park experience by replacing manual Feature Access Code (FAC) dialing with **dedicated Park and Retrieve soft keys** on SNOM IP phones.
When used with PortSIP PBX, Enhanced Call Park provides:
* One-touch call parking and retrieval
* Visual notifications for parked calls
* Integration with PortSIP’s advanced call park capabilities
***
#### Call Park
The **Call Park** service allows users to temporarily suspend an active call and retrieve it later from the same extension or a different extension.
**Typical use case:**\
You are on a call and need to move to another location. You park the call and retrieve it once you reach your destination.
***
#### Group Call Park
**Group Call Park** introduces a hunting mechanism that parks calls against an **available member of a configured Call Park group**, rather than only the user who initiated the park.
**Typical use case:**\
If you and your colleagues belong to the same Call Park group, a parked call may be placed on a colleague’s extension. That colleague can retrieve the call, continue the conversation, or transfer it back to you.
***
#### Call Park Notification
**Call Park Notification** provides a **visual alert** on the SNOM IP phone when a call is parked for a user.
* The phone displays an on-screen notification
* Keys or indicators highlight the parked call
* The user can retrieve the call by pressing the corresponding button
This eliminates the need to manually dial retrieval codes.
***
#### Retrieve Park
A parked call can be retrieved by dialing the **Call Park Retrieve Feature Access Code**, followed by the extension number where the call is parked.
**Typical use cases:**
* Retrieve a call parked on your own extension
* Retrieve a call parked on a colleague’s extension, then transfer the call or notify them
> **Note:** When Enhanced Call Park is enabled, retrieval is typically performed using a **dedicated soft key** rather than dialing a FAC.
***
#### Recall
The **Recall** feature ensures that parked calls are not left unanswered.
* You can configure:
* The **recall destination** (the parking user or a specified number)
* The **recall timer**
* If a parked call is not retrieved within the configured time, the PBX automatically recalls the call to the defined destination.
**Example:**\
If the recall timer is set to **30 seconds**, and no one retrieves the call within that time, the PBX recalls the call to the original parking user (or the configured recall destination).
***
### Configure Visual Park Using BLF
To enable **Visual Call Park** on a SNOM IP phone, you must configure a **BLF key** during phone provisioning.
#### Configure the BLF key
1. During the SNOM phone provisioning process, open the **BLF** tab.
2. From the BLF function list, select **Visual Park**, as shown in the screenshot below.
3. Save the configuration and provision (or reprovision) the phone.
#### Result after provisioning
* Once the phone is successfully provisioned:
* The BLF key is displayed on the phone with the **Visual Park** label.
* The user can park and retrieve calls using this key without dialing Feature Access Codes (FACs).
> **Note:**\
> BLF configuration changes take effect only after the phone is provisioned or reprovisioned.
***
### Parking a Call
If **James** wants to park a call for his colleague whose extension number is **103**, he can do so using the **Park** key, without dialing any Feature Access Codes (FACs).
#### Steps
1. While on an active call, James presses the **Park** key.
2. When prompted, he enters the destination extension number (`103`).
3. James presses **OK** to confirm.
The IP phone parks the call on **extension 103**.
***
### Group Call Park
Group Call Park allows a user to park a call to a **Call Park group**, making the call available for retrieval by any member of that group.
#### Configure a Call Park Group
1. Sign in to the PortSIP PBX Web Portal as the **Tenant Admin**.
2. Navigate to **Advanced Services > Call Park**.
3. Follow the [configuration guide](/portsip-communications-solution/portsip-pbx-administration-guide/14-call-parking) to create a Call Park group.
**Example configuration:**\
Extensions **101**, **102**, **103**, **104**, and **105** are members of the same Call Park group.
***
#### Park a Call to the Group
In this example:
* **James** has extension **101**
* James is on an active call with **extension 106**
To park the call to the Call Park group:
1. While on the active call, James presses the **Call Park** key on his IP phone (as shown in the screenshot below).
2. The IP phone parks the call to the Call Park group automatically.
#### Call behavior
* The call is parked using the group hunting logic.
* **All members of the Call Park group** receive a parked-call alert notification.
* Any group member can retrieve the parked call using their device’s parked-call button or retrieval method.
> **Result:**\
> James does not need to remember or dial any Feature Access Codes (FACs). Group call parking is completed with a single key press.
***
### Retrieve a Parked Call
When an extension receives a notification indicating that a call has been parked for that user, the **BLF key lights up in green**, signaling that a parked call is available.
#### Retrieve the call
1. The user presses the **green-lit BLF key** on the IP phone (as shown in the screenshot below).
2. The phone displays a list of **parked calls** on the screen.
3. The user selects the desired parked call and presses the **Retrieve** button.
The call is immediately connected to the user.
# Using Enhanced Call Park on Grandstream IP Phones
This article explains how to use **PortSIP PBX’s enhanced call park feature** with **Grandstream IP phones**, providing a streamlined call parking experience with visual notifications and one-touch actions.
***
### Supported Grandstream IP Phone Models
#### GRP 260x Series
* **Models:** 2601, 2602, 2603, 2604
* **Minimum firmware version:** 1.0.5.68
#### GRP 26xx Series
* **Models:** 2610, 2611, 2612, 2613, 2614, 2615, 2616, 2624, 2634, 2636, 2650, 2670
* **Minimum firmware version:** 1.0.13.13
***
### Application Scenarios
#### Enhanced Call Park
**Enhanced Call Park** improves the traditional call park experience by replacing manual Feature Access Code (FAC) dialing with **dedicated Park and Retrieve soft keys** on Grandstream IP phones.
When integrated with PortSIP PBX, Enhanced Call Park provides:
* One-touch call parking and retrieval
* Visual notifications for parked calls
* Seamless interaction with PortSIP’s advanced call park features
***
#### Call Park
The **Call Park** service allows users to temporarily place a call on hold and retrieve it later from the same extension or a different extension.
**Typical use case:**\
You are on an active call and need to move to another location. You park the call and retrieve it once you reach your destination.
***
#### Group Call Park
**Group Call Park** introduces a hunting mechanism that parks a call against an **available member of a configured Call Park group**, rather than only the user who initiated the park.
**Typical use case:**\
If you and your colleagues belong to the same Call Park group, a parked call may be placed on a colleague’s line. That colleague can retrieve the call, handle it directly, or transfer it back to you.
***
#### Call Park Notification
**Call Park Notification** provides a **visual alert** on the IP phone when a call is parked for a user.
* The phone displays an on-screen notification
* Indicators or keys light up
* The user can retrieve the call by pressing the corresponding button
This eliminates the need to manually dial retrieval codes.
***
#### Retrieve Park
A parked call can be retrieved by dialing the **Call Park Retrieve Feature Access Code**, followed by the extension number where the call is parked.
**Typical use cases:**
* Retrieve a call parked on your own extension
* Retrieve a call parked on a colleague’s extension, then transfer the call or notify them
> **Note:** When Enhanced Call Park is enabled, retrieval is typically performed using a **dedicated soft key** rather than dialing a FAC.
***
#### Recall
The **Recall** feature ensures that parked calls are not left unanswered indefinitely.
* You can configure:
* The **recall destination** (the parking user or a specified number)
* The **recall timer**
* If a parked call is not retrieved within the configured time, the PBX automatically recalls the call to the defined destination.
**Example:**\
If the recall timer is set to **30 seconds** and no one retrieves the parked call within that time, the PBX recalls the call to the original parking user (or the configured recall destination).
***
### Parking a Call
If **James** wants to park a call for his colleague whose extension number is **103**, he can do so using the **Call Park** key—without dialing any Feature Access Codes (FACs).
#### Steps
1. While on an active call, James presses the **Call Park** key.
2. When prompted, he enters the destination extension number (`103`).
3. James presses the **Park** key to confirm.
The IP phone parks the call on **extension 103**.
***
### Group Call Park
Group Call Park allows a user to park a call to a **Call Park group**, making the call available for retrieval by any member of that group.
#### Configure a Call Park Group
1. Sign in to the PortSIP PBX Web Portal as the **Tenant Admin**.
2. Navigate to **Advanced Services > Call Park**.
3. Follow the [configuration guide](/portsip-communications-solution/portsip-pbx-administration-guide/14-call-parking) to create a Call Park group.
**Example configuration:**\
Extensions **1001**, **1002**, **1003**, **1004**, and **1005** are members of the same Call Park group.
***
#### Park a Call to the Group
In this example:
* **James** has extension **1003**
* James is on an active call with **extension 1004**
To park the call to the Call Park group:
1. While on the active call, James presses the **Call Park** key on his IP phone.
2. As shown on the IP phone screen in the screenshot below, James then presses the **GPark** key.
3. The IP phone parks the call to the Call Park group automatically.
#### Call behavior
* The call is parked using the group hunting logic.
* **All members of the Call Park group** receive a parked-call alert notification.
* Any group member can retrieve the parked call using their device’s parked-call button or retrieval method.
> **Result:**\
> James does not need to remember or dial any Feature Access Codes (FACs). Group call parking is completed using on-screen keys, providing a faster and more user-friendly experience.
***
### Retrieve a Parked Call
In this example, **Alice** is on a call with **Bob**. Bob parks the call on **James’s extension (1003)**.
#### Visual notification
* On James’s IP phone, a **Retrieve** label is displayed on the screen (as shown in the screenshot below), indicating that a call has been parked on his extension.
#### Retrieve the call
1. James presses the **RetrievePark** soft key on his IP phone.
2. The call is immediately connected to James.
> **Result:**\
> James retrieves the parked call with a single key press and does **not** need to remember or dial any Feature Access Codes (FACs).
# Using Enhanced Call Park on Dinstar IP Phones
This article explains how to use **PortSIP PBX’s enhanced call park feature** with **Dinstar IP phones**, providing a simplified call parking experience with visual notifications and one-touch operations.
***
### Supported Dinstar IP Phone Models
* **Models:** C60, C61, C62, C63, C64, C66
* **Minimum firmware versions:**
* `2.x.6.9.7`, or
* `2.x.11.9.7`
***
### Application Scenarios
#### Enhanced Call Park
**Enhanced Call Park** improves the traditional call park experience by replacing manual Feature Access Code (FAC) dialing with **dedicated Park and Retrieve soft keys** on Dinstar IP phones.
When integrated with PortSIP PBX, Enhanced Call Park provides:
* One-touch call parking and retrieval
* Visual notifications for parked calls
* Access to additional enhanced call park features supported by PortSIP PBX
***
#### Call Park
The **Call Park** service allows users to temporarily suspend an active call and retrieve it later from the same extension or from another extension.
**Typical use case:**\
You are on an active call and need to move to a different location. You park the call and retrieve it once you reach your destination.
***
#### Group Call Park
**Group Call Park** introduces a hunting mechanism that parks a call against an **available member of a configured Call Park group**, rather than only the user who initiated the park.
**Typical use case:**\
If you and your colleagues belong to the same Call Park group, a parked call may be placed on a colleague’s line. That colleague can retrieve the call, continue the conversation, or transfer it back to you.
***
#### Call Park Notification
**Call Park Notification** provides a **visual alert** on the Dinstar IP phone when a call is parked for a user.
* The phone displays an on-screen notification
* Keys or indicators light up
* The user retrieves the call by pressing the corresponding button
This eliminates the need to manually dial retrieval codes.
***
#### Retrieve Park
A parked call can be retrieved by dialing the **Call Park Retrieve Feature Access Code**, followed by the extension number where the call is parked.
**Typical use cases:**
* Retrieve a call parked on your own extension
* Retrieve a call parked on a colleague’s extension, then transfer the call or notify them
> **Note:** When Enhanced Call Park is enabled, retrieval is typically performed using a **dedicated soft key** instead of dialing a FAC.
***
#### Recall
The **Recall** feature ensures that parked calls are not left unanswered indefinitely.
* You can configure:
* The **recall destination** (the parking user or a specified number)
* The **recall timer**
* If a parked call is not retrieved within the configured time, the PBX automatically recalls the call to the defined destination.
**Example:**\
If the recall timer is set to **30 seconds**, and no one retrieves the call within that time, the PBX recalls the call to the original parking user (or the configured recall destination).
***
### Configuring a Soft Key for Visual Park
When provisioning an IP phone, you can assign a **soft key** to **Visual Call Park** to enable one-touch call parking and retrieval.
#### How it works
* During the IP phone provisioning process, configure a soft key with the **Visual Park** function.
* After the phone is successfully provisioned:
* The soft key displays the label **“Visual Park”**
* The user can park and retrieve calls without dialing any Feature Access Codes (FACs)
#### Example
In the example shown:
* User **James** has extension **103**
* A soft key is configured with the **Visual Park** function
* The IP phone displays the **Visual Park** label, allowing James to manage parked calls directly from the phone interface
***
### Parking a Call
If **James** wants to park a call for his colleague whose extension number is **105**, he can do so using the **Visual Park** key—without dialing any Feature Access Codes (FACs).
#### Park a call to a specific extension
1. While on an active call, James presses the configured **Visual Park** key.
2. When prompted, he enters the destination extension number (`105`).
3. James presses the **Visual Park** soft key again to confirm.
The IP phone parks the call on **extension 105**.
> **Result:**\
> James does not need to remember or dial the call park FAC. The entire operation is completed using the Visual Park key.
***
### Group Call Park
Group Call Park allows a user to park a call to a **Call Park group**, making the call available for retrieval by any member of the group.
#### Prerequisites: Configure a Call Park Group
1. Sign in to the PortSIP PBX Web Portal as the **Tenant Admin**.
2. Navigate to **Advanced Services > Call Park**.
3. Follow the [configuration guide](/portsip-communications-solution/portsip-pbx-administration-guide/14-call-parking) to create a Call Park group.
**Example configuration:**\
Extensions **101**, **102**, **103**, **104**, and **105** are members of the same Call Park group.
***
#### Park a call to the Call Park group
If **James** (extension **103**) wants to park a call to the Call Park group:
1. While on an active call, James presses the configured **Visual Park** key **twice**.
2. The IP phone automatically parks the call to the Call Park group.
#### Call behavior
* The call is parked using the group hunting logic.
* **All members of the Call Park group** receive a parked-call alert notification.
* Any group member can retrieve the call using their device’s parked-call button or retrieval method.
> **Result:**\
> James does not need to remember or dial the FAC for Group Call Park. The Visual Park key provides a simple, one-touch experience.
***
### Retrieve a Parked Call
In this example, **Alice** is on a call with **Bob**. Bob parks the call on **James’s extension (103)** using the **Visual Park** key.
#### Visual notification
* On James’s IP phone, the **Visual Park** soft key **flashes red**, indicating that a call has been parked on his extension.
#### Retrieve the call
1. James presses the **flashing Visual Park** soft key.
2. The call is immediately connected to James.
> **Result:**\
> James retrieves the parked call with a single key press and does **not** need to remember or dial any Feature Access Codes (FACs).
# Using Enhanced Call Park on Htek IP Phones
This article explains how to use **PortSIP PBX’s enhanced call park feature** with **Htek IP phones**, providing a simplified and efficient call parking experience with visual notifications and one-touch operations.
***
### Supported Htek IP Phone Models
#### Models
* UCxxx series
#### Firmware Requirements
* Firmware version V2.42.6.6.1R22 or later
***
### Application Scenarios
#### Enhanced Call Park
**Enhanced Call Park** improves the traditional call park experience by replacing manual Feature Access Code (FAC) dialing with a **dedicated Park and Retrieve key** on Htek IP phones.
When integrated with PortSIP PBX, Enhanced Call Park provides:
* One-touch call parking and retrieval
* Visual notifications for parked calls
* Access to additional enhanced call park capabilities provided by PortSIP PBX
***
#### Call Park
The **Call Park** service allows users to temporarily suspend an active call and retrieve it later from the same extension or from another extension.
**Typical use case:**\
You are on an active call and need to move to another location. You park the call and retrieve it once you reach your destination.
***
#### Group Call Park
**Group Call Park** uses a hunting mechanism to park a call against an **available member of a configured Call Park group**, rather than only the user who initiated the park.
**Typical use case:**\
If you and your colleagues are members of the same Call Park group, a parked call may be placed on a colleague’s line. That colleague can retrieve the call, handle it directly, transfer it back to you, or notify you after retrieval.
***
#### Call Park Notification
**Call Park Notification** provides a **visual alert** on the Htek IP phone when a call is parked for a user.
* The phone displays an on-screen notification
* Indicators or keys highlight the parked call
* The user retrieves the call by pressing the corresponding button
This eliminates the need to manually dial retrieval codes.
***
#### Retrieve Park
A parked call can be retrieved by dialing the **Call Park Retrieve Feature Access Code**, followed by the extension number where the call is parked.
**Typical use cases:**
* Retrieve a call parked on your own extension
* Retrieve a call parked on a colleague’s extension, then transfer the call or notify them
> **Note:** When Enhanced Call Park is enabled, retrieval is typically performed using a **dedicated key** rather than dialing a FAC.
***
#### Recall
The **Recall** feature ensures that parked calls are not left unanswered.
* You can configure:
* The **recall destination** (the parking user or a specified number)
* The **recall timer**
* If a parked call is not retrieved within the configured time, the PBX automatically recalls the call to the defined destination.
**Example:**\
If the recall timer is set to **30 seconds** and no one retrieves the call within that time, the PBX recalls the call to the original parking user (or the configured recall destination).
***
### Provisioning IP Phones
Once an IP phone is successfully provisioned, the **PortSIP PBX Enhanced Call Park** feature is automatically activated on the device.
> **Note:**\
> Ensure the IP phone model and firmware version meet the supported requirements for Enhanced Call Park to function correctly.
***
### Parking a Call
If **James** wants to park a call for his colleague whose extension number is **104**, he can do so using the on-screen keys—without dialing any Feature Access Codes (FACs).
#### Steps
1. While on an active call, James presses the **More** button on the IP phone (as shown in the screenshot below).
2. On the next screen, James presses the **DPark** button.
3. When prompted, James enters the destination extension number (`104`).
4. James presses the **DPark** button again to confirm.
The IP phone parks the call on **extension 104**
***
### Group Call Park
Group Call Park allows a user to park a call to a **Call Park group**, making the call available for retrieval by any member of that group.
#### Prerequisites: Configure a Call Park Group
1. Sign in to the PortSIP PBX Web Portal as the **Tenant Admin**.
2. Navigate to **Advanced Services > Call Park**.
3. Follow the [configuration guide](/portsip-communications-solution/portsip-pbx-administration-guide/14-call-parking) to create a Call Park group.
**Example configuration:**\
Extensions **101**, **102**, **103**, **104**, and **105** are members of the same Call Park group.
***
#### Park a Call to the Group
In this example, **James** (extension **103**) wants to park an active call to the Call Park group.
1. While on the active call, James presses the **More** button on his IP phone.
2. James then presses the **GPark** button.
3. The IP phone parks the call to the Call Park group automatically.
#### Call behavior
* The call is parked using the group hunting mechanism.
* **All members of the Call Park group** receive a parked-call alert notification.
* Any group member can retrieve the parked call using their device’s parked-call button or retrieval method.
> **Result:**\
> James does not need to remember or dial any Feature Access Codes (FACs). Group call parking is completed using on-screen keys, providing a faster and more user-friendly experience.
***
### Retrieve Call
Once an IP Phone receives a park call/group park call notification, it will display the information like the screenshot below, simply by pressing the Retrieve button to retrieRetrieve a Parked Call
When an IP phone receives a **Call Park** or **Group Call Park** notification, it displays the parked call information on the screen (as shown in the screenshot below).
To retrieve the call, simply press the **Retrieve** button.
# 15 Shared Voicemail
### Overview
In some scenarios, multiple extensions or groups within your organization may need to share a **single voicemail box**. This is commonly used for:
* A main company number
* A Virtual Receptionist (Auto Attendant)
* A Ring Group
* A Call Queue
A shared voicemail ensures that important messages are captured even when no individual user answers the call.
#### Example Scenario
**Example A**\
A company uses one shared voicemail box for all incoming calls to the main number:
* A caller reaches the **Virtual Receptionist** and presses **5** to leave a message, **or**
* The call is routed to the **Sales** or **IT** group and no one answers
In both cases, the call is redirected to the same shared voicemail box.
***
### Creating a Shared Voicemail
1. Sign in to the **PortSIP PBX Web Portal**.
2. Navigate to **Call Manager > Advanced Services > Shared Voicemail**.
3. Click **Add**.
#### Configure the Following Fields
* **Extension Number**\
The unique number that identifies the shared voicemail.\
This must be a new number and **must not** conflict with any existing extension.
* **Display Name**\
A friendly name for the shared voicemail box.
* **Prompt Language**\
Select the language used for voicemail prompts.
* **PIN Number**\
Set the voicemail box password.
* **Email**\
Specify the email address that will receive voicemail notifications.
* **Voicemail PIN Authentication**\
Enable this option to require a PIN when users access this shared voicemail.
* **Send email when receiving a voicemail**\
Enable or disable email notifications for new voicemail messages.
Save the configuration to create the shared voicemail.
***
### Redirecting Calls to a Shared Voicemail
You can redirect unanswered or failed calls to a shared voicemail from several call-handling features.
***
#### Call Queue
To redirect unanswered queue calls:
1. Open the Call Queue settings.
2. Set **Destination if no answer** to **Forward to Number**.
3. In the popup window, select **Shared Voicemail**.
4. Choose the desired shared voicemail.
5. Click **OK**.
***
#### Ring Group
To redirect unanswered ring group calls:
1. Open the Ring Group settings.
2. Set **Destination if no answer** to **Forward to Number**.
3. Select **Shared Voicemail**.
4. Choose the shared voicemail.
5. Click **OK**.
***
#### Virtual Receptionist
To redirect failed Virtual Receptionist calls:
1. Open the Virtual Receptionist settings.
2. Set **Call Failed** to **Forward to Number**.
3. Select **Shared Voicemail**.
4. Choose the shared voicemail.
5. Click **OK**.
***
#### Extension
To redirect extension calls to a shared voicemail:
1. Open the extension settings.
2. Set the **Call Forward Destination** to **Forward to Number**.
3. Select **Shared Voicemail**.
4. Choose the shared voicemail.
5. Click **OK**.
***
#### Inbound Rule
To redirect inbound calls to a shared voicemail:
1. Open the inbound rule configuration.
2. Set the **Call Forward Destination** to **Forward to Number**.
3. Select **Shared Voicemail**.
4. Choose the shared voicemail.
5. Click **OK**.
***
### Accessing a Shared Voicemail
#### From an IP Phone or Client App
1. Dial **\*56** followed by the **shared voicemail number**.
2. When prompted, enter the voicemail **PIN**.
This method works from:
* IP phones
* Softphones
* Mobile and desktop client apps
***
#### From the PBX Web Portal
1. Sign in to the **PortSIP PBX Web Portal**.
2. Navigate to **Call Manager > Advanced Services > Shared Voicemail**.
3. Double-click a shared voicemail (or select it and click **Edit**).
4. Open the **Voicemail** page.
From the voicemail list, you can:
* Play messages
* Download recordings
* Delete voicemails
***
### Best Practices
* Use shared voicemail for **company-wide** or **department-level** calls.
* Assign a **clear display name** so users understand the voicemail purpose.
* Protect shared voicemail with a **PIN** to prevent unauthorized access.
* Enable email notifications to avoid missed messages.
# 16 Call Queue
### What Is a Call Queue?
A **call queue** is a call-handling mechanism that places incoming callers into a single waiting line until an available agent can answer the call. Each call can belong to **only one queue at a time**, while agents can be assigned to **multiple queues simultaneously**, allowing flexible and efficient call distribution.
Call queues are a foundational component of **call center and contact center operations**. They are designed to manage high inbound call volumes while maintaining a consistent customer experience. Advanced queue features often allow agents and supervisors to monitor queue status in real time—such as the number of callers waiting, wait times, and agent availability—and to control how calls are prioritized and distributed.
By using call queues, organizations can handle peak call traffic efficiently **without increasing staffing costs**, ensuring calls are answered in an orderly and predictable manner.
***
### Why Use Call Queues?
Call queues provide several critical benefits for businesses handling inbound calls:
* **Handle higher call volumes efficiently**\
Manage large numbers of inbound calls and prevent them from being immediately routed to voicemail during busy periods.
* **Improve inbound campaign performance**\
Ensure more calls are answered by distributing them intelligently across available agents.
* **Enhance the caller experience**\
Play music on hold, announcements, or promotional messages while callers wait, keeping them informed and engaged.
* **Intelligent call routing**\
Route calls dynamically based on business hours, dialed numbers (DIDs), caller priority (such as VIPs), or other routing rules.
* **Build a scalable contact center**\
Establish a professional, scalable contact center environment that supports growth, performance monitoring, and service-level optimization.
***
This article includes the following topics:
* [Configuring Call Queue](/portsip-communications-solution/portsip-pbx-administration-guide/16-call-queue/configuring-call-queue)
* [Configuring Queue Callback and Queue Exit](/portsip-communications-solution/portsip-pbx-administration-guide/16-call-queue/configuring-queue-callback-and-queue-exit)
* [Agent States and Work Modes](/portsip-communications-solution/portsip-pbx-administration-guide/16-call-queue/agent-states-and-work-modes)
* [Skills-Based Routing](/portsip-communications-solution/portsip-pbx-administration-guide/16-call-queue/skills-based-routing)
* [Live Wallboards](/portsip-communications-solution/portsip-pbx-administration-guide/16-call-queue/live-wallboards)
* [Silent Monitoring](/portsip-communications-solution/portsip-pbx-administration-guide/16-call-queue/silent-monitoring)
# Configuring Call Queue
### Creating a Call Queue
From the Web Portal, navigate to **Advanced Services > Call Queues** and click **Add**.\
Configure the following settings:
***
### Basic Settings
**Queue Number**\
Specifies the queue number. This number must **not conflict with an existing extension**.
**Queue Name**\
Enter a **descriptive name** for the queue.
**Ring Duration**\
Defines the **ring timeout (in seconds)** for each agent before the call is considered unanswered and routed according to the selected strategy.
**Music on Hold**\
Select the **music file** played to callers while they are waiting in the queue.
**Play Periodic Announcement**\
When this option is enabled, you can upload an announcement audio file and configure a Periodic Announcement Interval (in seconds).\
The queue will play the announcement periodically to callers while they are waiting, for example, to deliver informational messages or advertisements.
**Night Mode**\
Set the queue with Night Mode activated or deactivated. For more details, please refer to [Night Mode](/portsip-communications-solution/portsip-pbx-administration-guide/32-night-mode).
***
### Call Distribution Strategy (Polling Strategy)
**Polling Strategy**\
Determines how calls are distributed to available agents:
* **Ring Simultaneous** – All queue members ring at the same time.
* **Prioritized Hunt** – Agents ring sequentially in the configured order.
* **Cyclic Hunt** – Agents ring in a round-robin order; the agent who rang least recently is prioritized.
* **Least Worked Hunt** – Calls are routed to the agent who has answered the fewest calls from this queue.
* **Skill-Based Routing – Prioritized Hunt** – Rings available agents serially, starting with the highest skill group.
* **Skill-Based Routing – Cyclic Hunt** – Rings the agent who has not been rung for the longest time, starting with the highest skill group.
* **Skill-Based Routing – Least Worked Hunt** – Rings the agent who has answered the fewest calls, starting with the highest skill group.
***
### Agent State Management
**Keep Waiting If There Are No Members Online**\
If enabled, callers remain in the queue even when no agents are online, until the maximum wait time is reached.
**Set Agent to Ready Automatically**\
When enabled, agents are automatically set to **Ready** upon registration and after completing or missing a call.\
When disabled, agents must manually sign in and change their status to **Ready** using a FAC or the REST API.
**Set Agent Status to Wrap-Up After Non-ACD Calls**\
If enabled, agents are automatically placed into **Wrap-Up** after completing a non-ACD call.\
This option is ignored if **Set Agent to Ready Automatically** is enabled.
**Last Called Agent Routing**\
Enables routing repeat callers to the agent who last handled their call.\
For more details, see **Skill-Based Routing**.
**Wrap-Up Time (Seconds)**\
When this option is enabled, you can configure a **wrap-up duration** for agents.\
Once the specified time expires, the agent automatically transitions from **Wrap-Up** to **Ready**.
***
### Destination If No Answer
**Destination If No Answer**\
Defines the **maximum queue waiting time** and the action to take if the call remains unanswered.\
If no agents are logged in and **Keep Waiting If There Are No Members Online** is disabled, this destination is triggered immediately.
***
### Destination for Night Mode
**Destination for Night Mode**\
Defines how incoming calls are handled when **Night Mode** is active.\
For details, refer to the **Night Mode** section of this guide.
***
### Queue Options
**Announce Queue Position**\
Controls how the caller’s position in the queue is announced:
* Don’t announce the position
* Periodically announce position
* Announce once when connected, then periodically
**Play Intro Prompt Before Calling Agents**\
Allows you to configure a custom introduction prompt and music-on-hold file, and control whether the full prompt plays before agents are rung.
**Maximum Queue Wait Time**\
Defines the maximum time a caller can remain in the queue.\
Once exceeded, the call is treated as **Abandoned** and follows the **Destination If No Answer** settings.
**SLA Time (Seconds)**\
Defines the **Service Level Agreement (SLA)** threshold.\
Calls waiting longer than this value are marked as **SLA breached** in reports and trigger notifications.
**Example:**\
If calls must be answered within **3 minutes**, set the SLA time to **180 seconds**.
***
### Configuring Queue Agents
In the **Agents** tab, you can select the agents assigned to the call queue.\
To change the order of the agents, simply **drag and drop** them into the desired sequence.
***
### Notifications
You can configure the system to send **email notifications** when:
* A call **exceeds the SLA time**, or
* A call is **lost or abandoned**
To enable email notifications:
* The **email server** must be properly configured
* The **notification option** must be enabled
For detailed instructions, refer to [Configuring Email Notifications](/portsip-communications-solution/portsip-pbx-administration-guide/31-configuring-email-notifications).
***
### Outbound Caller ID
When an **external (PSTN) number** is configured as the **Destination if No Answer**, the call is forwarded to a SIP trunk based on the **matched outbound rule**.
In this scenario, you can specify the **Outbound Caller ID** to be used for the forwarded call.\
The outbound caller ID may **replace certain SIP headers or fields**, depending on the trunk configuration.
For more details, refer to:
* [Outbound Parameters](/portsip-communications-solution/portsip-pbx-administration-guide/7-trunk-management)
* [Handle Outbound Calls Through SIP Trunk](/portsip-communications-solution/portsip-pbx-administration-guide/7-trunk-management/handle-outbound-calls-through-sip-trunk)
# Configuring Queue Callback and Queue Exit
### Queue Callback
A **callback** allows callers to request a return call instead of waiting on hold when agents are unavailable. In contact center environments, callbacks help reduce queue congestion, improve agent efficiency, and enhance customer experience by eliminating long hold times and potential long-distance charges.
By offering callbacks, customers can **retain their position in the queue** and receive a call back automatically when an agent becomes available.
***
#### Callback Configuration Overview
**Tenant Administrators** can configure and manage callback rules for call queues.\
When enabled, the queue can automatically offer callers the option to schedule a callback while preserving their queue position.
***
#### Callback Outbound Prefix
You can configure a **Callback Outbound Prefix** to ensure that callback calls match an appropriate **outbound rule** when dialing the caller.
**Callback Outbound Prefix Example:**
Assume a caller with the number **12345** requests a callback:
* **Without an outbound prefix**\
The PBX dials the number exactly as received:\
`12345`
* **With an outbound prefix configured**\
The PBX prepends the configured prefix before dialing.\
For example, if the prefix is set to **003**, the PBX dials:\
`00312345`
This is commonly used for PSTN access codes, country codes, or carrier routing rules.
***
#### Callback Trigger Modes
You can configure how callbacks are offered to callers using one of the following modes.
**Callback Requested by the Caller**
In this mode, the caller can manually request a callback by pressing a predefined DTMF key (for example, **3**) while waiting in the queue.
When the caller presses **3**, the following prompt is played:
> “Please confirm your phone number in full, followed by the pound key (#), so that we may call you back.\
> Alternatively, if you would like us to contact you on the current number, just press #.\
> To continue holding, please press \* and we will be with you as soon as possible.”
**Callback Offered After Queue Timeout**
In this mode, the callback option is **automatically offered** after the caller has waited longer than the configured **Offered to the Caller After Timeout** (in seconds).
When the timeout is reached, the queue plays the following prompt:
> “All of our agents are busy at this time. We appreciate your patience.\
> You can continue to hold, or press 3 to keep your position in the queue and schedule a callback.”
If the caller presses **3**, the following prompt is played:
> “Please confirm your phone number in full, followed by the pound key (#), so that we may call you back.\
> Alternatively, if you would like us to contact you on the current number, just press #.\
> To continue holding, please press \* and we will be with you as soon as possible.”
***
#### Callback Completion Flow
Once the caller confirms their phone number:
1. The original call **ends automatically**
2. The caller’s **queue position is preserved**
3. When the caller reaches the front of the queue:
* The PBX calls an **available agent**
* Once the agent answers, the PBX places the **callback call to the caller**
4. The callback is considered **complete** when the caller answers the callback call
***
### Queue Exit Option
**Queue Exit Options** allow callers who are waiting in a call queue to **proactively leave the queue** and choose an alternative action, instead of simply hanging up and abandoning the call.\
This is typically implemented through an **IVR option**, where the caller presses a designated key on their phone keypad (for example, **press 8**).
The primary purpose of Queue Exit Options is to **improve the caller experience**, reduce frustration during long wait times, and **lower call abandonment rates** by giving callers more control over how their call is handled.
As the screenshot below, once the queue exit option is activated, the caller in the queue can press 8 to exit the queue that call will be forawrd to the ring group which extension number is 6000.
***
#### Common Queue Exit Destinations
When a caller exits the queue, the call can be routed to one of the following **configured destinations**:
* **Voicemail**
* **Shared Voicemail**
* **IVR**
* **Another Queue**
* **Ring Group**
* **Extension**
* **External Number**
# Agent States and Work Modes
A*gent states* specify what state an agent is in. For example, an agent in the **Ready** state is available to handle calls from an ACD queue. An agent can have several states with respect to different ACD devices, or he can use a single state to describe his relationship to all ACD devices. Agent states are reported in [queue events](/development-portsip/going-real-time-with-portsip-pbx-pub-sub#queue_events).
The below Agent-State Diagram shows the agent states. Transitions between states, represented by arrows, show subsequent states that may be entered from a given state. You can use the [WSI](/development-portsip/going-real-time-with-portsip-pbx-pub-sub) to receive state events.
## Agent Status
### Logged Out
The state where an agent is logged out of the call queue, the ACD will no longer distribute calls to this agent.
### Not Ready
The state where an agent is logged in to the call queue, but is not prepared to handle calls that the ACD distributes. While in this state, an agent can receive calls that are not handled by the ACD.
### Ready
The state where an agent is logged in to a call queue and is prepared to handle calls that the ACD distributes.
### Queue Call / Other Call
The state where an agent is on the current call and can't handle new calls that the ACD distributes. The Queue Call indicates that the agent is on an ACD call, while the Other Call indicates the agent is on a non-ACD call,
### Wrap Up
Also known as "**After Call Work**". the state where an agent, is no longer involved with an ACD call. While in this state, the agent is performing administrative duties for a previous call and cannot receive further calls from the ACD.
## Managing Agent Status
PortSIP provides options that enable agents to control their status. Use these options to change the agent status:
{% hint style="info" %}
If you create the call queue with "**Set agent to Ready automatically**" turned on, you do not need to set the agent status to "**Ready**" manually.
{% endhint %}
### FAC - Feature Access Code
Agents can dial a feature access code to change their status for that call queue or to change their status for all call queues to which they belong.
1. **Log the agent into the queue** - Dial `*38` to log into all queues that the agent belongs; Dial `*388000` to log into the queue that number is `8000`. After logging in, if the queue is checked **Set agent to Ready automatically**, the agent state will be changed to **Ready**, otherwise will be **Not Ready**.
2. **Log the agent out of the queue** - Dial `*39` to log out of all queues; Dial `*398000` to log out of the queue that number is 8000.
3. **Set Agent to Ready** - Change the agent state to **Ready** of the queue. Dial `*36` to change the agent state to **Ready** of all queues that the agent belongs; Dial `*368000` to change the agent state to **Ready** of the queue that number is 8000.
4. **Set Agent to Not Ready** - Change the agent state to **Not Ready** of the queue. Dial `*37` to change the agent state to **Not Ready** of all queues that the agent belongs; Dial `*378000` to change the agent state to **Not Ready** of the queue that number is 8000.
### REST API
The PortSIP also supports changing the agent status by calling the REST API.
1. [Log the agent into the queue](https://www.portsip.com/pbx-rest-api/v16/html/index.html#tag/Call-Queue/operation/loginQueueAgent).
2. [Log the agent out of the queue](https://www.portsip.com/pbx-rest-api/v16/html/index.html#tag/Call-Queue/operation/logoutQueueAgent).
3. [Set the agent status](https://www.portsip.com/pbx-rest-api/v16/html/index.html#tag/Call-Queue/operation/setQueueAgentStatus).
## 3 Receive the Agent State Event in Real-time
PortSIP PBX provides a real-time mechanism that allows the admin and queue manager to subscribe to queue and agent status; the PBX will push the related events to the subscriber via WebSocket; For more details please follow [Going Real-Time with PortSIP PBX Pub/Sub](/development-portsip/going-real-time-with-portsip-pbx-pub-sub#queue_events).
# Skills-Based Routing
### Overview
Every call center agent has encountered irate customer situations. To reduce customer frustration, a contact center must resolve issues **quickly and accurately**. One of the most effective ways to achieve this is ensuring that calls are handled by agents with the **right skills**.
This is where **skills-based routing** becomes essential.
***
### What Is Skills-Based Routing?
**Skills-based routing** (also known as skill-based distribution) is a call routing strategy that assigns incoming calls to agents based on the skills most relevant to the customer’s needs.
**Example:**\
Spanish-speaking customers are routed to agents who speak Spanish.
PortSIP PBX supports Skills-Based Routing by automatically routing incoming queue calls to agents in the **highest-skill group first**. If no agents in that group are available (busy, unavailable, or logged out), the call is routed to agents in **lower skill groups**.
This ensures:
* Customers are handled by qualified agents
* Call resolution times are reduced
* Customer frustration is minimized
***
### Route Calls by Caller Language
You can route calls by language using **Inbound Rules** based on the caller ID (CID) mask.
#### Example Scenario
DID number: **00442012345670**
Create two inbound rules using the same DID but different CID masks:
* **Rule 1**
* CID mask: `0044**********`
* DID mask: `442012345670`
* Route to: **English Support Queue (8000)**
* **Rule 2**
* CID mask: `0033*********`
* DID mask: `442012345670`
* Route to: **French Support Queue (9000)**
Assign English-speaking agents to queue **8000** and French-speaking agents to queue **9000**.
**Result:**
* Calls from the UK are routed to English-speaking agents
* Calls from France are routed to French-speaking agents
***
### Route Calls by VIP Priority
PortSIP PBX provides a **VIP Caller** feature to prioritize high-value customers.
When a VIP call is detected:
* The caller is placed at the **front of the queue**
* The call is always handled with **highest priority**
#### Configure VIP Callers
1. Navigate to **Contact Center > VIP Numbers**.
2. Click **Add**.
3. Configure the following fields:
* **Enabled** – Turn VIP handling on or off
* **VIP Number** – Enter the customer phone number
* **Description** – Friendly name (for example, *Microsoft Team*)
* **Validity Period** – Define how long the VIP entry remains active
> ❗**Note**\
> The VIP list applies globally to **all queues within the tenant**.
***
### Exclusive Agent Routing
Some callers—such as those from specialized industries—require agents with **specific domain expertise**.
The **Exclusive Agent** feature allows you to assign one or more agents as **priority handlers** for specific callers.
#### How Exclusive Agent Routing Works
* When a call arrives from a configured caller number:
* The call is routed to an exclusive agent with **highest priority**
* If all exclusive agents are **busy, not ready, or signed out**:
* The call is routed to other available agents in the queue
> ❗**Limitation**\
> Exclusive Agent routing is **not supported** when the queue Ring Strategy is set to **Ring Simultaneously**.
#### Configure Exclusive Agents
1. Navigate to **Contact Center > Exclusive Agent**.
2. Click **Add**.
3. Configure the following:
* **Description** – For example, *XXX Bank*
* **Caller Number** – Caller numbers eligible for exclusive handling
* **Call Queue** – Select the queue and assign exclusive agents
If the call does **not** match the configured caller numbers, the agent behaves as a normal queue agent.
***
### Route Calls by Agent Skill Level
PortSIP PBX supports multiple **skill-based routing strategies** within call queues:
* **Skill-Based Routing – Prioritized Hunt**\
Agents are rung serially in a configured order, starting with the highest skill group.
* **Skill-Based Routing – Cyclic Hunt**\
Agents are rung serially, prioritizing the agent who has not been rung for the longest time, starting with the highest skill group.
* **Skill-Based Routing – Least Worked Hunt**\
Agents are rung serially, prioritizing the agent who has answered the fewest calls, starting with the highest skill group.
When adding agents to a queue, you assign a **skill level**:
* Higher number = higher skill level
***
### Last Called Agent Routing (LCA)
**Last Called Agent Routing** routes repeat callers to the agent who last handled their call.
#### How It Works
1. A customer calls the contact center.
2. The PBX stores the agent ID and call time.
3. When the same customer calls again:
* The call is routed to the **same agent**, if available
4. If the agent is unavailable:
* The call is routed to another suitable agent
> ❗**Limitation**\
> LCA routing is **not supported** when the queue Ring Strategy is set to **Ring Simultaneously**.
***
### Harass Numbers (Spam Call Protection)
Spam calls are a major issue for contact centers. PortSIP PBX provides **two layers** of protection.
#### Global Number Blacklist
* Calls from blacklisted numbers are **silently rejected**
* Configure under **Blacklist and Codes > Number Blacklist**
***
#### Harass Number (Queue-Specific Protection)
Harass Numbers apply **only to Call Queues** and operate in two levels:
**Level 1 Harass Number**
* A warning prompt is played
* Caller options:
* Press **1** – Hang up
* Press **2** – Continue the call
**Level 2 Harass Number**
* A warning prompt is played
* The call is **automatically disconnected** after playback
#### Configure Harass Numbers
1. Navigate to:
* **Contact Center > Harass Number Level 1**
* **Contact Center > Harass Number Level 2**
2. Open **Global Settings**
3. Enable or disable:
* **Enable Level 1 Harass Number**
* **Enable Level 2 Harass Number**
4. Upload the corresponding prompt files
***
### Best Practices
* Use **skills-based routing** to reduce call transfers and improve first-call resolution
* Combine **VIP routing** with **exclusive agents** for premium customers
* Enable **LCA routing** to improve customer continuity
* Use **harass number protection** to reduce spam without blocking legitimate callers
* Avoid **Ring Simultaneously** when advanced routing logic is required
# Live Wallboards
### Live Wallboards Overview
PortSIP Contact Center Live Wallboards provide real-time visibility into contact center performance through dynamic, widget-based dashboards. These wallboards allow supervisors and operations teams to monitor key metrics at a glance and tailor the display to their specific operational needs.
Live wallboards can also be displayed on **large screens** in shared environments, making them ideal for team rooms, operations centers, and supervisor dashboards—ensuring everyone stays aligned on current queue and agent performance.
***
### Permissions
Access to Live Wallboards is controlled by user roles and permissions:
* Users assigned the **Tenant Administrator** or **Queue Manager** role can access Live Wallboards by default.
* If you create a **custom role**, you must explicitly grant the **Data Analytics** permission.
* Any user assigned to this custom role will then be able to access Live Wallboards.
This role-based access control ensures secure and appropriate visibility across your contact center operations.
***
### Accessing Live Wallboards
Follow the steps below to access Live Wallboards in the PortSIP PBX web portal:
1. Sign in to the PortSIP PBX web portal using one of the following methods:
* Sign in as a **System Administrator**, then switch to the desired tenant.
* Sign in directly as a **Tenant Administrator** or **Queue Manager**.
2. Navigate to the Wallboards:
* Go to **Contact Center > Wallboard** to view live wallboards for call queues.
* Go to **Contact Center > Agent Activity** to view real-time agent activity boards.
3. View detailed information:
* Click on a **queue** to view detailed statistics for that queue.
* Click on an **agent** to view detailed real-time information for the selected agent.
***
### Queue Details
Click a **queue name** to view detailed information about the selected queue, including the callers currently waiting in the queue.
***
### Agent Activity
Navigate to **Contact Center > Agent Activity** to view the real-time status of all agents, as shown in the screenshot below.
***
### Agent Details
Click an **agent** to display real-time information for that agent, including current status and activity details.
# Silent Monitoring
### Overview
**Contact center monitoring** is the practice of listening to sales or support agent calls—either **in real time** or **after the call has completed**—to evaluate call handling quality and agent performance.
In simple terms:
**Call Center Monitoring = listening to live or recorded agent calls**
This practice is essential for improving agent communication skills, customer satisfaction, and overall service quality.
***
### Benefits of Real-Time Monitoring
Real-time call monitoring provides several operational advantages:
* Supervisors can step in to assist struggling agents immediately
* Junior agents receive hands-on coaching during live calls
* Customers get faster resolution without requiring follow-up calls
* Supervisors can focus on immediate problem-solving for the customer
***
### Enabling Call Monitoring
To enable call monitoring:
1. Sign in to the **PortSIP PBX Web Portal**.
2. Navigate to **Contact Center > Monitor Service**.
3. Turn on the **Enable Monitor** option.
> ❗**Note**\
> The default monitoring service number is **888**.\
> It is strongly recommended **not to change this number**.
***
### Creating a Monitor Group
Monitor Groups define:
* Which agents can be monitored
* Which supervisors are allowed to monitor them
To create a Monitor Group:
1. Navigate to **Contact Center > Monitor Group**.
2. Click **Add**.
#### Configure the Monitor Group
* **Information**\
Enter a friendly name for the monitor group.
* **Enable**\
Enable or disable the monitor group.
* **Group Members**\
Agents whose calls can be monitored.\
Click **Add** to include agents.
* **Supervisors**\
Users who are authorized to monitor the group members.
Click **OK** to save the configuration.
***
### Silent Monitoring (Listen-Only)
#### Example Scenario
You want supervisors **101** and **102** to silently monitor agents **600** and **601**.
#### Configuration Steps
1. Create a Monitor Group named **Queue Management**.
2. Enable the group.
3. Add extensions **600** and **601** as **Group Members**.
4. Add extensions **101** and **102** as **Supervisors**.
5. Click **OK** to save.
***
### Monitoring Agent Calls
When an agent is on an active call:
* A supervisor can start silent monitoring by dialing the **Feature Access Code (FAC)** followed by the agent’s extension.
#### Examples
* Silent monitor agent **600**:\
**\*63600**
* Silent monitor agent **601**:\
**\*63601**
***
### Supervisor Call Control During Monitoring
While silently monitoring, the supervisor can use DTMF keys to change the monitoring mode:
* **Press 2** – Whisper to the agent (agent hears supervisor; caller does not)
* **Press 3** – Barge in (supervisor joins the call with both agent and caller)
* **Press 4** – Barge-break (supervisor takes over the call; agent is removed)
***
### Direct Monitoring with Mode Selection
Supervisors can also start monitoring with a specific mode directly:
* **Silent monitoring**:\
\*63601\*1
* **Whisper**:\
\*63601\*2
* **Barge-in**:\
\*63601\*3
* **Barge-break**:\
\*63601\*4
> ❗**Tip**\
> The exact Feature Access Codes (FACs) can be reviewed or customized under\
> **Advanced > Feature Access Codes**.
***
### Best Practices
* Limit monitoring permissions to authorized supervisors only
* Use silent monitoring for quality assurance and coaching
* Use whisper mode for real-time agent guidance without affecting customers
* Reserve barge-in and barge-break for escalation or critical situations
* Inform agents of monitoring policies to comply with local regulations
# 17 Roles and Permissions
### Roles and Permissions Overview
PortSIP Roles and Permissions provide role-based control over the features and functions that users can access in the PortSIP PBX.
Each role includes a predefined set of permissions that determines the scope of access available to a user. By assigning roles, administrators can efficiently control who can view, configure, and manage different parts of the system.
PortSIP PBX includes **ready-to-use standard roles** for common positions, such as administrators and end users, with appropriate permissions already configured. For more specialized requirements, you can also create **custom roles** and define exactly which permissions they include. Both standard and custom roles can be assigned to users.
***
### System Administrators
System Administrator roles provide access to system-level configuration and management.
For details about System Administrator roles and permissions, see [Administrator Management](/portsip-communications-solution/portsip-pbx-administration-guide/2-portsip-pbx-management/administrator-management).
***
{% hint style="info" %}
The following guides are only available for Tenant-level management and settings.
{% endhint %}
### Tenant User Roles
**Tenant user roles control access within a specific tenant.** Permissions are **limited to tenant-level** settings and assigned user functions.
**Admin**
Full administrative access within the tenant. This role allows the user to manage tenant settings, users, and features.
**Queue Supervisor (Queue Manager)**
Access limited to queue management. This role is intended for users responsible for monitoring and managing call queues.
**Standard (International)**
Access to personal user settings and international calling.
**Standard**
Access to personal user settings and domestic calling.
***
### Custom Roles
Custom roles allow you to define permission sets for specific business functions, departments, or jurisdictions.
When creating a custom role, select the exact permissions you want to grant, such as access to phone settings while restricting access to administrative features. You can continue adding permissions until the role includes only the intended scope of access.
Once created, the role can be assigned to any user who requires the same permissions, eliminating the need to repeatedly configure permissions for individual users.
***
### Predefined Roles and Permissions
PortSIP PBX also includes **predefined roles** with built-in permission sets that can be assigned by administrators.
Permissions for predefined roles **cannot be modified**.
#### View Predefined Roles
**Option 1: Sign in as System Administrator**
1. Sign in to the PortSIP PBX Web Portal as a **System Administrator**.
2. Navigate to **Tenants**.
3. Select the desired tenant and click **Manage** to switch to that tenant’s administration context.
**Option 2: Sign in as Tenant Administrator**
* Sign in directly as a **Tenant Administrator** to manage the tenant.
After signing in to the web portal, please now go to the menu **Advanced > Roles**; you will see the roles list.
***
### Permissions Overview
Permissions control access to features and configuration options within the PBX Web Portal.
Administrators grant permissions to allow users to view or modify specific features. In some cases, permissions can be assigned to enable management of individual system components.
You may need to adjust permissions when, for example:
* A user needs to manage other users.
* A user needs to configure or manage SIP trunks.
***
### Access and Manage Permissions
**Option 1: Sign in as System Administrator**
1. Sign in to the PortSIP PBX Web Portal as a **System Administrator**.
2. Navigate to **Tenants**.
3. Select the desired tenant and click **Manage** to switch to that tenant’s administration context.
**Option 2: Sign in as Tenant Administrator**
1. Sign in directly as a **Tenant Administrator** to manage the tenant.
After signing in to the web portal, please:
1. Go to the menu **Advanced > Roles**.
2. Double-click a role to view its permissions.
Some permissions depend on others and cannot be disabled until the related permissions are disabled first.
Role
Description
SystemAdmin
Full system access. On Initial setup, the PBX maintainer.
Admin
Full Virtual PBX (for a tenant) access
All settings of the tenant
Plus Standard International
QueueManager
Managing and confining queues
View trunks
User management functions for all Users
Company reporting functionality
Plus Standard International
CDR log and Company reporting functionality
StandardInternationalUser
User-level access with international dialing access.
StandardUser
User-level access without international dialing access, but has domestic calls. This is the default role assigned to new Users.
***
### User Permissions
This section describes each user permission, including its access level and functional scope.
***
#### User Voicemail
**View Only**\
Allows viewing the extension user’s voicemail.
**Full Access**\
Allows configuring and deleting the extension user’s voicemail.
***
#### User Meetings
**View Only**\
Allows viewing information about meetings created from the PortSIP ONE app.
**Full Access**\
Allows viewing, editing, and deleting meetings created from the PortSIP ONE app.
***
#### User Call Log
**View Only**\
Allows viewing the extension user’s call log.
**Full Access**\
Allows viewing and managing the extension user’s call log.
***
#### User Recordings
**View Only**\
Allows viewing the extension user’s call recordings.
**Full Access**\
Allows managing the extension user’s call recordings.
***
#### Features
**Audit**\
Allows viewing audit logs.
**Events**\
Allows viewing event logs.
***
#### Trunk
**View Only**\
Allows viewing trunk information.
**Full Access**\
Allows viewing and managing trunk settings.
***
#### Integrations
**View Only**\
Allows viewing integrations such as CRM, Microsoft 365, and Google Workspace.
**Full Access**\
Allows configuring integrations such as CRM, Microsoft 365, and Google Workspace.
***
#### CRM Contacts
**View Only**\
Allows viewing and searching CRM contacts.
**Full Access**\
Allows viewing, searching, creating, and editing CRM contacts.
***
#### Company (Tenant)
**View Only**\
Allows viewing tenant information.
**Full Access**\
Allows managing and configuring tenant settings.
***
#### Analytics
**View Only**\
Allows viewing analytics data, including reports, call history, call recordings, and external message history.
**Full Access**\
Allows managing analytics data, including reports, call history, call recordings, and external message history.
***
#### Company Recordings
**View Only**\
Allows viewing all call recordings within the tenant.
**Full Access**\
Allows managing all call recordings within the tenant.
***
#### Company Call Sessions
**View Only**\
Allows viewing active call sessions within the tenant.
**Full Access**\
Allows managing active call sessions within the tenant, such as ending calls.
***
#### Company Contacts
**View Only**\
Allows viewing company contacts within the tenant.
**Full Access**\
Allows viewing, searching, creating, and editing company contacts within the tenant.
***
#### Phone System
**View Only**\
Allows viewing phone system settings.
**Full Access**\
Allows managing and configuring phone system settings.
***
#### Call Policies
**Domestic Calls**\
Allows making domestic calls.
**Internal Calls**\
Allows making internal calls.
**International Calls**\
Allows making international calls.
***
#### Billing
**View Only**\
Allows viewing billing settings.
**Full Access**\
Allows managing and configuring billing settings.
***
#### Roles
**View Only**\
Allows viewing roles.
**Full Access**\
Allows creating, editing, configuring, and deleting roles.
***
#### Users
**View Only**\
Allows viewing extension users.
**Full Access**\
Allows creating, editing, and deleting extension users.
# 18 E164 Number Processing
E.164 is an [international standard](https://en.wikipedia.org/wiki/International_standard) ([ITU-T](https://en.wikipedia.org/wiki/ITU-T) Recommendation), titled *The international public telecommunication numbering plan*, that defines a [numbering plan](https://en.wikipedia.org/wiki/Telephone_numbering_plan) for the worldwide [public switched telephone network](https://en.wikipedia.org/wiki/Public_switched_telephone_network) (PSTN) and some other data [networks](https://en.wikipedia.org/wiki/Telecommunications_network).
E.164 defines a general format for international [telephone numbers](https://en.wikipedia.org/wiki/Telephone_number). Plan-conforming telephone numbers are limited to only digits and to a maximum of fifteen digits.[\[1\]](https://en.wikipedia.org/wiki/E.164#cite_note-:0-1) The specification divides the digit string into a country code of one to three digits, and the subscriber telephone number of a maximum of twelve digits.
In PortSIP PBX, E164 processing converts user-dialed numbers (including those with a leading +) into a standardized format that can be interpreted by your outbound rules and provider.
Using E164 processing is optional, but it can help solve the issue of handling numbers dialed with a leading +. It converts these numbers into a format that can be interpreted by the rules based on the call type (local, national, or international).
***
### E.164 Settings
The **E.164 Settings** control how PortSIP PBX normalizes and transforms dialed phone numbers—especially numbers entered in international (E.164) format—before outbound routing rules are applied.
#### Accessing E.164 Settings
1. Sign in to the PortSIP PBX Web Portal as a **Tenant Admin**.
2. Navigate to **Blacklist and Codes > Codes and E164 > E164**.
3. The E.164 configuration page appears (as shown in the screenshot below).
***
### Configuration Options
#### International Code
Defines the international dialing prefix used when placing calls to other countries **without using the “+” symbol**.
* Example (United States):
* International Code: `011`
* Dialed number: `+44123456789`
* Converted number: `01144123456789`
This allows users to dial international numbers using E.164 format while remaining compatible with carriers that require a numeric international prefix.
***
#### Process E.164 Numbers
Controls whether the PBX processes numbers that begin with a leading **“+”**.
* **Enabled**:\
Numbers dialed in E.164 format (e.g., `+44123456789`) are normalized according to the E.164 rules.
* **Disabled**:\
The PBX does **not** modify the dialed number, even if it starts with `+`.
> **Recommendation:**\
> Enable this option in most deployments to ensure consistent number normalization.
***
#### Remove Special Characters
**Remove the following characters from processed numbers:**\
`(`, `)`, and spaces
* When enabled, the PBX removes these characters from dialed numbers.
* Example:
* Dialed number: `+1 (813) 456 78910`
* Converted number: `+181345678910`
This ensures compatibility with SIP trunks and outbound routing rules.
***
#### Remove Country Code for Same Country
When enabled, the PBX removes the country code if the call is made **within the same country**.
* Example (United States):
* Dialed number: `+12345678910`
* Converted number: `2345678910`
This is useful when your carrier expects national-format numbers for domestic calls.
***
#### Select Country
Select the country where your PBX tenant is located.
* This setting allows the PBX to correctly identify:
* Your country code
* Domestic vs. international calls
**Example:**\
Select **United States (US)** for all examples in this section.
***
#### Area Code
Enter your local area code.
**Remove if Same Area Code**
When enabled, the PBX removes the area code for local calls if it matches the configured area code.
* Example:
* Area Code: `813`
* Dialed number: `+181345678910`
* Converted number: `45678910`
This is useful in regions where local dialing does not require an area code.
***
#### National Code
Adds a national dialing prefix to the beginning of the number during processing.
* Example:
* National Code: `8`
* Dialed number: `+12345678910`
* Converted number: `82345678910`
This is typically required in countries where domestic calls must include a national prefix.
***
#### Add Prefix
Adds a custom prefix to the processed number.
* Common use cases:
* Selecting specific outbound rules
* Carrier-specific routing requirements
> **Important:**\
> E.164 rules are processed **before outbound routing rules**.
* Example:
* Prefix: `2`
* Dialed number: `+12345678910`
* Converted number: `22345678910`
***
### Non-E.164 Calls
A **Non-E.164 call** is a call dialed **without a leading “+”**.
#### International Calls (Non-E.164 Format)
If the dialed number:
* Does **not** begin with `+`, and
* Begins with the configured **International Code**
then the call is treated as an **international call**.
**Call Processing Flow**
1. The PBX identifies the call as international based on the **International Code**.
2. The PBX checks the destination country code against:
* **Blacklist**
* **Codes > Codes and E164 > Allowed Country Code**
3. The PBX verifies the caller’s **role and permissions**:
* If the caller does **not** have permission to make international calls, the call is rejected.
**Example**
* International Code: `00`
* Dialed number: `004412345678`
* Extracted country code: `44` (United Kingdom)
The PBX will:
* Verify whether country code `44` is allowed
* Check whether the caller is permitted to place international calls
If either check fails, the call is blocked.
***
#### Domestic Calls (Non-E.164 Format)
If the dialed number:
* Does **not** begin with `+`, and
* Does **not** begin with the International Code
then the call is treated as a **domestic call**.
The PBX checks:
* The caller’s role and permissions for domestic calling
If the caller is not authorized to place domestic calls, the call is rejected.
***
### E.164 Calls
An **E.164 call** is any call where the dialed number begins with a leading **“+”**.\
These calls are always treated as **international-format numbers**, but how they are processed depends on whether **Process E.164 Numbers** is enabled.
***
### When **Process E.164 Numbers** Is Disabled
If **Process E.164 Numbers** is disabled, the PBX does **not** normalize or rewrite the dialed number.
#### Call Processing Behavior
1. The call is identified as an **international call**.
2. The PBX checks the destination country code against:
* **Blacklist**
* **Codes > Codes and E164 > Allowed Country Code**
3. The PBX verifies the caller’s **role and permissions**:
* If the caller is not permitted to make international calls, the call is rejected.
#### Example
* Dialed number: `+4412345678`
* Country code extracted: `44`
The PBX checks whether country code **44** is allowed and whether the caller has international calling permissions.\
If either check fails, the call is blocked.
***
### When **Process E.164 Numbers** Is Enabled
When enabled, the PBX **removes the leading “+”** and applies E.164 normalization rules before outbound routing.
After removing the `+`, the PBX evaluates the number using the following logic.
***
#### 1. Dialed Number Starts with the **Selected Country Code**
If the dialed number begins with the configured **Select Country** code, the call is treated as a **national (domestic) call**.
**Processing Steps**
1. Remove the leading `+`.
2. Remove the country code.
3. If **Remove if same country** is enabled, the country code is discarded.
4. If **Remove Area Code** is enabled, the area code is also removed.
5. Generate the new dialed number using the rule:
```
Prefix + National Code + Remaining Number
```
6. Check the caller’s **domestic calling permissions**.
* If the caller is not permitted to make domestic calls, the call is rejected.
**Example**
Configuration:
* Select Country: `44`
* Area Code: `31`
* Remove if same country: **Enabled**
* Remove Area Code: **Enabled**
* National Code: `11`
* Add Prefix: `22`
Dialed number:
```
+4431867762
```
Processing result:
* Remove `+` → `4431867762`
* Remove country code `44` → `31867762`
* Remove area code `31` → `867762`
* Add National Code `11` → `11867762`
* Add Prefix `22` → `2211867762`
**Final dialed number:** `2211867762`
***
#### 2. Dialed Number Does NOT Start with the Selected Country Code
If the E.164 number does **not** begin with the configured country code, the PBX treats it as an **international destination**.
**Processing Steps**
1. Remove the leading `+`.
2. Generate the new dialed number using the rule:
```
Prefix + International Code + Dialed Number
```
3. Determine call type:
* If **Add Prefix** is empty → **International call**
* If **Add Prefix** is configured → **National call**
4. For international calls:
* Check **Allowed Country Code**
* Check caller’s **international calling permissions**
If any check fails, the call is rejected.
**Example**
* International Code: `00`
* Add Prefix: *(empty)*
* Dialed number: `+3312345678`
Processing result:
* Converted number: `003312345678`
* Country code checked: `33`
The PBX verifies:
* Country code `33` is allowed
* Caller has international calling permissions
If either condition fails, the call is blocked.
***
### Summary: E.164 Call Processing Logic
| Scenario | Call Type | Permission Check |
| ------------------------------- | ------------- | ---------------- |
| `+` dialed, processing disabled | International | International |
| `+` dialed, same country | Domestic | Domestic |
| `+` dialed, different country | International | International |
| Prefix added | National | Domestic |
---
[Next Page](/llms-full.txt/1)